Watch it draw itself · tap to replay
How to Draw a Feather Duster
Draw a feather duster in 11 easy steps, about 8 minutes. Free, with a printable worksheet.
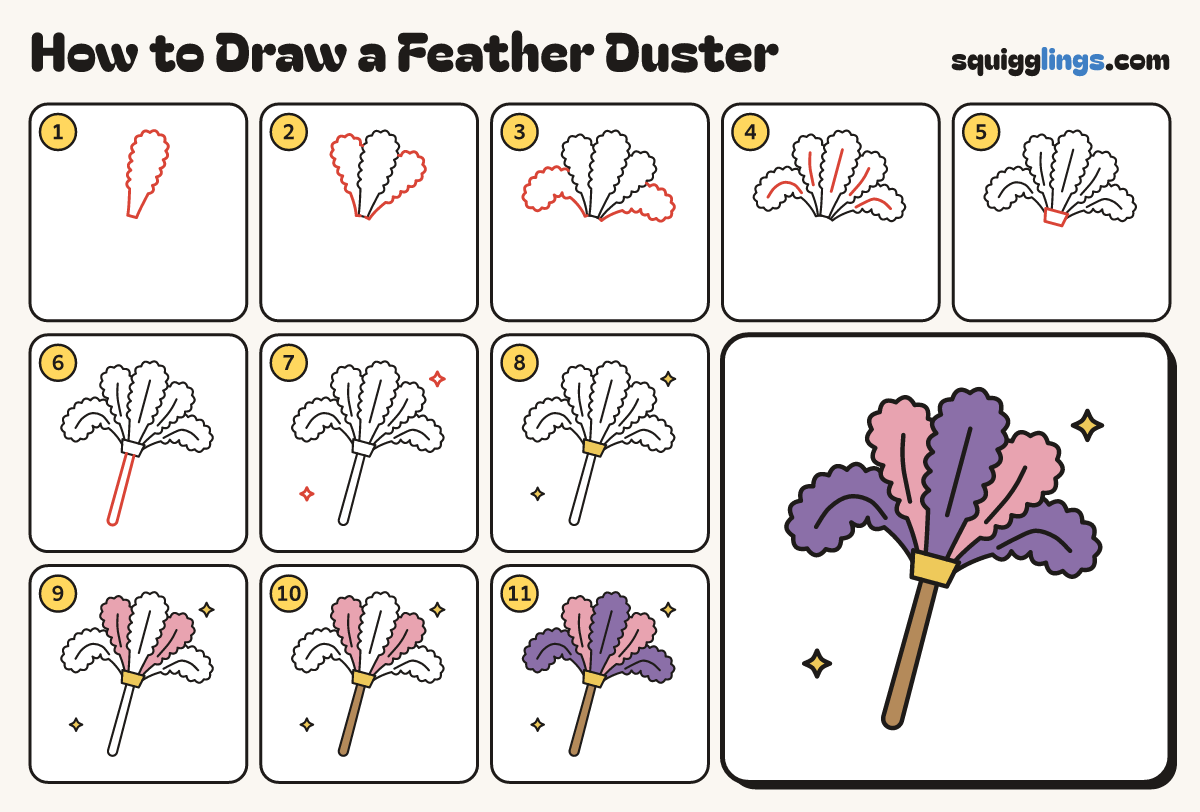
Each picture adds one red line. Draw that line, then scroll to the next picture. Rub out any dashed helper lines at the end. First up: the middle feather.
Step 1: The middle feather
Near the top draw a tall fluffy feather leaning a little right, with bumpy edges and a round top.
Tip Keep the bottom of the feather narrow and the bumpy part wide.
Step 2: Two side feathers
Draw a fluffy feather leaning out on each side of the middle one, a little shorter, tucked behind it.
Step 3: Drooping feathers
Low on each side draw one more fluffy feather that bends out and droops down at the end, tucked behind.
Step 4: Feather spines
Draw a line up the middle of each feather. Start well above the bottom and stop before the tip.
Step 5: The collar
Under the feathers draw a short band, wider at the top, to hold them all together.
Step 6: The handle
From the bottom of the collar draw a long thin handle with a round end.
Step 7: Two sparkles
Draw a small sparkle star on each side of the duster, not touching it.
Step 8: Yellow collar
Go over your lines. Colour the collar and the 2 sparkles yellow.
Step 9: Pink feathers
Colour the 2 side feathers next to the middle one pink.
Step 10: Wood handle
Colour the handle wood brown.
Step 11: Purple feathers
Colour the middle feather and the 2 drooping feathers purple, and your feather duster is ready to dust!
Your finished drawing
Follow the steps above and this is where you end up: a feather duster, drawn by you.
Every step in one picture