Watch it draw itself · tap to replay
How to Draw a Family Tree
Draw a family tree in 11 easy steps, about 8 minutes. Free, with a printable worksheet.
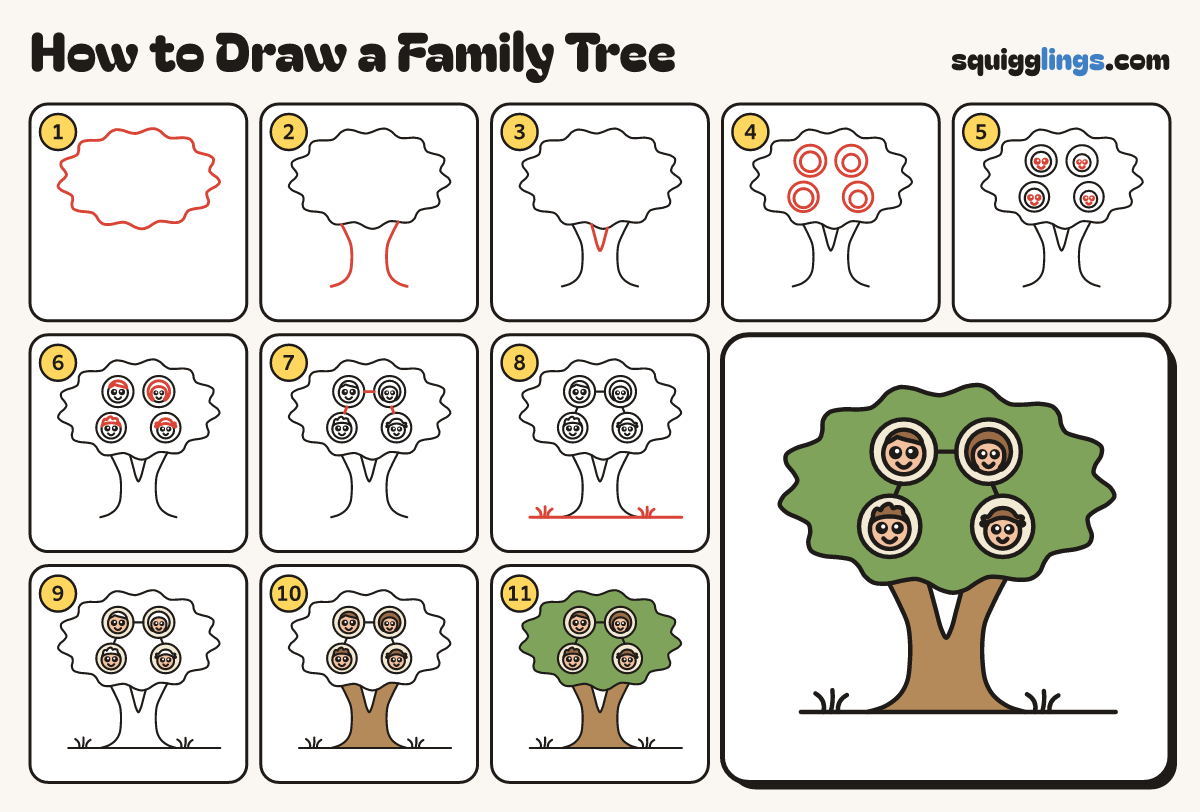
Each picture adds one red line. Draw that line, then scroll to the next picture. Rub out any dashed helper lines at the end. First up: the leafy cloud.
Step 1: The leafy cloud
Above the middle of your paper draw one big wide cloud of soft bumps, the top half of the tree.
Tip Big lazy bumps, each about as wide as your thumb. Lumpy is good.
Step 2: The trunk
Start under the leaves, left of the middle. Draw a line down to a root near the bottom. Same right.
Step 3: Two branches
Start on the bottom of the leaves, left of the middle. Draw a skinny V into the trunk and up.
Tip Leave the V empty: that is sky peeking through.
Step 4: Four portrait frames
In the leaves draw 4 big round frames: 2 near the top for the parents, 2 lower. Add circles inside.
Tip Parents on top, kids underneath: a little family.
Step 5: Eyes and smiles
In each face draw 2 dot eyes with a tiny white shine, and a small smile under them.
Step 6: Hair for everyone
Give dad a short fringe, mum long hair past her cheeks, the boy 3 tufts and the girl 2 bunches.
Tip Rub out the face line under the hair.
Step 7: Branch lines
Draw a short line between the 2 parents' frames. Draw a line from each parent down to the child below.
Step 8: Ground and grass
Draw a ground line under the roots, from well left to well right. Add a grass tuft beside each root.
Step 9: Cream frames, peach faces
Colour the frames cream and the faces peach. Leave the eye shines white.
Step 10: Hair and trunk
Colour the hair brown. Colour the trunk and both branches wood brown up to the leaves, leaving the V empty.
Step 11: Colour the leaves green
Colour the leaves green around the frames. Go over your lines and your family tree is done.
Your finished drawing
Follow the steps above and this is where you end up: a family tree, drawn by you.
Every step in one picture