Watch it draw itself · tap to replay
How to Draw a Bromeliad
Draw a bromeliad in 12 easy steps, about 9 minutes. Free, with a printable worksheet.
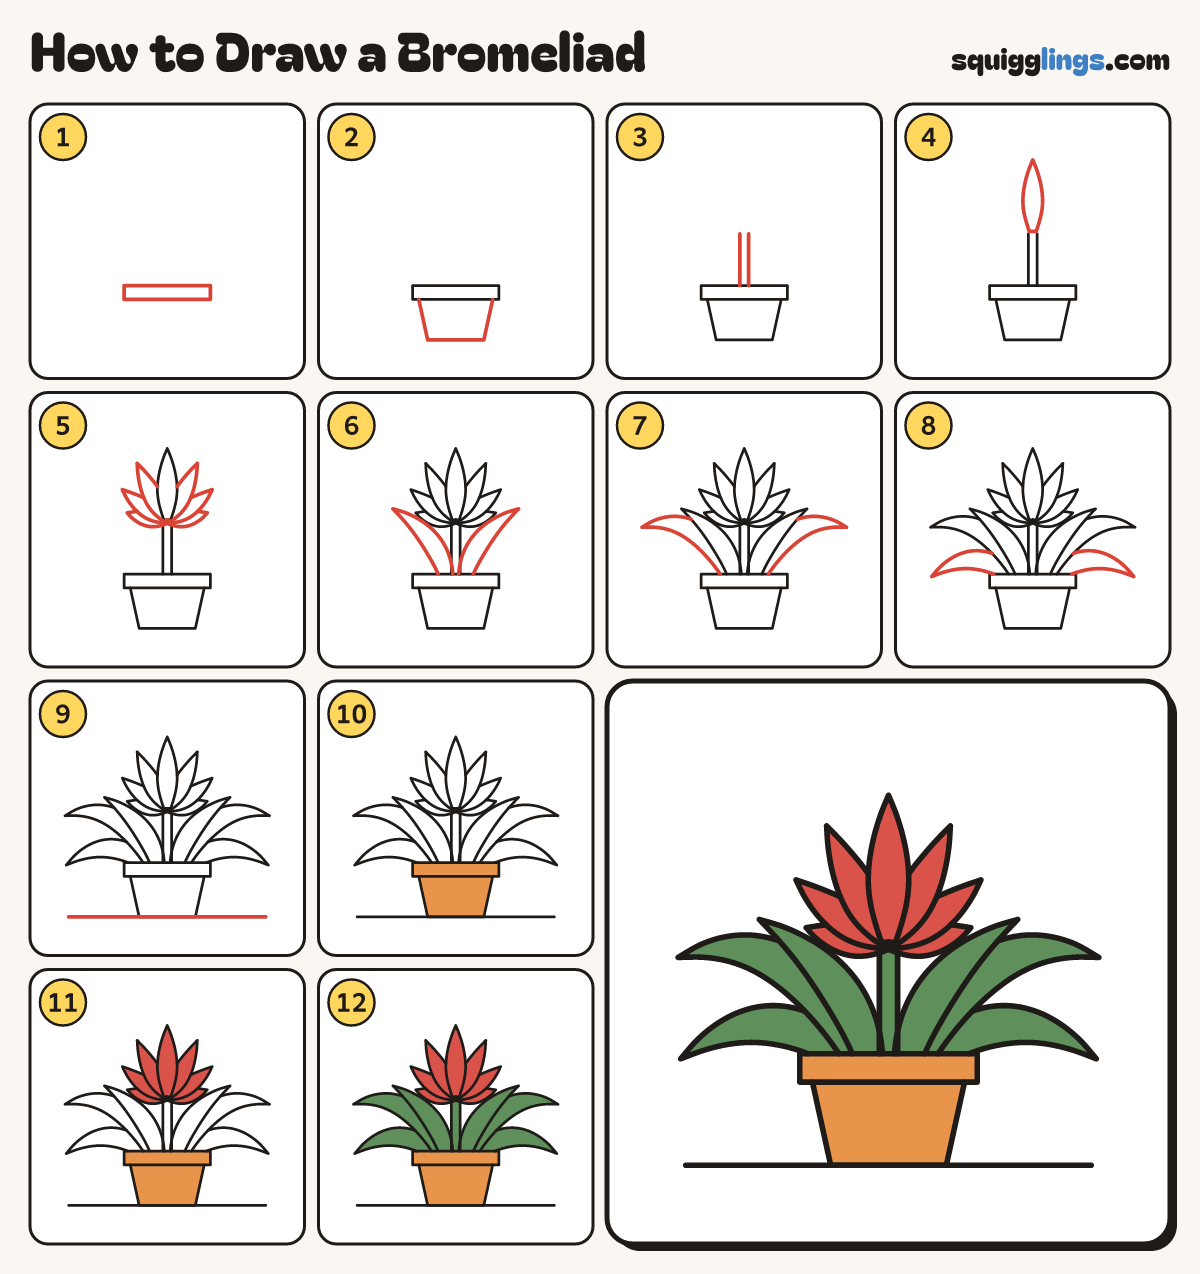
Each picture adds one red line. Draw that line, then scroll to the next picture. Rub out any dashed helper lines at the end. First up: pot rim.
Step 1: Pot rim
Below the middle of your paper draw a wide flat box, as tall as a finger is wide.
Step 2: The pot
Start under the rim's left. Draw down leaning in, across, and stop under the rim's right.
Step 3: Flower stalk
Start on the middle of the rim. Draw 2 lines up, close together. Stop near the middle of the page.
Step 4: Flower tip
On top of the stalk draw one tall thin pointed leaf standing straight up, like a candle flame.
Tip This is the middle of the flower. It is fat low down and pointed on top.
Step 5: Flower star
From the same spot draw 3 thin pointed leaves each side, fanning out behind the tall one like a star.
Step 6: Two tall leaves
From the rim draw a long leaf curving up and out each side of the stalk, ending in a point.
Tip Both sides match, like a mirror.
Step 7: Arching leaves
Behind them draw a longer leaf each side, arching out wide like a rainbow, with a pointed tip.
Step 8: Low leaves
Draw one more leaf each side, low down, curving out and drooping to a point beside the pot.
Step 9: The table
Draw a long straight line along the bottom of the pot for the table.
Step 10: Orange pot
Go over your lines. Colour the pot and its rim orange.
Step 11: Red flower
Colour the 7 pointed leaves of the flower star red.
Step 12: Green leaves
Colour the stalk and the 6 long leaves green. Your bromeliad is done!
Your finished drawing
Follow the steps above and this is where you end up: a bromeliad, drawn by you.
Every step in one picture