Watch it draw itself · tap to replay
How to Draw Fairy Bread
Draw fairy bread in 11 easy steps, about 8 minutes. Free, with a printable worksheet.
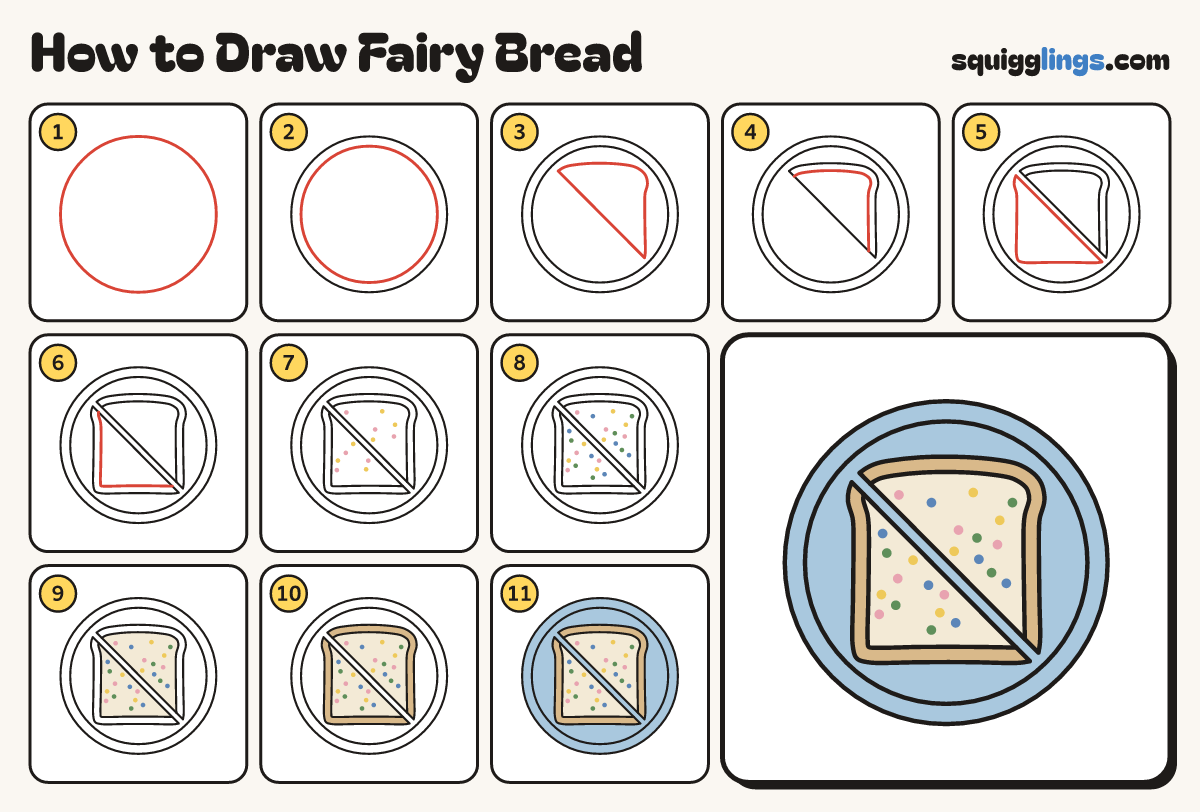
Each picture adds one red line. Draw that line, then scroll to the next picture. Rub out any dashed helper lines at the end. First up: a round plate.
Step 1: A round plate
In the middle of your paper draw a big round plate, as wide as your hand.
Step 2: The rim
Draw a second circle a finger inside the plate, all the way round, for the rim.
Step 3: Top half
Inside the rim draw half a bread slice: a round top, a straight right side, a slanted cut edge.
Tip Fairy bread is buttered white bread cut into triangles and covered in hundreds and thousands.
Step 4: Top crust
From the top of the cut edge, draw a line a finger inside the edge, round to its bottom.
Step 5: Bottom half
Below a thin gap, draw the other half: a straight left side, a flat bottom and a cut edge.
Step 6: Bottom crust
From the top of its cut edge, draw a line a finger inside, round to the bottom of the cut.
Step 7: Yellow and pink sprinkles
Go over your lines. Dot tiny yellow and pink sprinkles over both halves, inside the crust lines, spread apart.
Tip Never put two dots side by side in a neat row.
Step 8: Blue and green sprinkles
Dot tiny blue and green sprinkles in the gaps between them, none touching.
Step 9: Cream bread
Colour the middle of both halves cream, around the sprinkles.
Step 10: Tan crust
Colour the crust bands tan.
Step 11: Sky plate
Colour the plate sky blue.
Your finished drawing
Follow the steps above and this is where you end up: fairy bread, drawn by you.
Every step in one picture