Watch it draw itself · tap to replay
How to Draw Enoki
Draw enoki in 10 easy steps, about 8 minutes. Free, with a printable worksheet.
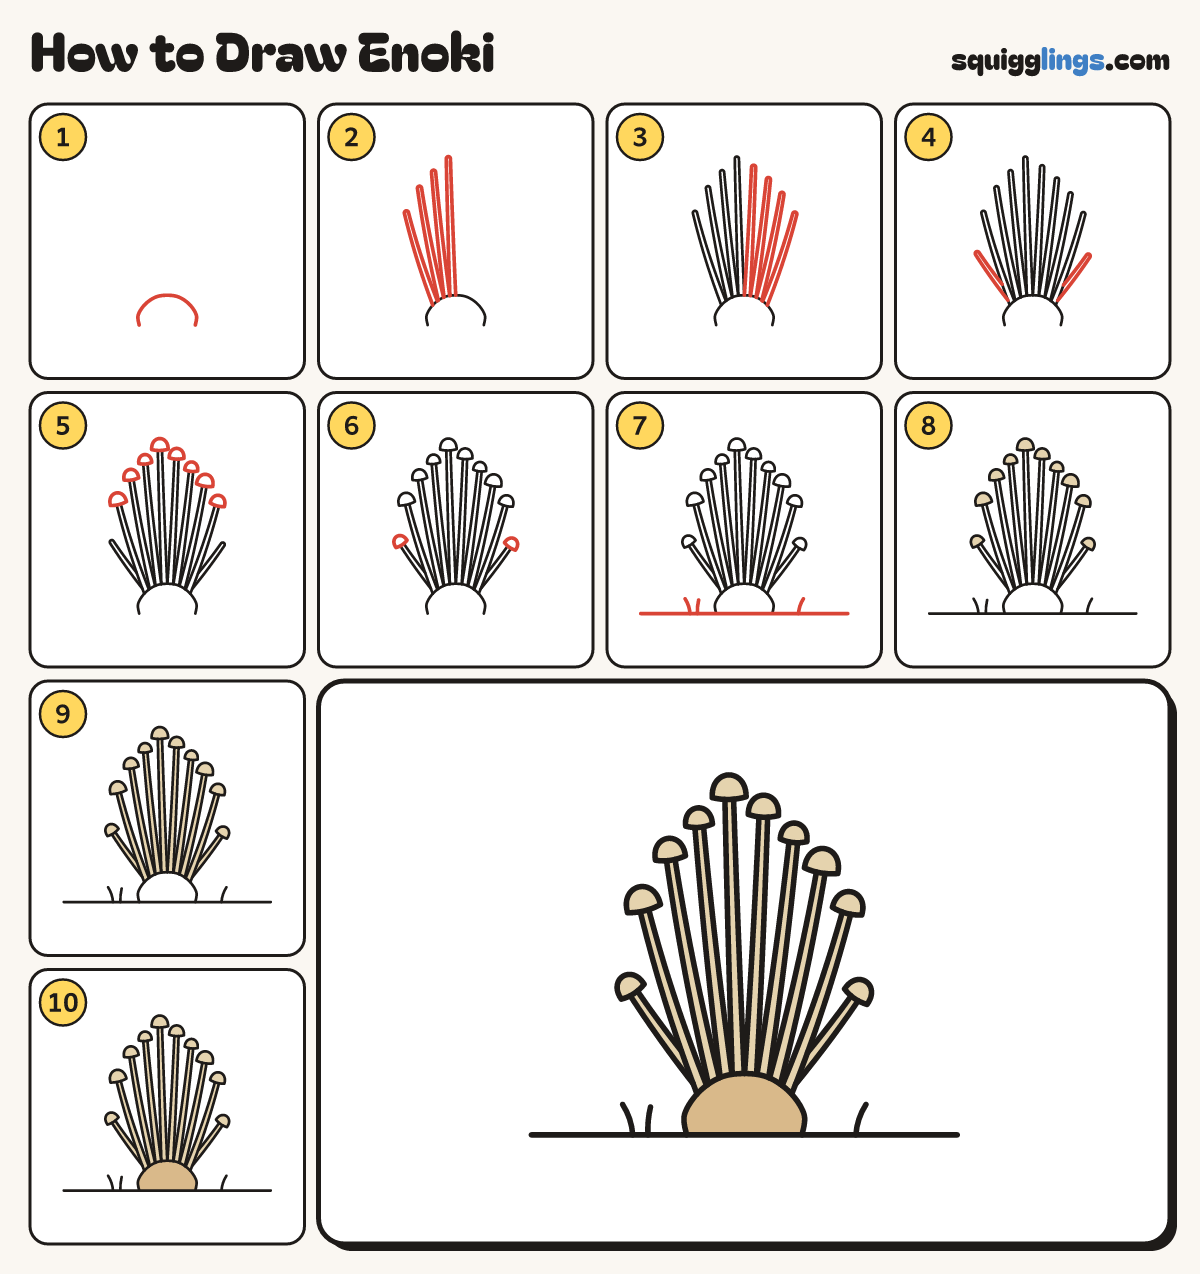
Each picture adds one red line. Draw that line, then scroll to the next picture. Rub out any dashed helper lines at the end. First up: the base clump.
Step 1: The base clump
Start low, left of the middle. Draw a soft loaf-shaped hump up and over, back down to the ground.
Tip Enoki grow in a tight bundle, sharing one root.
Step 2: 4 stems
From the top of the hump draw 4 long thin stems fanning up to the left, thinner at the top.
Step 3: 4 more stems
Draw 4 more stems fanning up to the right. Keep a small gap between neighbours so none cross.
Step 4: 2 short stems
Add 2 shorter stems on the outside, leaning out, tucked behind the outer stems.
Step 5: Button caps
On the tip of each long stem draw a tiny dome cap, round on top and flat underneath.
Step 6: Last caps
Put a smaller dome cap on the tip of each short stem.
Step 7: Ground and grass
Draw the ground line from well left to well right through the bottom of the hump. Add grass each side.
Step 8: Sand caps
Go over your lines, then colour every cap a pale sand colour.
Step 9: Sand stems
Colour all the stems pale sand too.
Step 10: Tan base
Colour the base tan, and your enoki are done!
Your finished drawing
Follow the steps above and this is where you end up: enoki, drawn by you.
Every step in one picture