Watch it draw itself · tap to replay
How to Draw an Enchilada
Draw an enchilada in 11 easy steps, about 8 minutes. Free, with a printable worksheet.
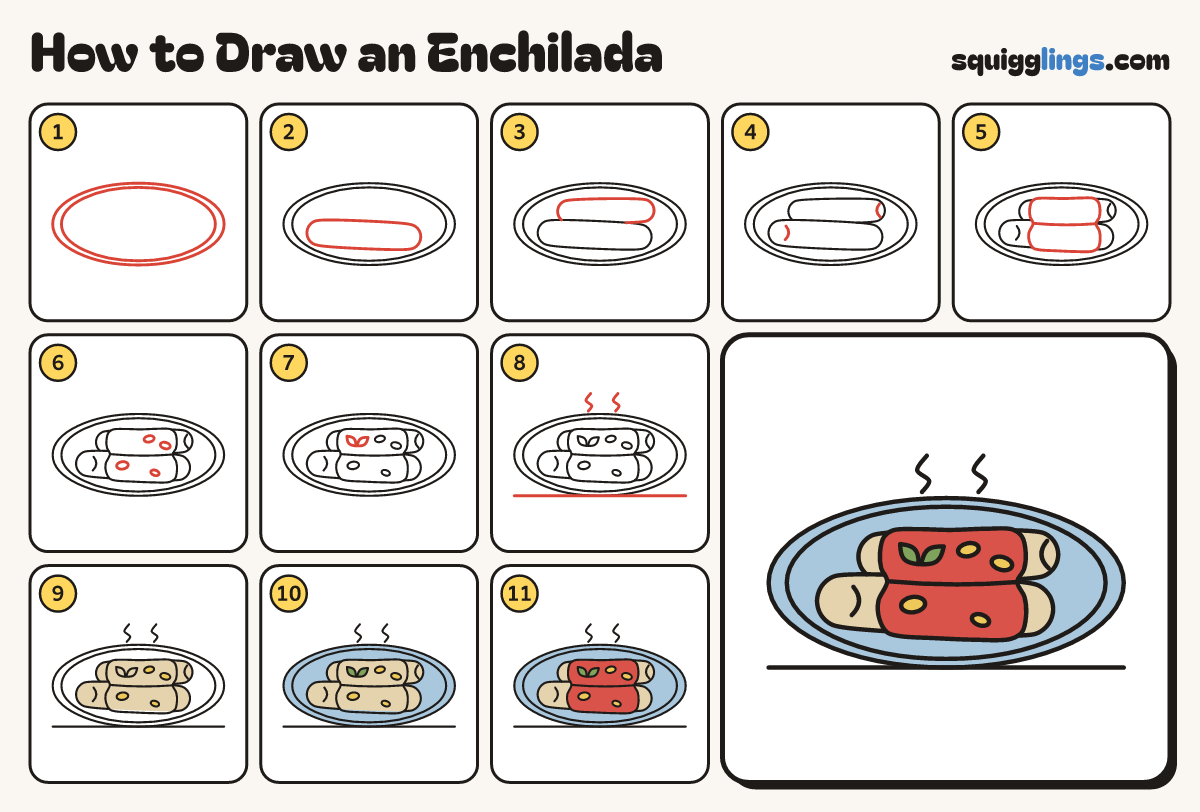
Each picture adds one red line. Draw that line, then scroll to the next picture. Rub out any dashed helper lines at the end. First up: a big plate.
Step 1: A big plate
In the middle, draw a big oval plate nearly as wide as the paper. Add a rim oval just inside.
Step 2: The front roll
Draw a long roll: start top right, round the left end, stop bottom right. Close it with a tall oval.
Tip Keep it low on the plate, inside the rim.
Step 3: The back roll
Draw a second roll behind, higher and further right: start top right, stop on the front roll. Add its oval.
Tip It peeks out above the front roll.
Step 4: The filling
Inside each tall oval draw a smaller oval for the cheesy filling.
Step 5: The sauce
Over the middle of both rolls draw the sauce: curved sides and 3 round drips down the front roll.
Tip Add a line across the sauce where the rolls meet. Rub out the roll lines under the sauce.
Step 6: Melted cheese
On the sauce, draw 3 small tilted cheese ovals, spread out and not touching.
Step 7: Two little leaves
On the sauce near the top left, draw 2 small pointed leaves lying flat, joined at one end.
Step 8: Steam and table
Above the rolls, draw 2 wiggly steam lines going up. Then draw a long table line under the plate.
Step 9: Sand rolls, yellow cheese
Colour both rolls a sand colour, leaving the sauce. Colour the cheese ovals and the fillings yellow.
Step 10: Green leaves, sky plate
Colour the two leaves leaf green and the plate sky blue around the rolls.
Step 11: Red sauce
Colour the sauce red around the cheese and leaves. Go over your lines and your enchiladas are done!
Your finished drawing
Follow the steps above and this is where you end up: an enchilada, drawn by you.
Every step in one picture