Watch it draw itself · tap to replay
How to Draw Elves Making Toys
Draw elves making toys in 12 easy steps, about 9 minutes. Free, with a printable worksheet.
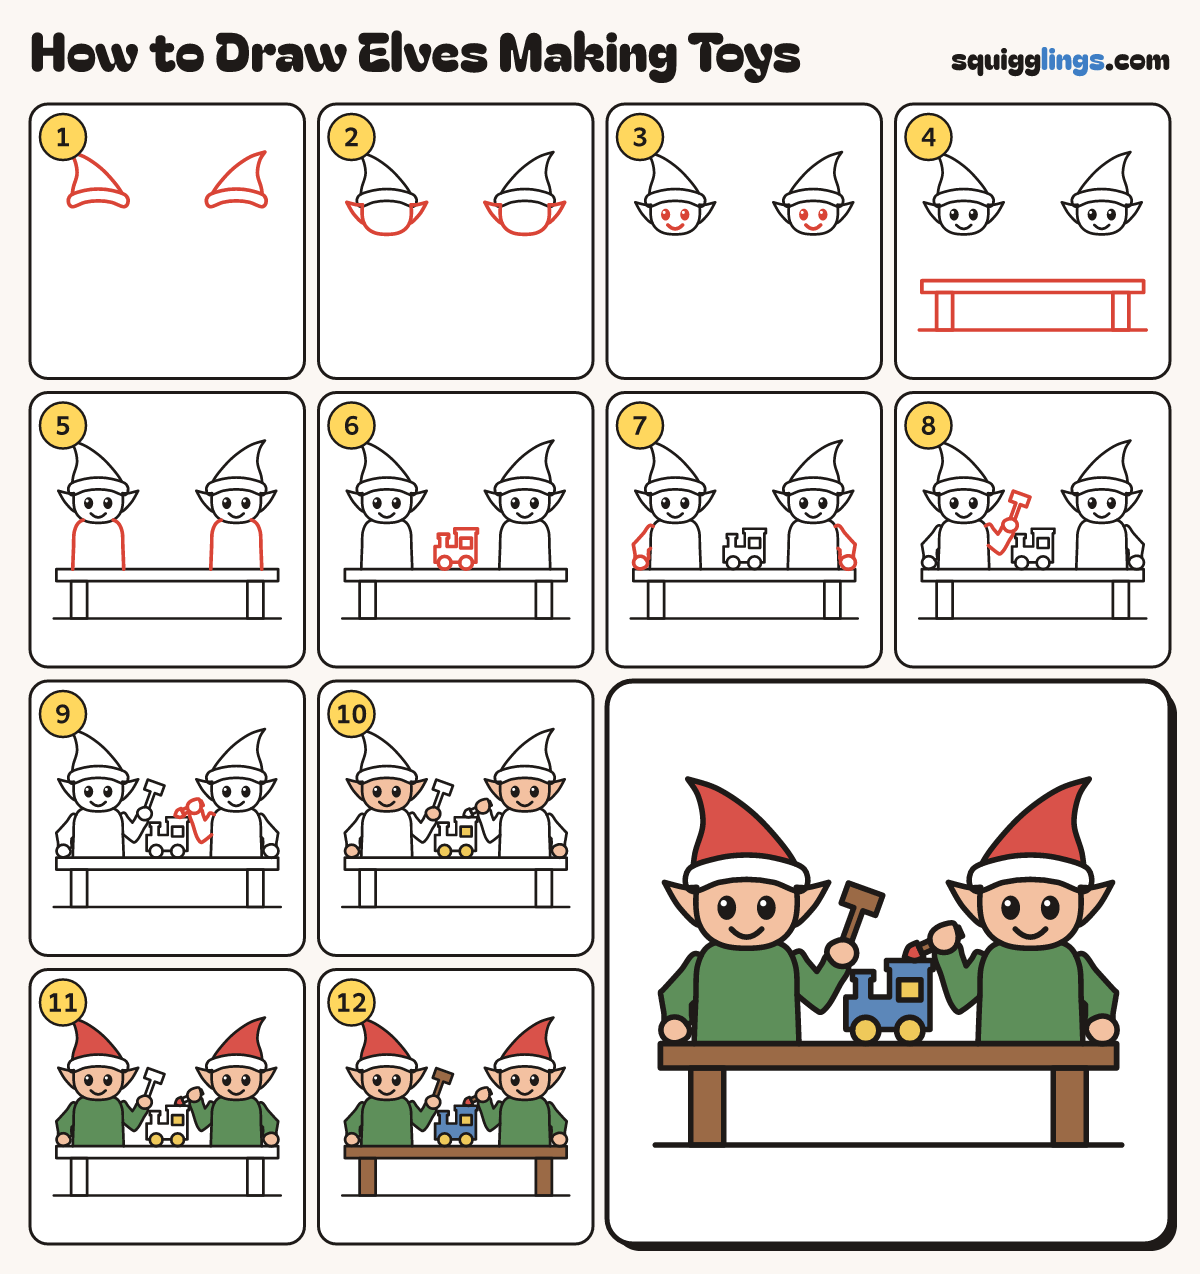
Each picture adds one red line. Draw that line, then scroll to the next picture. Rub out any dashed helper lines at the end. First up: two pointed hats.
Step 1: Two pointed hats
Near the top draw 2 pointed hats, one on each side, tips leaning out. Add a curved band under each.
Step 2: Heads and ears
Under each hat draw a big egg head. Add a pointed ear on each side of both heads.
Tip The ears point out sideways, level with the eyes.
Step 3: Happy faces
Give each elf 2 black oval eyes with a tiny white shine, and a big smile.
Step 4: The workbench
Below the elves draw a long thin box for the bench top. Add 2 legs and a floor line.
Step 5: Two tunics
Under each chin draw a tunic with round shoulders, straight down to the bench top.
Tip Each tunic is narrower than the head above it.
Step 6: A toy train
Between the elves draw a train on the bench: a long box, a chimney, a cab, a window, 2 wheels.
Step 7: Resting arms
From each outside shoulder draw an arm with a bent elbow. End it in a mitten resting on the bench.
Step 8: The hammer
From the left elf's other shoulder draw a bent arm and a mitten held up. Put a hammer in it.
Tip The elbow points down and the hammer leans over the train.
Step 9: The paintbrush
Give the right elf a bent arm and a mitten too. Draw a paintbrush in it, touching the cab roof.
Step 10: Peach and yellow
Colour both faces, all 4 ears and all 4 hands peach. Colour the train's 2 wheels and window yellow.
Step 11: Red and green
Colour the hats and the brush tip red. Colour the tunics and sleeves green. Leave the hat bands white.
Step 12: Blue and brown
Colour the train blue. Colour the bench, the hammer and the brush handle brown. The elves are busy!
Your finished drawing
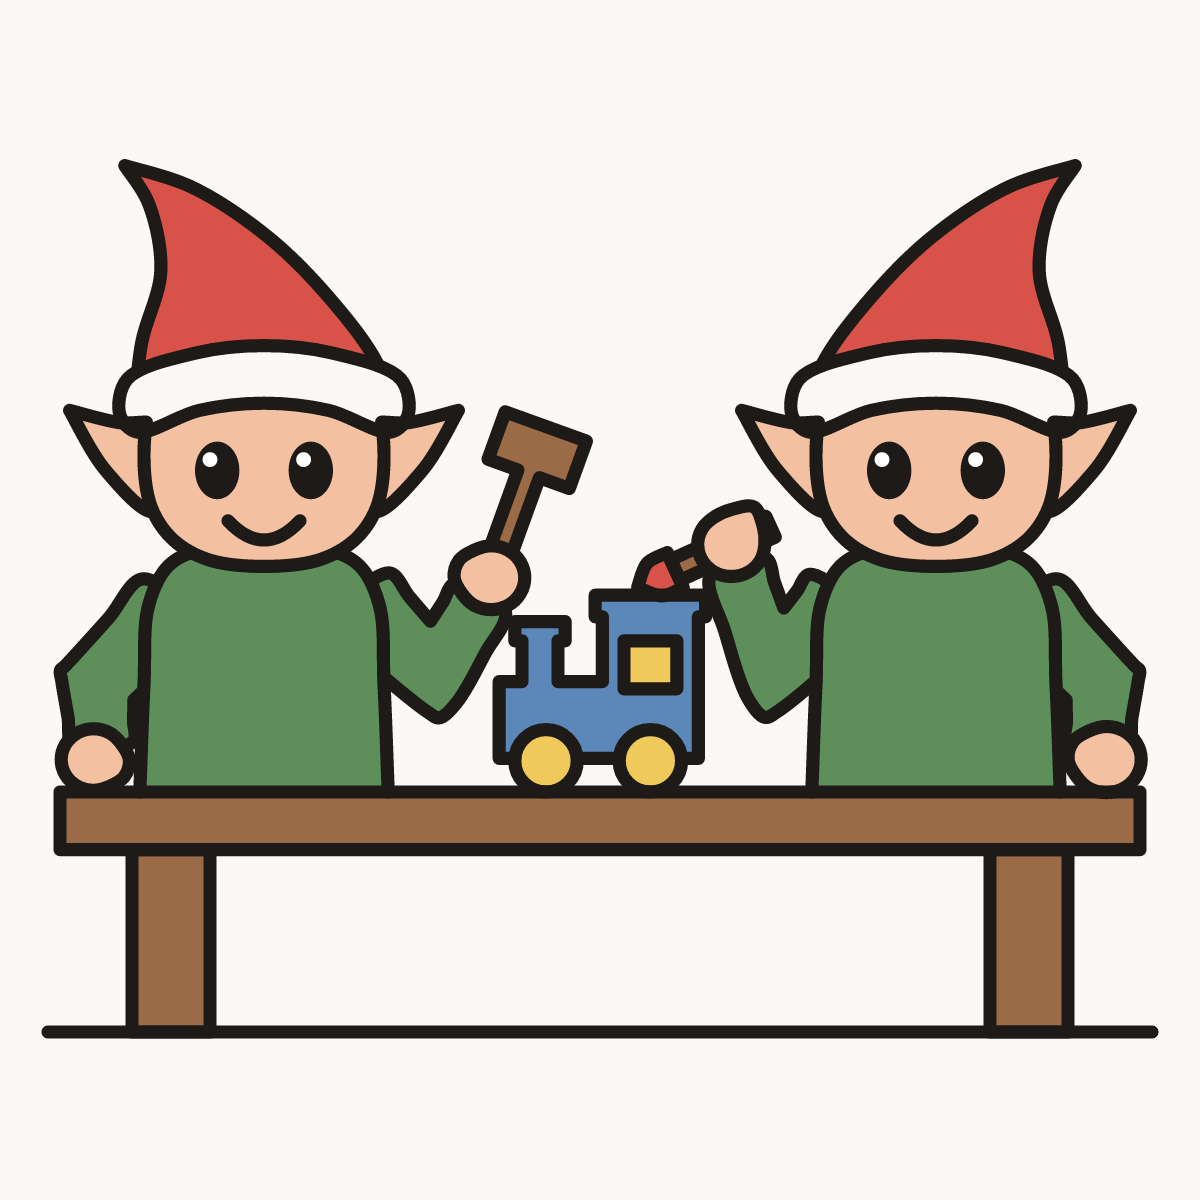
Follow the steps above and this is where you end up: elves making toys, drawn by you.
Every step in one picture