Watch it draw itself · tap to replay
How to Draw an Elm Tree
Draw an elm tree in 10 easy steps, about 8 minutes. Free, with a printable worksheet.
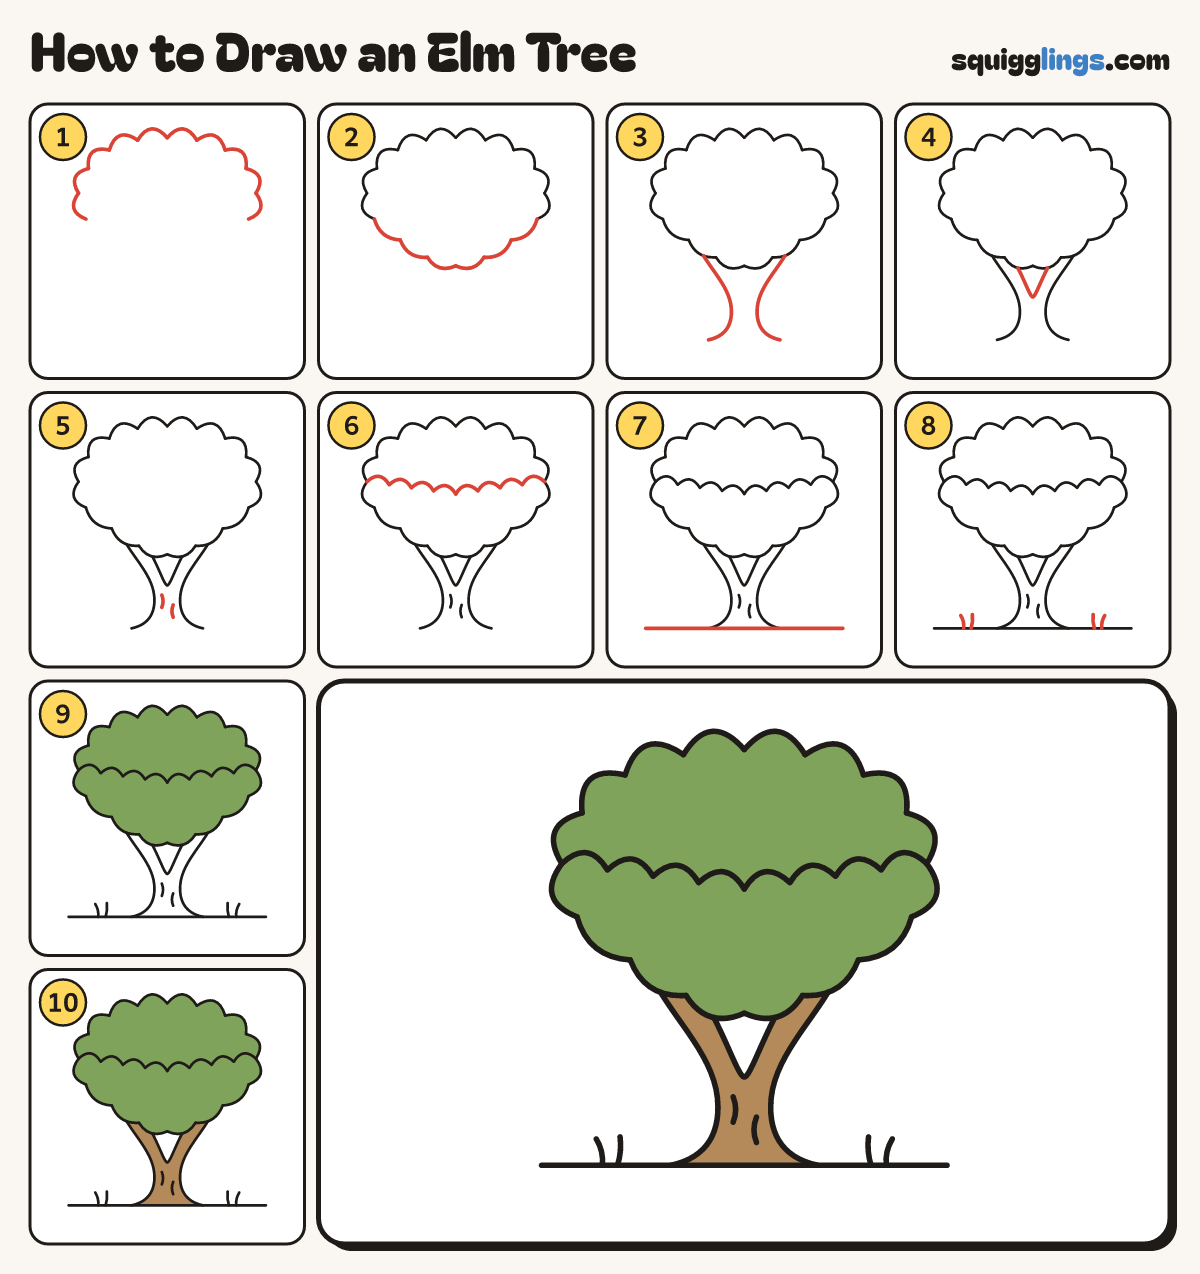
Each picture adds one red line. Draw that line, then scroll to the next picture. Rub out any dashed helper lines at the end. First up: the leafy top.
Step 1: The leafy top
Start on the left, near the middle. Draw a tall rainbow of 10 big bumps and stop on the right.
Tip Make it tall and wide, like an open umbrella.
Step 2: Bumps underneath
From where the rainbow ended, draw 6 small bumps sloping down to the middle and back up.
Tip The bottom of the leaves makes a wide V.
Step 3: The trunk
Start under the leaves, left of the middle. Draw a curving line down to a root. Same right.
Tip The trunk is tall and slim, wide at the top like a vase.
Step 4: Two big branches
Start on the leaves between the two lines. Draw a deep V down into the trunk and back up.
Step 5: Bark lines
On the trunk draw 2 short curved lines for bark, one higher than the other.
Step 6: Leafy hills
Start on the left edge of the leaves, high up. Draw hill bumps across to the right edge.
Step 7: The ground
Draw a long ground line under the trunk. Start far left of the tree and stop far right.
Step 8: Grass
On each side of the trunk, away from it, draw 2 short curved grass blades on the ground.
Step 9: Green leaves
Go over your lines. Colour the whole leafy top green, right to the bumpy edges.
Step 10: Brown trunk
Colour the trunk and both branches wood brown, leaving the V empty. Your elm tree is done!
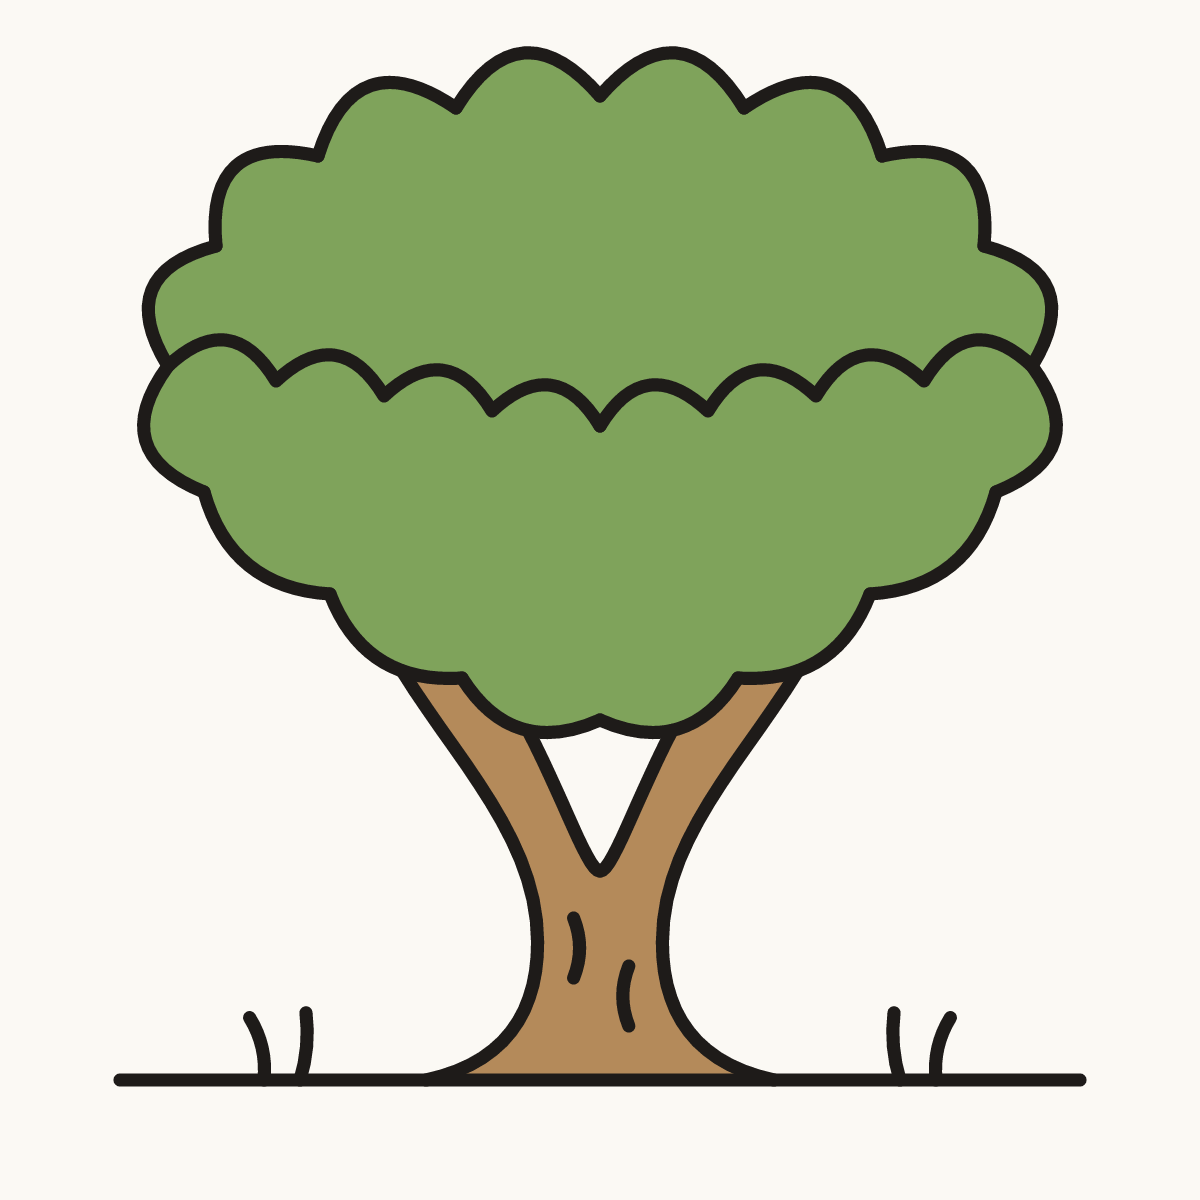
Your finished drawing
Follow the steps above and this is where you end up: an elm tree, drawn by you.
Every step in one picture