Watch it draw itself · tap to replay
How to Draw a Brussels Sprout Stalk
Draw a Brussels sprout stalk in 12 easy steps, about 9 minutes. Free, with a printable worksheet.
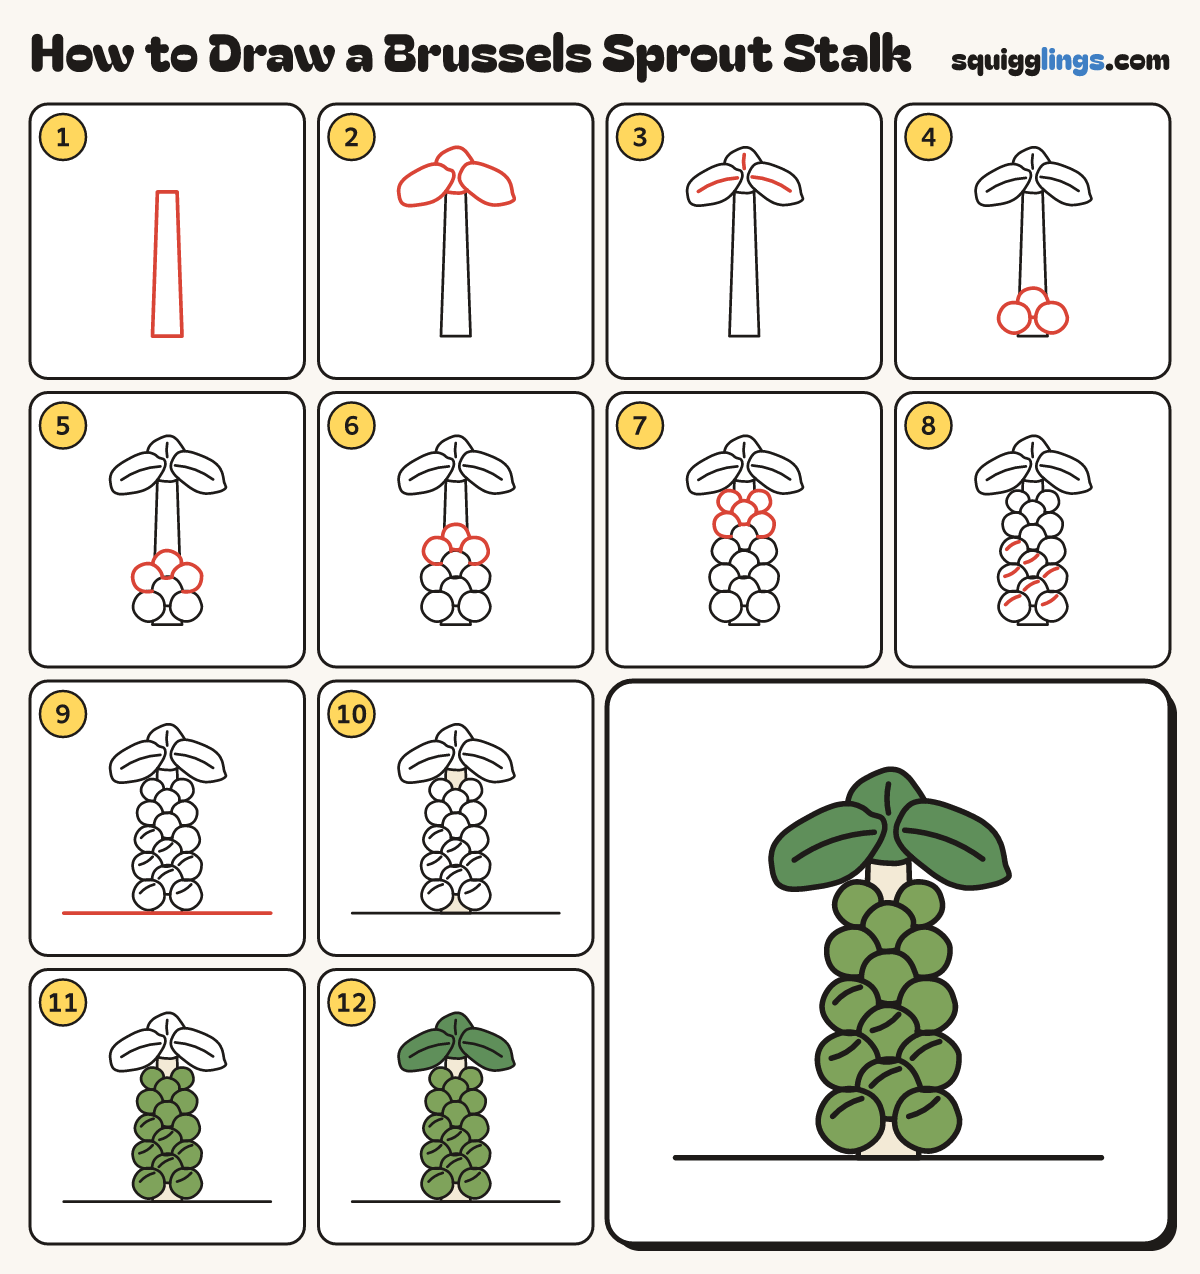
Each picture adds one red line. Draw that line, then scroll to the next picture. Rub out any dashed helper lines at the end. First up: the stalk.
Step 1: The stalk
Draw one thick stalk standing up in the middle of your paper, with a flat top just above the middle.
Tip Sprouts grow like little green knobs all over a thick stalk.
Step 2: Floppy leaves
On the flat top draw 3 floppy leaves with wobbly edges: one flopping left, one right, one standing up behind.
Step 3: Leaf veins
Inside each leaf draw one bowed line along its middle, from the stalk end, stopping before the tip.
Step 4: Bottom sprouts
Near the bottom of the stalk draw a round sprout on each side, and a third above in the middle.
Step 5: More sprouts
Keep going up: 2 more balls, one each side, then one in the middle, so the sprouts zigzag up.
Step 6: Even more sprouts
Add 3 more the same way, a little smaller: 2 at the sides and 1 in the middle.
Step 7: Top sprouts
Finish with 5 smaller sprouts zigzagging up to just under the leaves: 2, then 1, then 2.
Step 8: Sprout caps
On the 7 lowest sprouts draw one short curved line near the top, like a little leaf wrapping round.
Step 9: The ground
Draw a ground line from left to right, just touching the bottom of the stalk.
Step 10: Pale stalk
Go over your lines, then colour the stalk cream at the top and the bottom, where it shows.
Step 11: Light green sprouts
Colour all the sprouts light green.
Step 12: Dark green leaves
Colour the leaves dark green, and your sprout stalk is done!
Your finished drawing
Follow the steps above and this is where you end up: a Brussels sprout stalk, drawn by you.
Every step in one picture