Watch it draw itself · tap to replay
How to Draw a Cake Slice
Draw a cake slice in 10 easy steps, about 8 minutes. Free, with a printable worksheet.
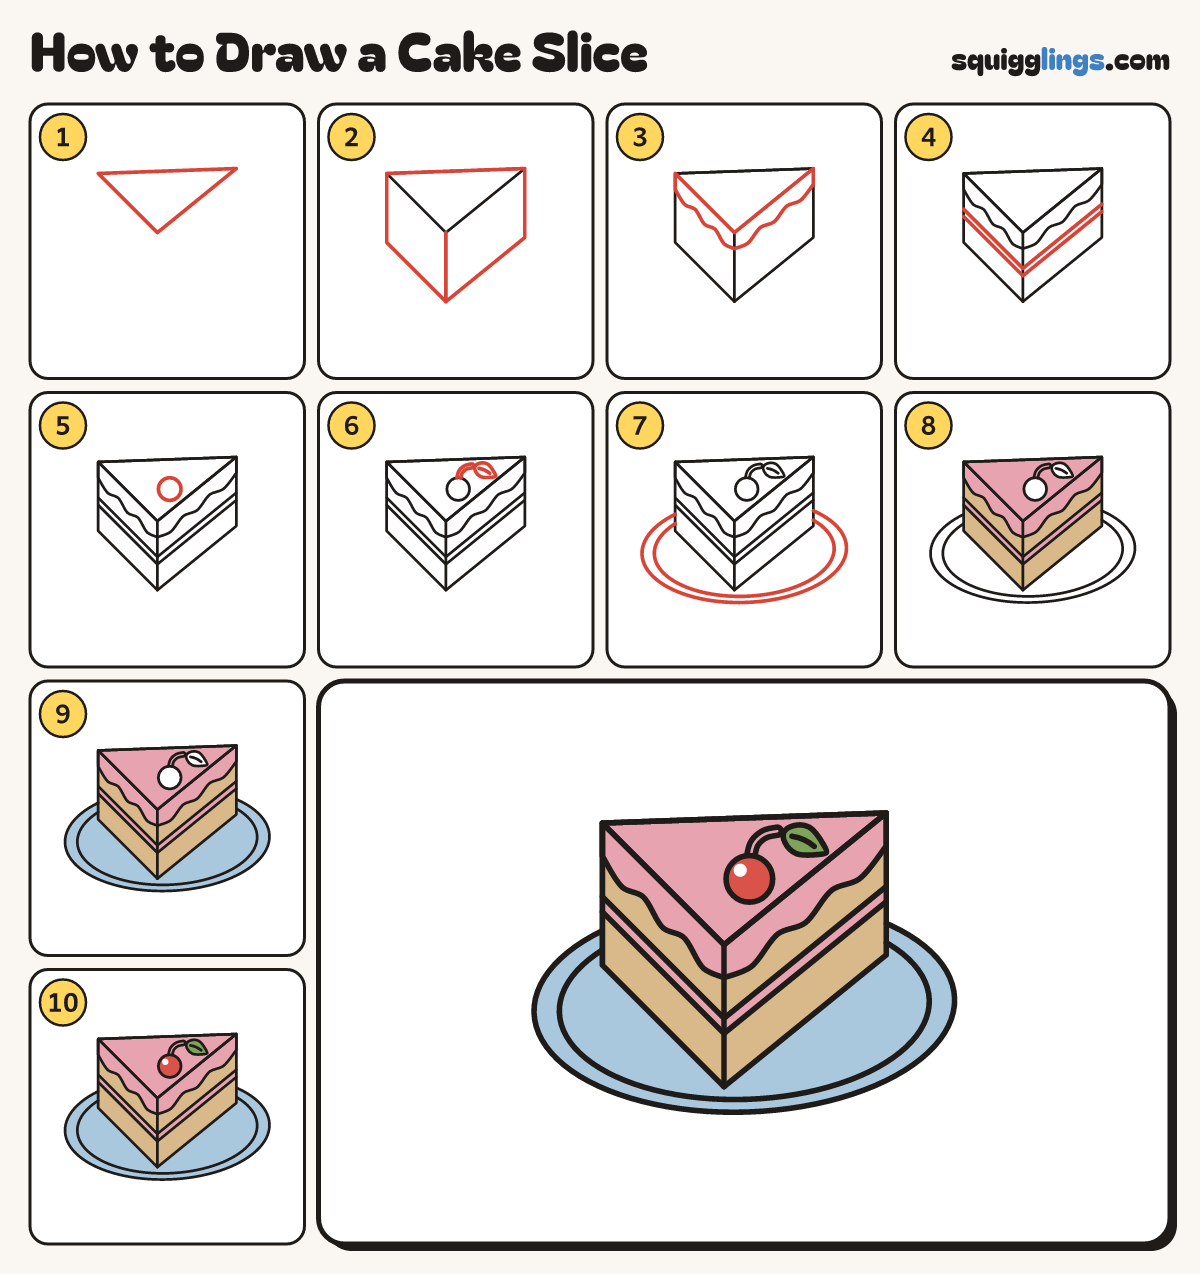
Each picture adds one red line. Draw that line, then scroll to the next picture. Rub out any dashed helper lines at the end. First up: top of the slice.
Step 1: Top of the slice
Above the middle, draw a wide triangle with its point aiming down toward you.
Tip The point is the thin end that faces you.
Step 2: Tall sides
From each corner, draw a line straight down, all the same length. Join their ends with 2 bottom lines.
Step 3: Thick frosting
Draw a thick frosting layer round the top edges, with a wavy dripping line along its bottom.
Tip Wobbly drips, like melted icing.
Step 4: Jam layer
Below the frosting, draw 2 lines close together across both sides, bending at the front corner.
Step 5: Cherry on top
On the top of the slice, draw a round cherry about as big as a grape.
Step 6: Stem and leaf
From the top of the cherry, draw a short curved stem up. Hang a little leaf off its end.
Step 7: A plate
Draw a big oval plate under the slice, with a smaller oval inside it for the rim.
Tip Stop each oval where it meets the slice.
Step 8: Tan sponge, pink frosting
Go over your lines. Colour the top, frosting and jam pink, around the cherry and leaf, and the sponge tan.
Step 9: Sky plate
Colour the plate sky blue, going around the slice.
Step 10: Red cherry, green leaf
Colour the cherry red, leaving a little white shine, and the leaf green. Your cake is ready!
Your finished drawing
Follow the steps above and this is where you end up: a cake slice, drawn by you.
Every step in one picture