Watch it draw itself · tap to replay
How to Draw an Edelweiss
Draw an edelweiss in 11 easy steps, about 8 minutes. Free, with a printable worksheet.
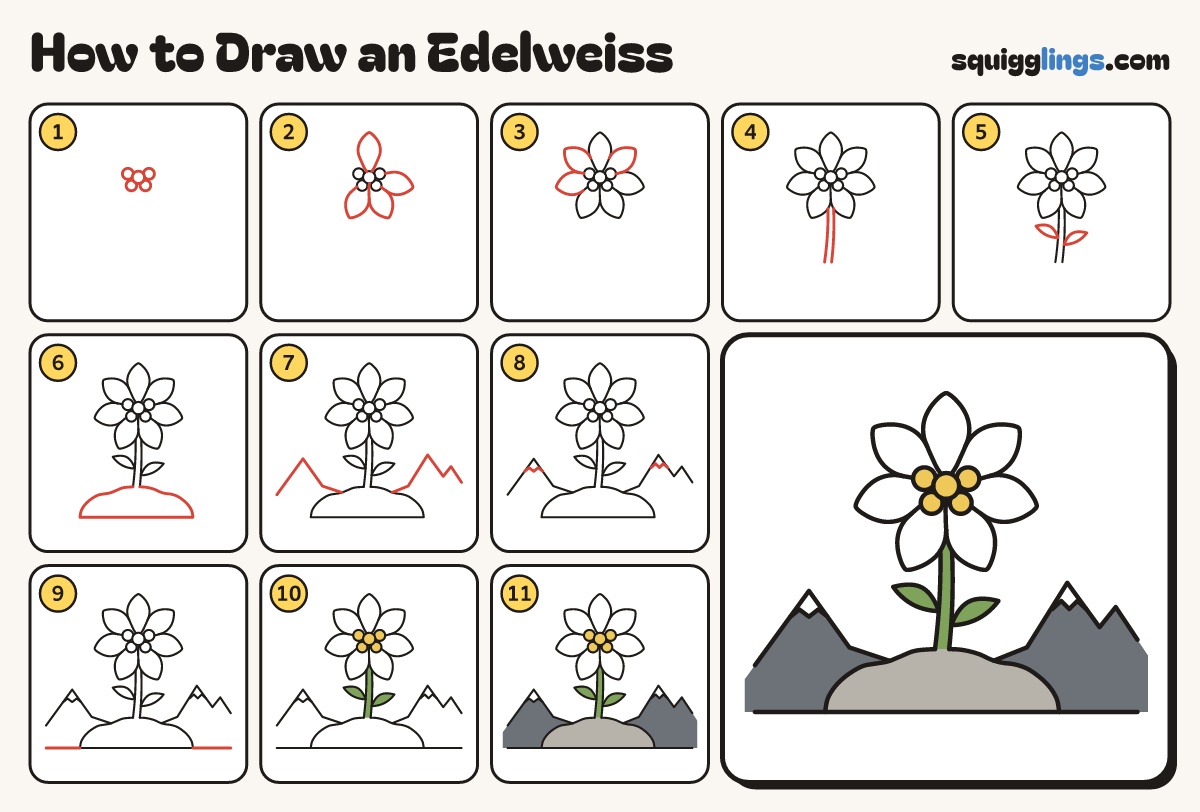
Each picture adds one red line. Draw that line, then scroll to the next picture. Rub out any dashed helper lines at the end. First up: button florets.
Step 1: Button florets
A little above the middle draw 5 small circles touching like buttons: 1 in the middle, 2 above, 2 below.
Step 2: Four petals
Around the buttons draw 4 fat woolly petals with soft points: 1 up, 1 right, 2 pointing down.
Step 3: Three more petals
Draw 3 more fat petals in the gaps, so 7 petals make a star.
Step 4: The stem
Start between the 2 bottom petals. Draw 2 gently curving lines down. Stop where the rock will be.
Step 5: Two narrow leaves
Start on the stem. Draw a thin pointed leaf out and back to the stem. Do both sides.
Step 6: A rock
Under the stem draw a big lumpy rock with a flat bottom. The stem grows out of its top.
Step 7: Mountains behind
Start low at the left edge. Draw pointed mountain peaks behind the rock and stop at the right edge.
Tip Keep the peaks lower than the flower. Skip lines hidden behind the rock.
Step 8: Snow caps
On the 2 tallest peaks draw a short zigzag across, a little way down from the point.
Step 9: The ground
Draw a ground line from the left edge across to the rock, and from the rock to the right edge.
Step 10: Yellow buttons, green leaves
Colour the button florets yellow, and the stem and leaves green.
Step 11: Grey rock, slate peaks
Colour the rock grey, then the mountains slate around it. Leave the petals and snow white. Your edelweiss is done!
Your finished drawing
Follow the steps above and this is where you end up: an edelweiss, drawn by you.
Every step in one picture