Watch it draw itself · tap to replay
How to Draw an Easter Egg
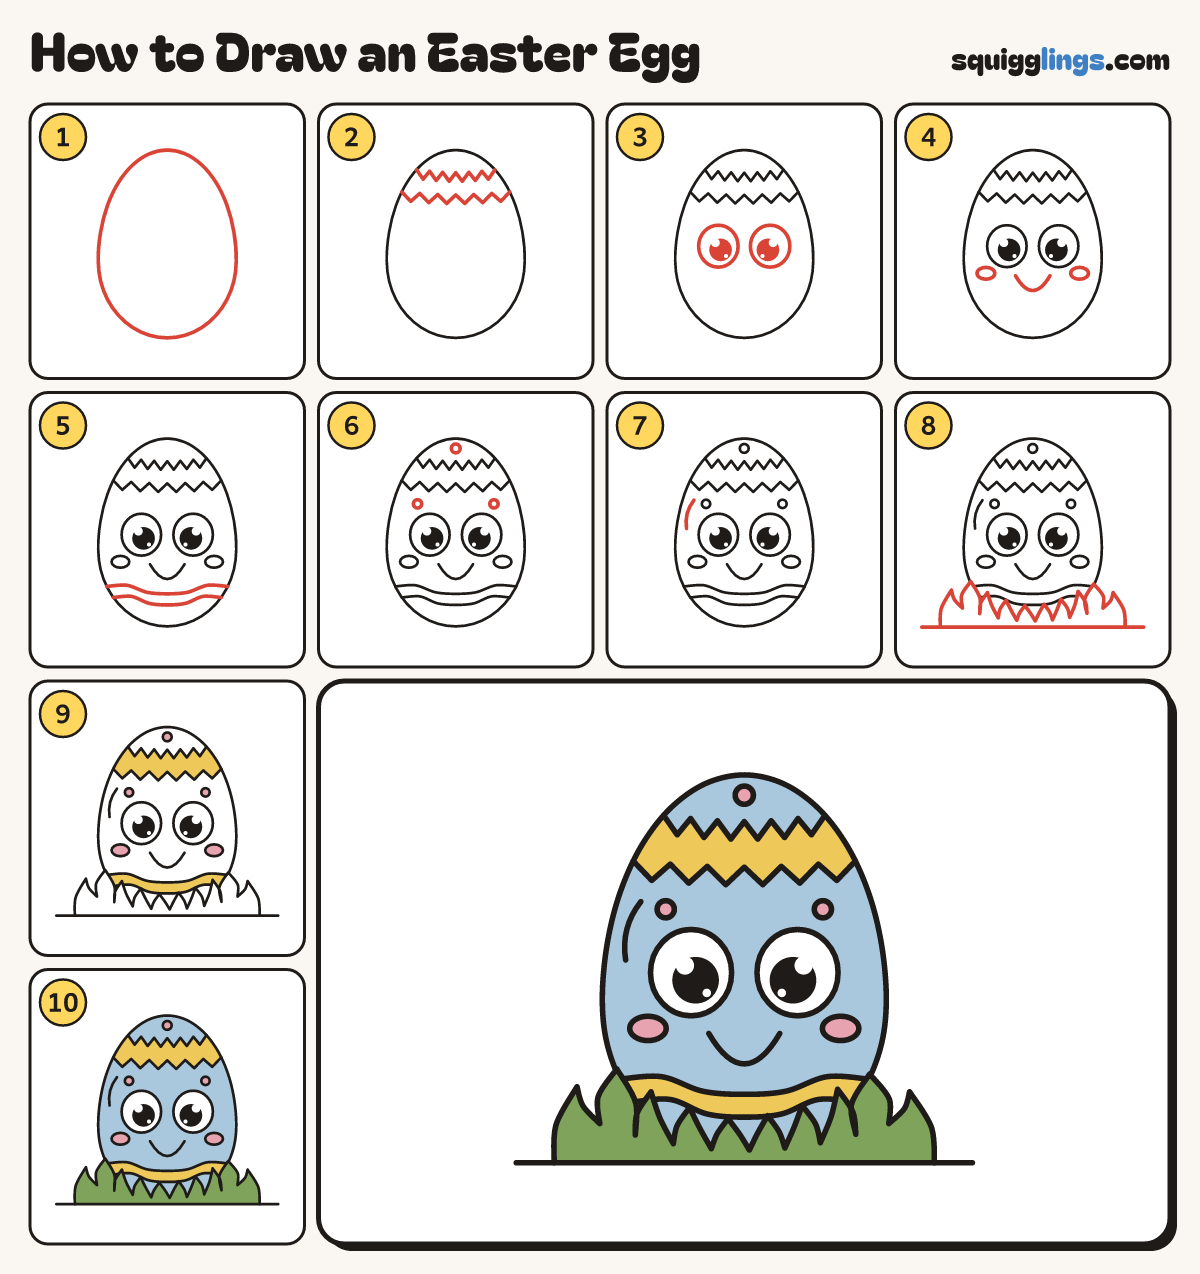
Draw an Easter egg in 10 easy steps, about 8 minutes. Free, with a printable worksheet.
Each picture adds one red line. Draw that line, then scroll to the next picture. Rub out any dashed helper lines at the end. First up: the egg.
Step 1: The egg
Near the top, draw a big egg, a little narrower at the top and fatter at the bottom.
Step 2: Zigzag band
Near the top of the egg, draw a zigzag from edge to edge. Draw a second zigzag a finger below.
Step 3: Two big eyes
In the middle of the egg, draw 2 big round eyes. Add a big black dot with white shines.
Step 4: Smile and cheeks
Under the eyes, draw a big happy U smile. Add a small oval cheek beside each eye.
Step 5: Wavy band
Under the smile, draw a wavy line from edge to edge with 3 bumps. Draw another a finger below.
Step 6: Polka dots
Draw a little circle at the top of the egg, and one on each side under the zigzag.
Step 7: A shine
Start a finger below the zigzag, near the left edge. Draw a short curved shine line down beside the eye.
Step 8: Grass nest
Start on the ground left of the egg. Draw pointy grass blades across, short in the middle. Add ground lines.
Step 9: Yellow bands, pink dots
Colour both bands yellow. Colour the 3 polka dots and the cheeks pink.
Step 10: Blue egg, green nest
Colour the egg light blue around the bands, dots and cheeks. Leave the eyes white. Colour the nest green.
Your finished drawing
Follow the steps above and this is where you end up: an Easter egg, drawn by you.
Every step in one picture