Watch it draw itself · tap to replay
How to Draw an Easter Card
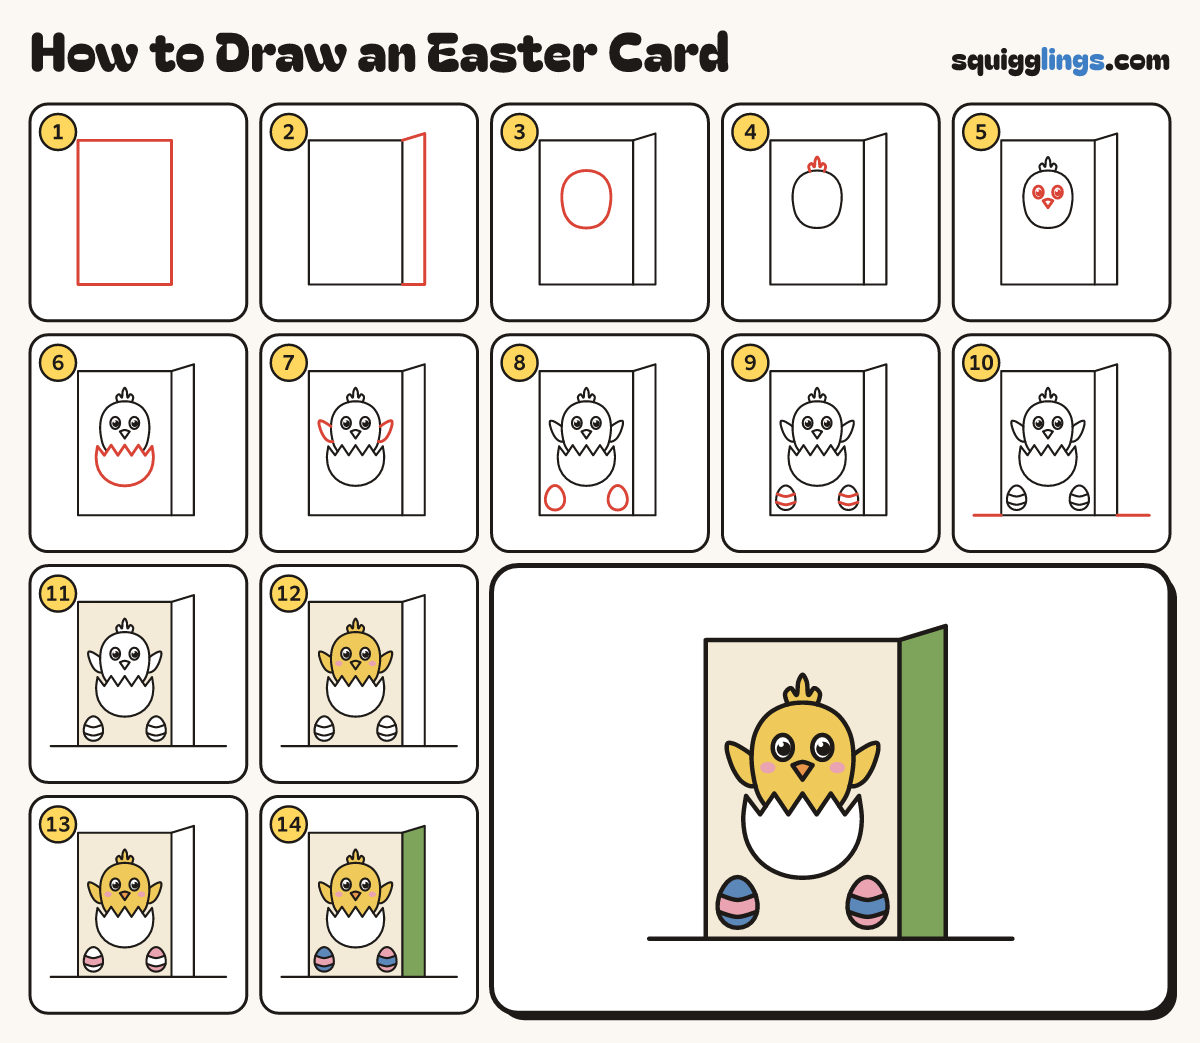
Draw an Easter card in 14 easy steps, about 11 minutes. Free, with a printable worksheet.
Each picture adds one red line. Draw that line, then scroll to the next picture. Rub out any dashed helper lines at the end. First up: the card.
Step 1: The card
Draw a tall rectangle in the middle of your paper for the front of the card.
Tip Leave some room on the right for the back page.
Step 2: The back page
Start at the top right corner. Draw a line slanting up, then straight down, and back to the bottom corner.
Tip The card stands a little open, so you can see a strip of its back page.
Step 3: Round chick
In the middle of the card draw a fat round shape, a little taller than wide, for the chick.
Step 4: Fluffy tuft
On top of the chick's head draw 3 small feather bumps, the middle one tallest.
Step 5: The face
Draw 2 oval eyes with black dots. Between them, a little lower, draw a small pointed beak.
Step 6: Cracked shell
Across the chick's tummy draw a zigzag, wider than the chick. Join its ends with a big U underneath.
Tip Rub out the chick's line inside the shell.
Step 7: Two wings
Draw a small pointed wing poking up on each side of the chick, tucked behind the shell.
Step 8: Two eggs
Under the shell draw 2 small eggs, one in each bottom corner of the card.
Tip An egg is a little narrower at the top.
Step 9: Egg stripes
On each egg start at the left edge and draw 2 curved lines across to the right edge.
Step 10: Ground line
Start at the left, draw a ground line and stop at the card. Carry on from the other side.
Step 11: Cream card
Colour the front of the card cream, all around the chick, the shell and the 2 eggs.
Tip Leave the shell white.
Step 12: Yellow chick, pink cheeks
Colour 2 small pink cheeks. Colour the chick, its tuft and its wings yellow. Leave the eyes white.
Step 13: Orange beak, pink stripes
Colour the beak orange. Colour pink: the middle of the left egg and both ends of the right egg.
Step 14: Blue eggs, green page
Go over your lines. Colour the rest of each egg blue and the back page green.
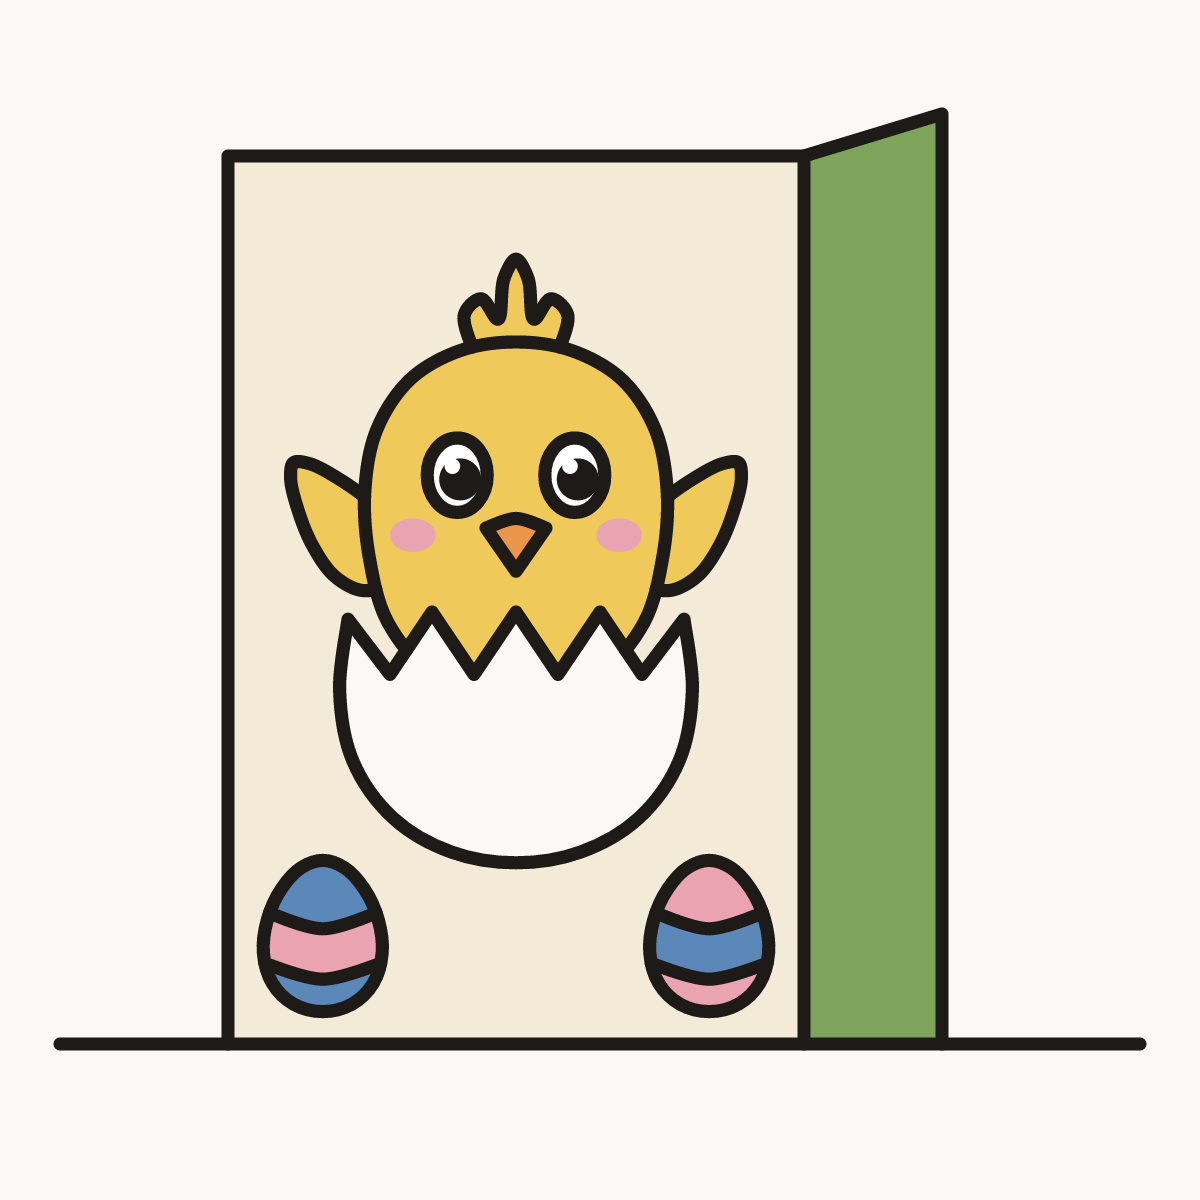
Your finished drawing
Follow the steps above and this is where you end up: an Easter card, drawn by you.
Every step in one picture