Watch it draw itself · tap to replay
How to Draw an Eagle Ray
Draw an eagle ray in 10 easy steps, about 8 minutes. Free, with a printable worksheet.
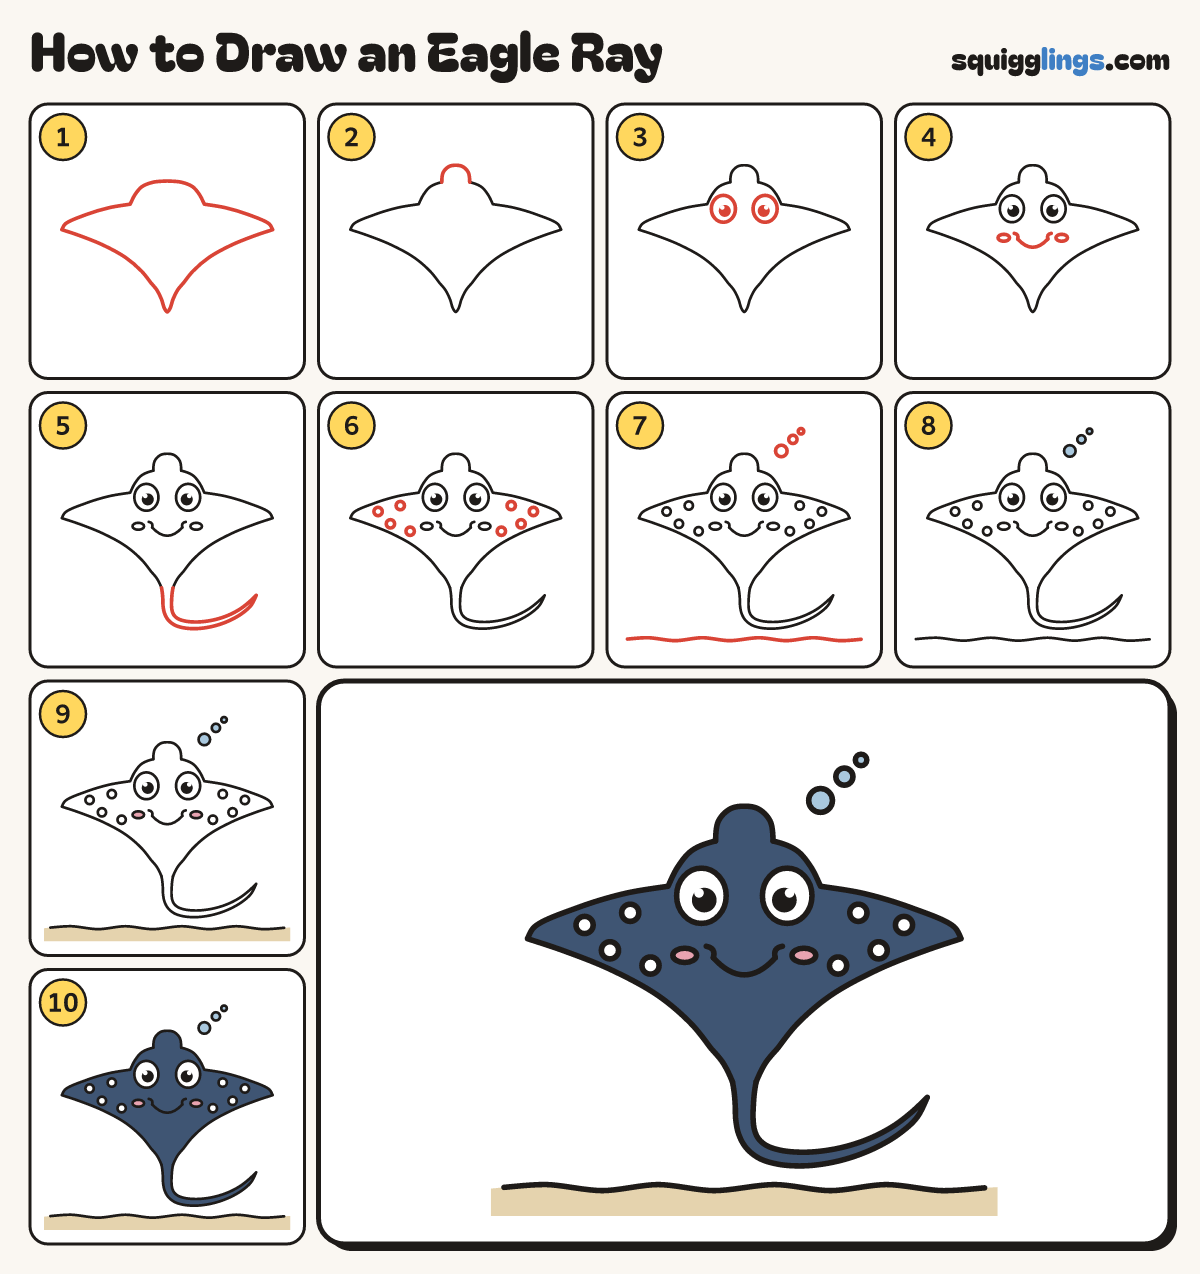
Each picture adds one red line. Draw that line, then scroll to the next picture. Rub out any dashed helper lines at the end. First up: pointed wings.
Step 1: Pointed wings
Draw a dome head near the top. Sweep each side out to a wing tip, then down to a point.
Tip Eagle ray wings are pointy like a bird's: 2 sharp tips.
Step 2: Duck-bill snout
Start on top of the head. Draw a duck-bill bump back down to it. Rub out the line inside.
Step 3: Two big eyes
On the head, a finger below the top, draw 2 big egg eyes side by side with black dots.
Step 4: Smile and cheeks
Start under the left eye. Draw a wide U smile across to the right eye. Add a cheek each end.
Step 5: Long whip tail
From the body's bottom point draw a very long thin tail. It curves down and right to a fine point.
Tip The tail is longer than the whole body.
Step 6: Spots
On each wing draw 4 round spots in 2 soft rows, well away from the eyes, cheeks and smile.
Step 7: Bubbles and sea floor
Beside the head draw 3 little bubbles going up. Draw a wavy line right across the bottom of the paper.
Step 8: Blue bubbles
Colour the bubbles light blue.
Step 9: Pink cheeks, sandy floor
Colour the 2 cheeks pink and the floor under the wavy line sandy.
Step 10: Colour it dark blue
Colour the ray dark blue, going around the pink cheeks and leaving the eyes and spots white. All done!
Your finished drawing
Follow the steps above and this is where you end up: an eagle ray, drawn by you.
Every step in one picture