Watch it draw itself · tap to replay
How to Draw Driftwood
Draw driftwood in 10 easy steps, about 8 minutes. Free, with a printable worksheet.
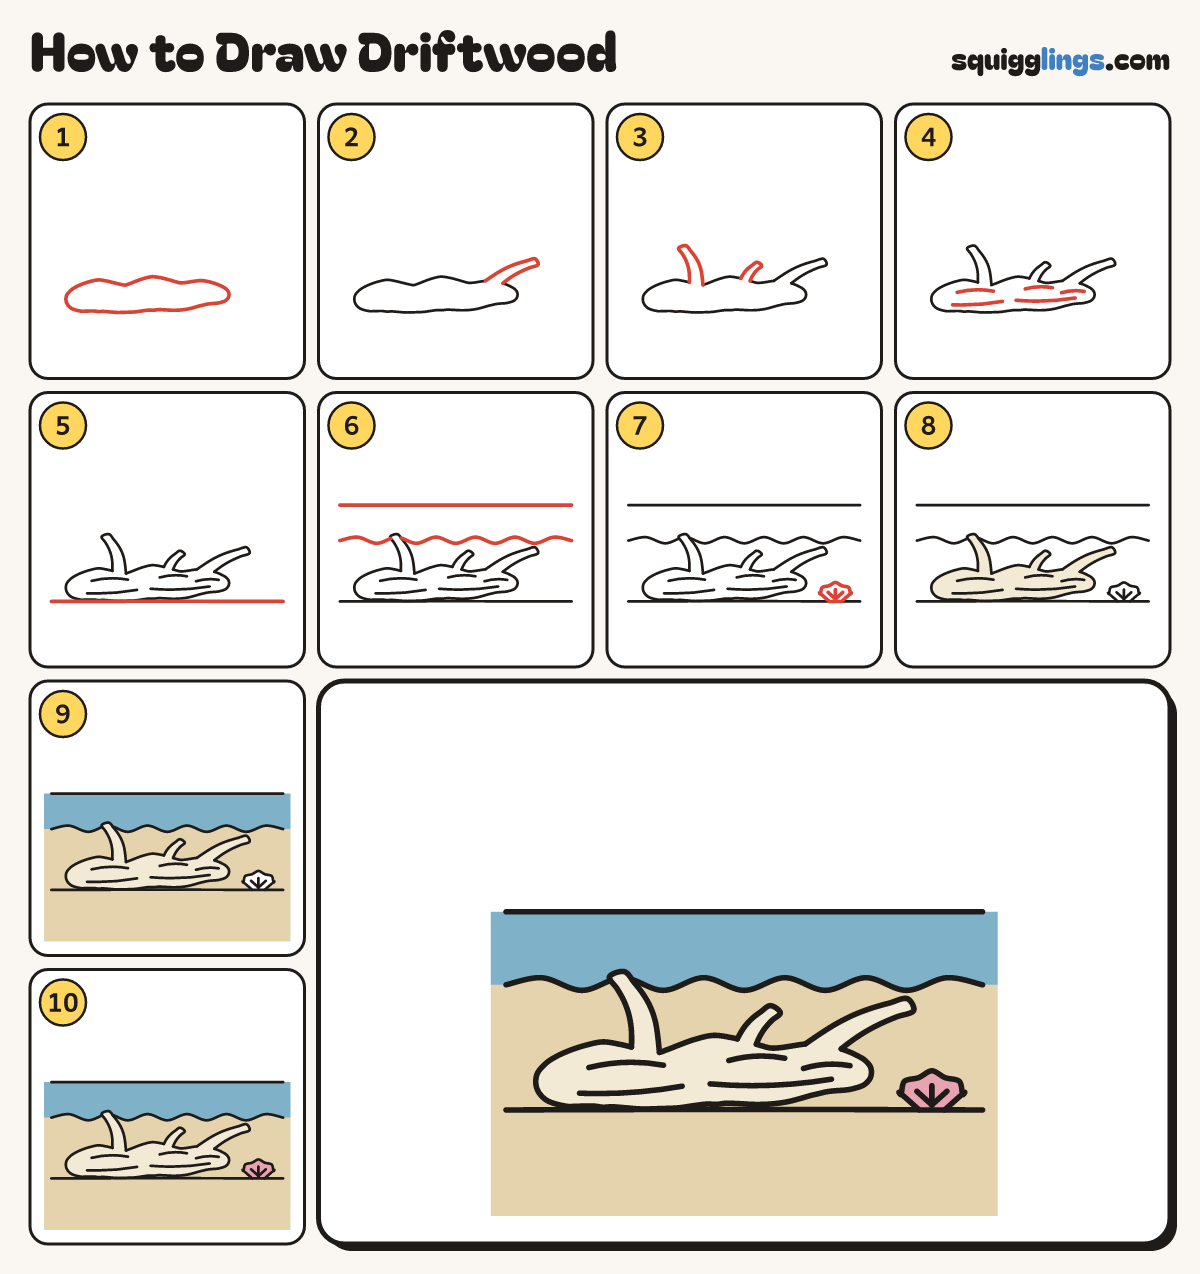
Each picture adds one red line. Draw that line, then scroll to the next picture. Rub out any dashed helper lines at the end. First up: the log.
Step 1: The log
Across the lower middle draw a chunky log on its side, twisty on top, thinner at the right end.
Tip Driftwood is wood the sea has tumbled smooth and bleached pale.
Step 2: A branch
Near the right end draw a long branch growing out of the log. Rub out the line across its base.
Step 3: Broken stubs
On top draw 2 stubs growing out of the log, a tall one leaning left, a short one leaning right.
Tip Rub out the log line across the bottom of each stub, so they grow out of the wood.
Step 4: Grain lines
Along the log draw 5 long curved grain lines of different lengths, following its bumps.
Step 5: The sand
Under the log draw a soft sand line from edge to edge, just touching the bottom of the log.
Step 6: Waves behind
Behind the log draw a wavy sea line from edge to edge, and a straight horizon line above it.
Step 7: A shell
Right of the log draw a fan shell on the sand, bumpy on top, with 3 lines fanning up inside.
Step 8: Pale wood
Go over your lines, then colour the log, branch and stubs pale cream, like bleached bone.
Step 9: Sand and sea
Colour the sea blue around the tall stub, and the sand below the waves sandy yellow around everything.
Step 10: Pink shell
Colour the shell pink, and your driftwood is done!
Your finished drawing
Follow the steps above and this is where you end up: driftwood, drawn by you.
Every step in one picture