Watch it draw itself · tap to replay
How to Draw a Dome Home
Draw a dome home in 12 easy steps, about 9 minutes. Free, with a printable worksheet.
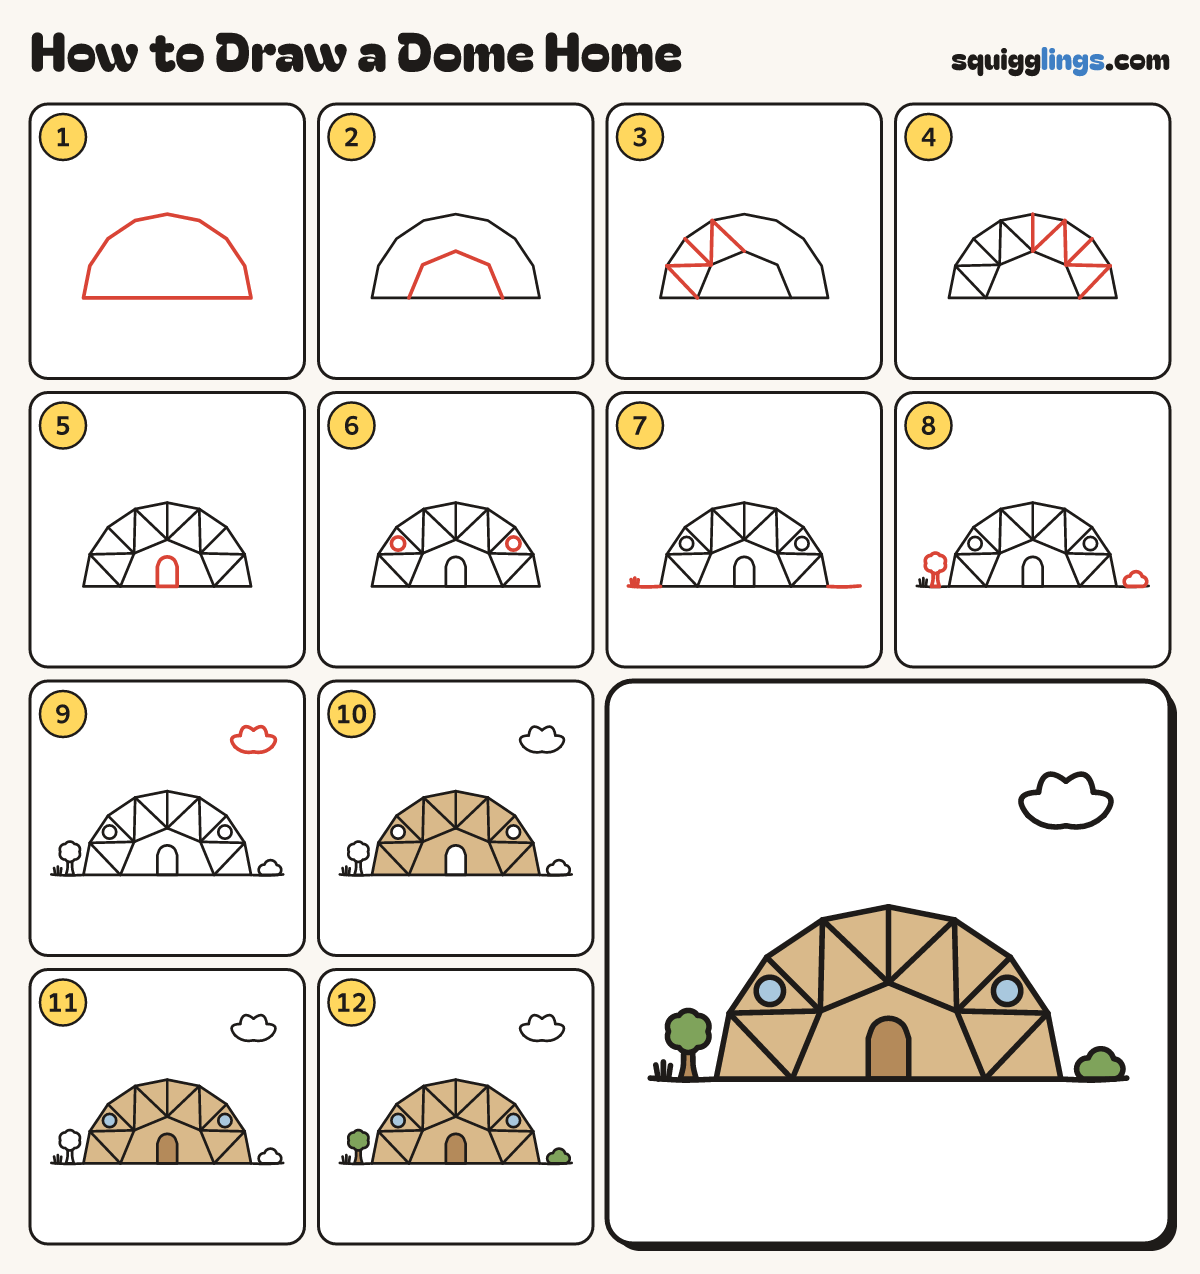
Each picture adds one red line. Draw that line, then scroll to the next picture. Rub out any dashed helper lines at the end. First up: the dome.
Step 1: The dome
Start low on the left. Draw a big dome of short straight lines to the right, then a flat bottom.
Tip A dome home is made of flat triangles, not one smooth curve.
Step 2: The inner ring
Inside the dome, draw a smaller half-ring of 4 straight lines, starting and stopping on the flat bottom.
Step 3: Left struts
Join the dome corners to the inner ring corners with straight lines. The left half fills with triangles.
Step 4: Right struts
Do the same on the right half. Straight lines from corner to corner make triangles.
Step 5: The door
In the middle of the dome, draw an arched door standing on the flat bottom line.
Step 6: Round windows
Draw a round window on each side of the dome, inside one triangle panel.
Step 7: The ground
Draw the ground line from the dome out to each edge. Add 3 small grass blades near the left end.
Step 8: Tree and bush
On the left, draw a short trunk and a bumpy round tree top. On the right, a small bumpy bush.
Tip Leave a little gap between the dome and the tree, grass and bush.
Step 9: A cloud
Draw a puffy cloud in the top right, with a flatter line underneath.
Step 10: Tan panels
Colour the dome tan, leaving the door and windows white. Press softly so the lines show.
Step 11: Door and windows
Colour the door brown and the round windows sky blue.
Step 12: Green tree and bush
Colour the trunk brown, the tree top and bush green, and the cloud white. Your dome home is done!
Your finished drawing
Follow the steps above and this is where you end up: a dome home, drawn by you.
Every step in one picture