Watch it draw itself · tap to replay
How to Draw a Ditch
Draw a ditch in 13 easy steps, about 10 minutes. Free, with a printable worksheet.
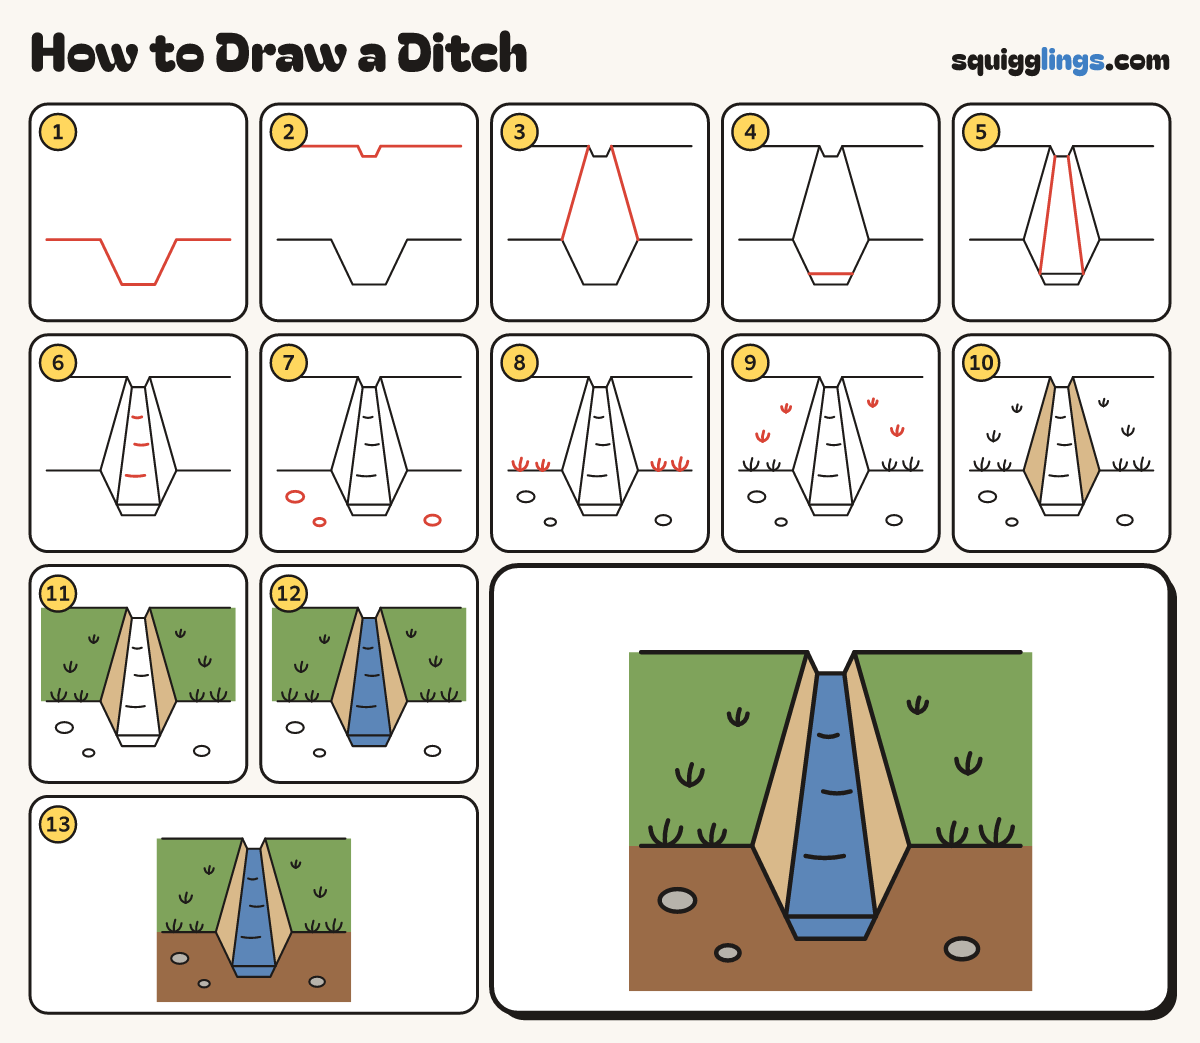
Each picture adds one red line. Draw that line, then scroll to the next picture. Rub out any dashed helper lines at the end. First up: the ground.
Step 1: The ground
Start at the left edge. Draw a line across with a wide flat-bottomed dip. Stop at the right edge.
Tip Draw it below the middle of the paper. The dip is the ditch, cut open so you can see inside.
Step 2: The far edge
Start at the left edge, near the top. Draw a line with a tiny dip. Stop at the right edge.
Tip Put the tiny dip right above the big one.
Step 3: The ditch edges
Start at each top corner of the big dip. Draw a straight line up to the tiny dip.
Tip The ditch looks wide up close and narrow far away.
Step 4: The water line
Start on one slope of the big dip, just above the bottom. Draw straight across to the other slope.
Step 5: The water edges
Start at each end of the water line. Draw a straight line up to the bottom of the tiny dip.
Step 6: Ripples
In the water draw 3 short curved ripples, getting smaller further away.
Step 7: Stones
In the soil under the ground line draw 3 flat oval stones of different sizes.
Step 8: Grass in front
On the ground line draw 4 tufts of grass, 2 on each side. Give each one 3 blades.
Step 9: Grass behind
In the field draw 4 smaller tufts of grass, 2 on each side of the ditch.
Step 10: Light brown sides
Colour the 2 long sloping sides of the ditch light brown.
Step 11: Green grass
Colour the field on both sides of the ditch leaf green, out to the edges.
Step 12: Blue water
Colour the water blue, all the way back, and the piece at the front too.
Step 13: Grey and brown
Colour the stones grey and the soil around them dark brown, down to the bottom. Your ditch is done!
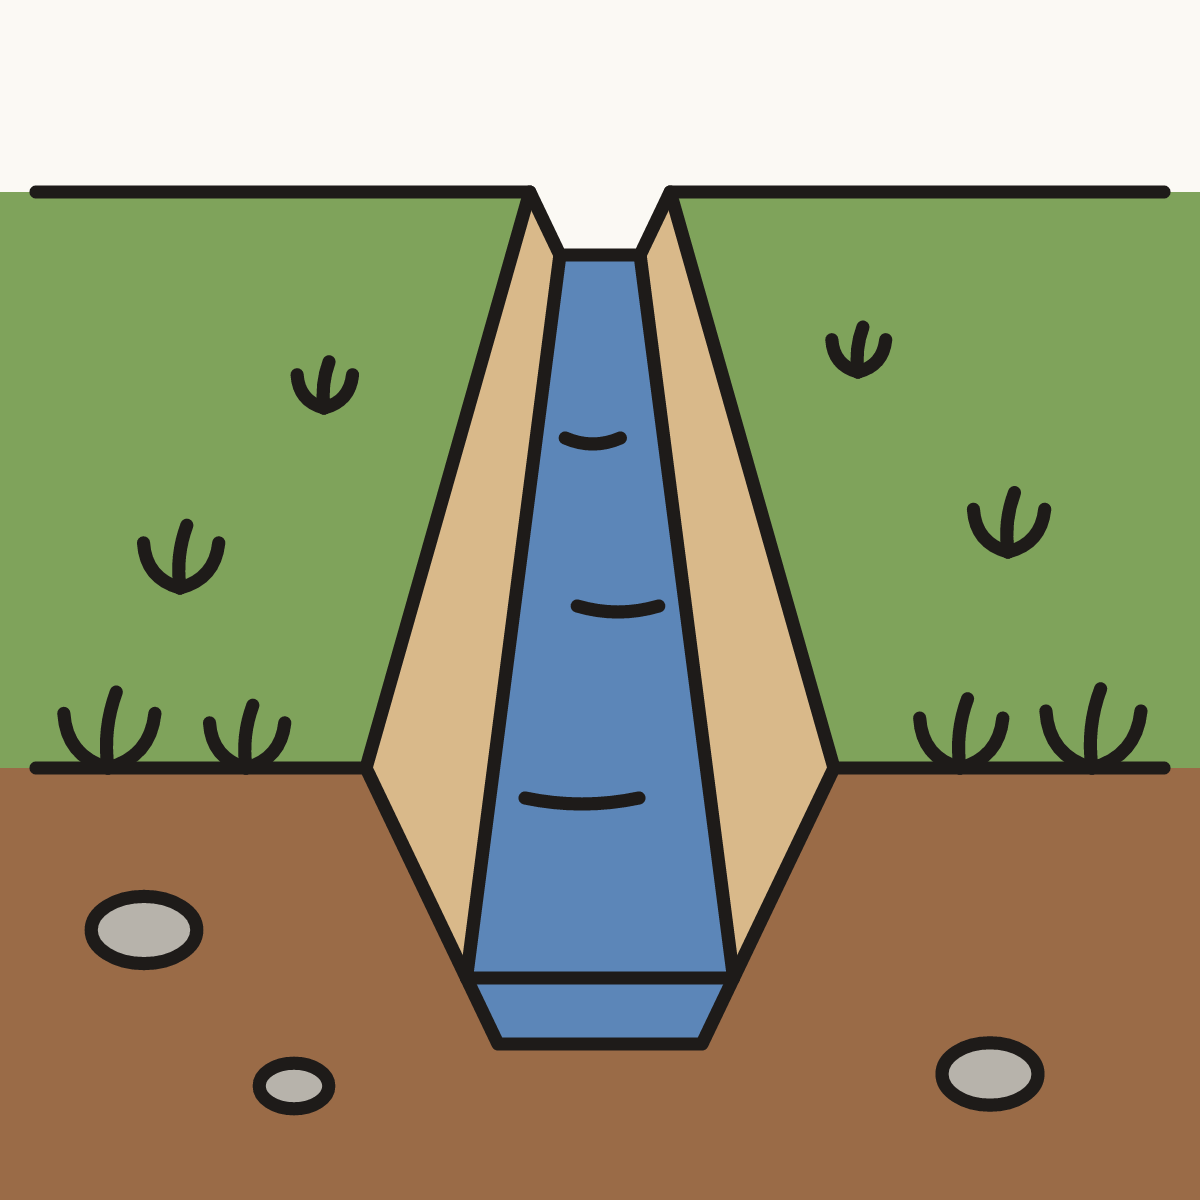
Your finished drawing
Follow the steps above and this is where you end up: a ditch, drawn by you.
Every step in one picture