Watch it draw itself · tap to replay
How to Draw a Declaration of Independence
Draw a declaration of independence in 12 easy steps, about 9 minutes. Free, with a printable worksheet.
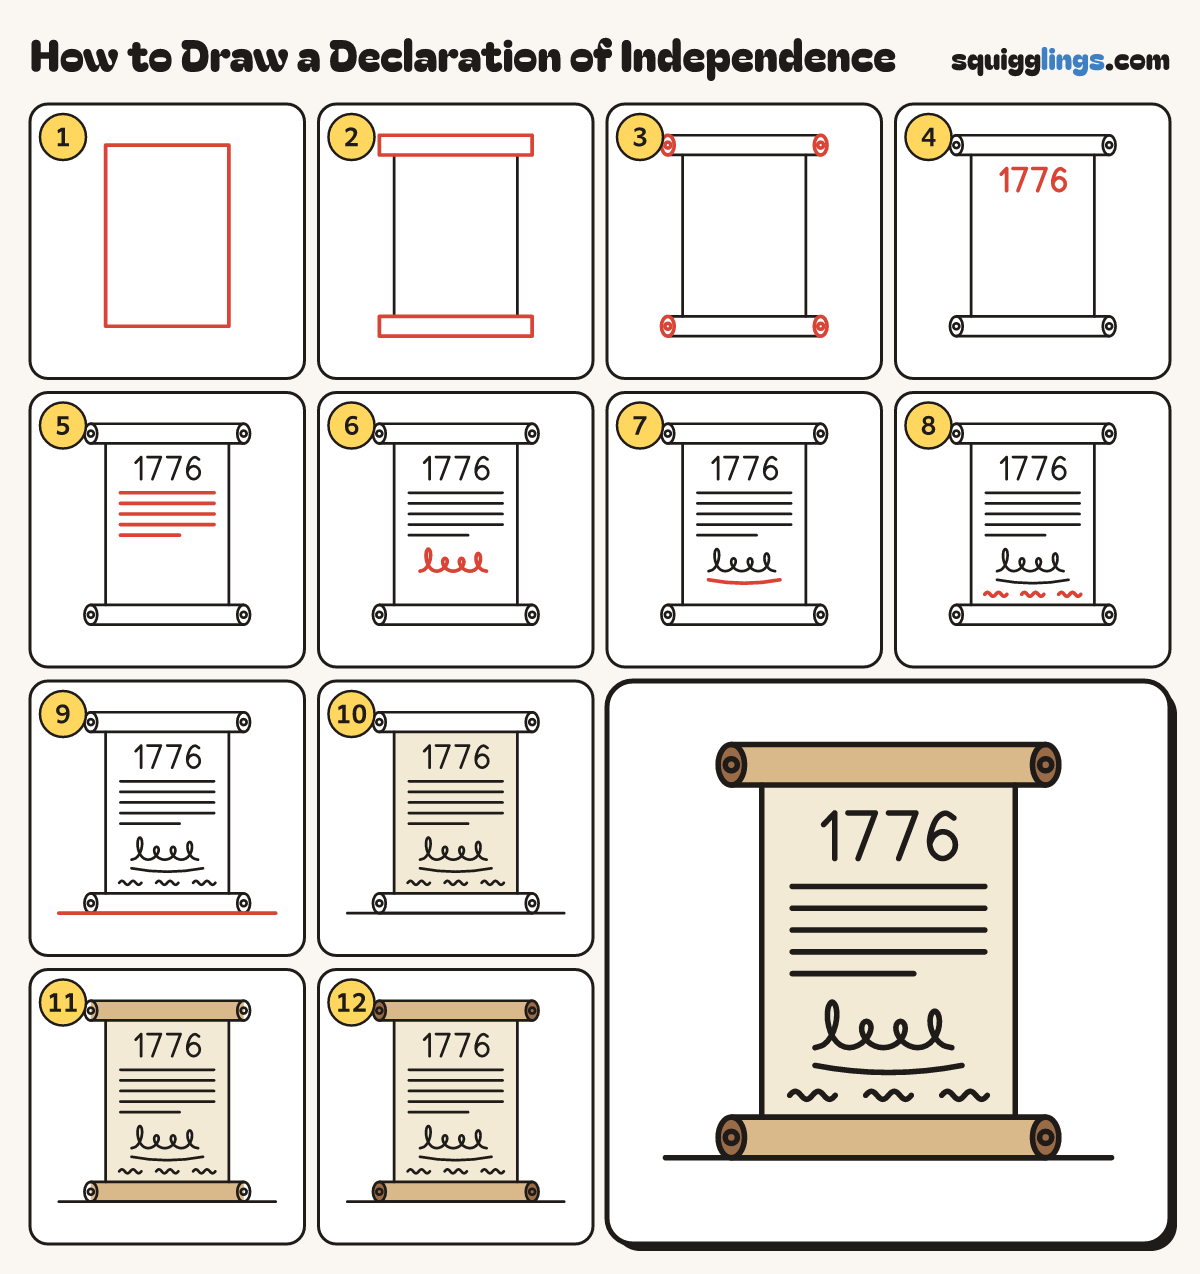
Each picture adds one red line. Draw that line, then scroll to the next picture. Rub out any dashed helper lines at the end. First up: the paper.
Step 1: The paper
In the middle of your paper draw a big tall box for the page, taller than wide.
Tip Use a ruler if you like. The real page is old animal skin called parchment.
Step 2: Two rolls
Across the top of the page draw a long flat bar poking out both sides. Same across the bottom.
Tip The page is rolled up at both ends, like a scroll.
Step 3: Roll ends
On each end of each roll draw a small upright oval with a tiny circle inside.
Step 4: The year
At the top of the page write 1776 in big numbers, right in the middle.
Tip 1776 is the year it was signed, on the 4th of July.
Step 5: Lines of writing
Under the year rule 5 lines of writing across the page. Make the last one short.
Tip Leave a little space at each side of the page.
Step 6: The big signature
Under the writing draw one long loopy line from left to right, like fancy joined-up writing.
Tip Start with a tall loop, then keep looping without lifting your pencil.
Step 7: A swoosh
Under the signature draw a long curved line from its start to its end, like a smile.
Step 8: More names
Along the bottom of the page draw 3 short wavy lines in a row, for 3 more names.
Step 9: Ground line
Draw a ground line under the bottom roll, from well left to well right.
Step 10: Cream page
Go over your lines. Colour the page cream, the palest colour you have, around all the writing.
Step 11: Tan rolls
Colour the 2 rolls tan, a light brown, from end to end.
Step 12: Brown ends
Colour the 4 roll ends brown. Your Declaration of Independence is signed!
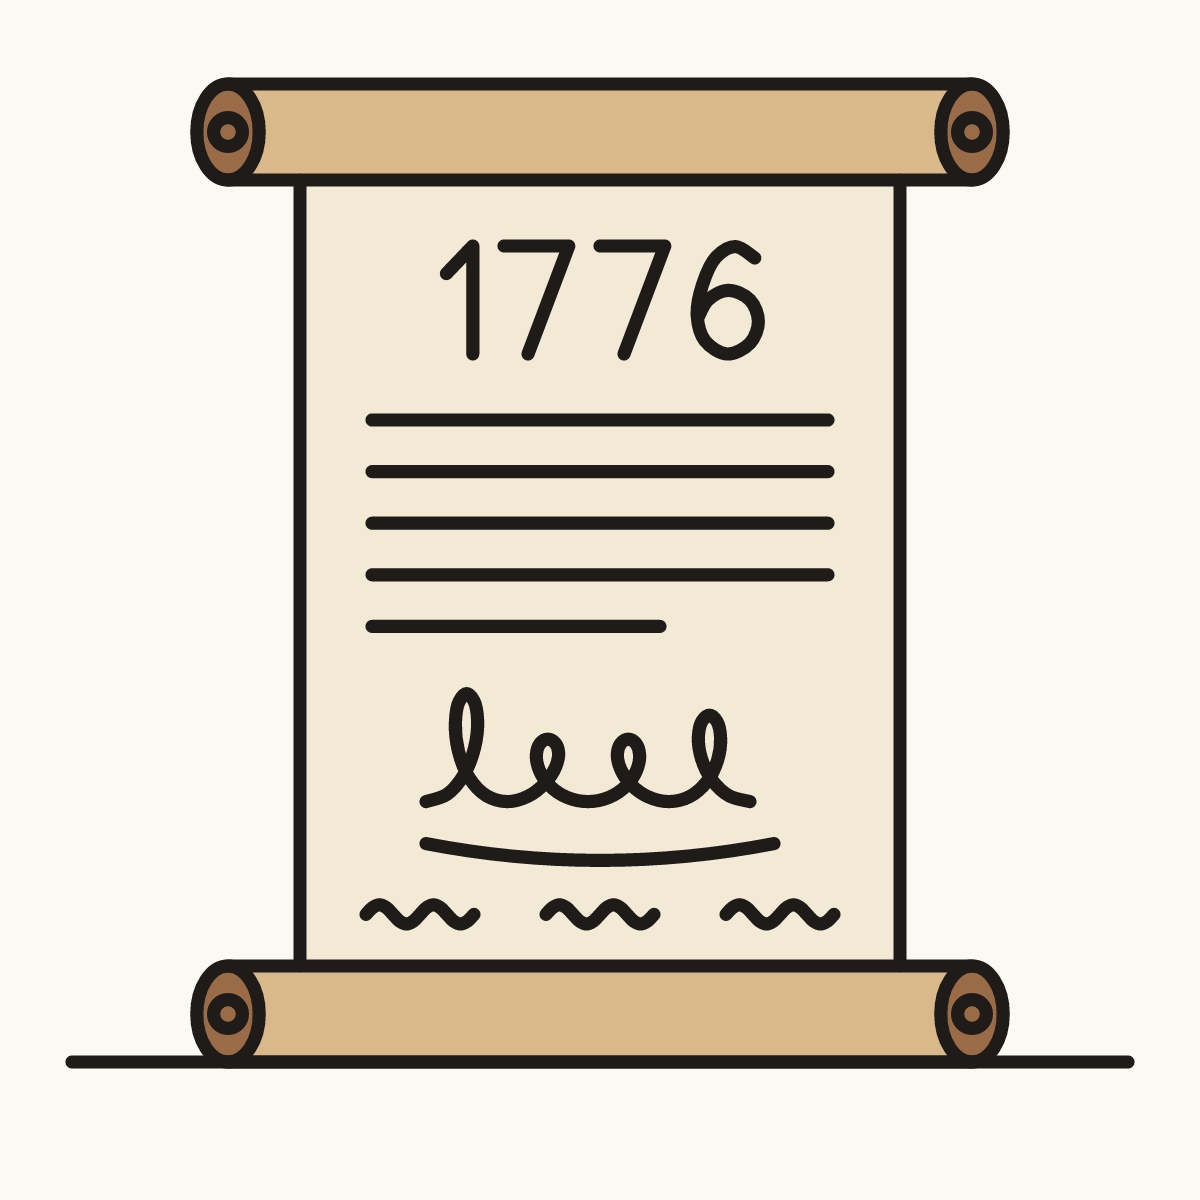
Your finished drawing
Follow the steps above and this is where you end up: a declaration of independence, drawn by you.
Every step in one picture