Watch it draw itself · tap to replay
How to Draw a Crepe Cone
Draw a crepe cone in 12 easy steps, about 9 minutes. Free, with a printable worksheet.
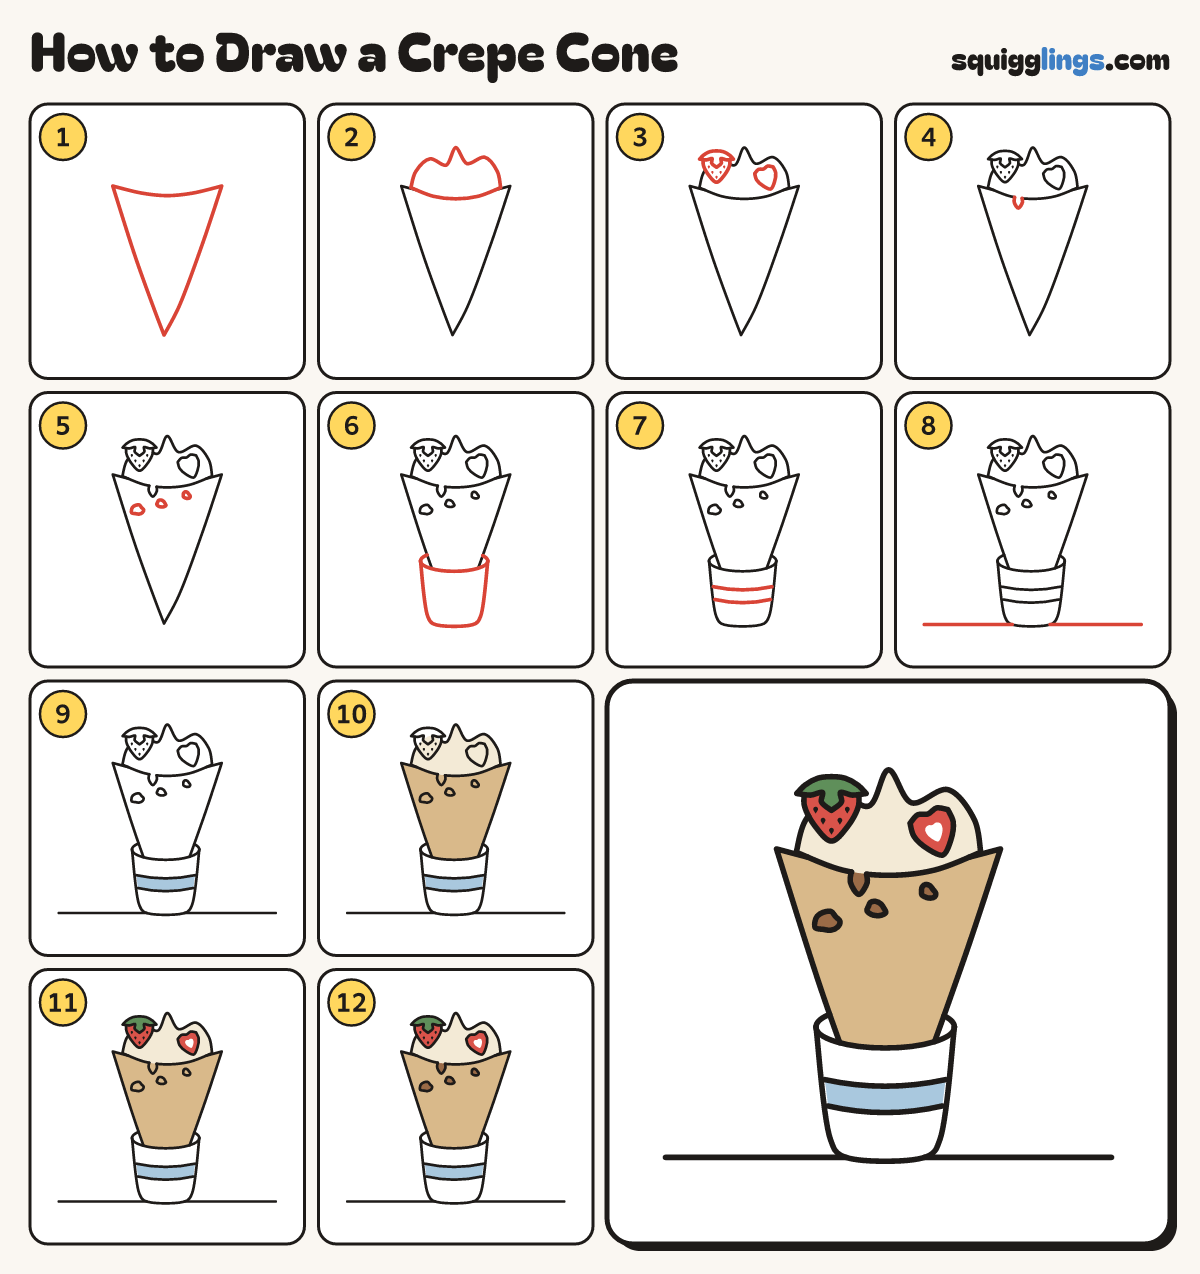
Each picture adds one red line. Draw that line, then scroll to the next picture. Rub out any dashed helper lines at the end. First up: the cone.
Step 1: The cone
Draw a tall cone in the middle, point down. Close the top with a shallow bowed line.
Tip A crepe cone is a pancake folded into a cone, eaten like ice cream.
Step 2: Cream
On top of the cone draw a big puffy blob of cream with soft peaks, tallest in the middle.
Step 3: Strawberries
On the cream draw a strawberry with a leafy cap on the left, and a half strawberry on the right.
Tip Make the whole strawberry a plump heart with 5 tiny seeds. The half is a small plain heart.
Step 4: A sauce drip
Start on the cream's bottom edge. Draw a small drip down in a narrow U. Stop back on the cream.
Step 5: Toasty spots
On the cone draw 3 small wobbly spots in a slanted line, getting smaller as they go up.
Step 6: A cup holder
Draw a flat oval round the lower cone. From its ends draw 2 lines down to a flat bottom.
Tip The oval's back edge hides behind the cone.
Step 7: Cup stripes
Round the cup draw 2 bowed lines, a finger apart, below its middle, from left side to right side.
Step 8: The table
Draw a long table line under the cup, just touching its bottom.
Step 9: White cup, sky band
Go over your lines. Colour the cup white with a sky blue band between its stripes.
Step 10: Cream, tan cone
Colour the cream around the strawberries a light cream colour, and the cone tan around the spots and drip.
Step 11: Red strawberries
Colour the strawberries red and the leafy cap green. Leave the middle of the half white.
Step 12: Brown spots
Colour the toasty spots and the sauce drip brown. Your crepe cone is done!
Your finished drawing
Follow the steps above and this is where you end up: a crepe cone, drawn by you.
Every step in one picture