Watch it draw itself · tap to replay
How to Draw Corn
Draw corn in 10 easy steps, about 8 minutes. Free, with a printable worksheet.
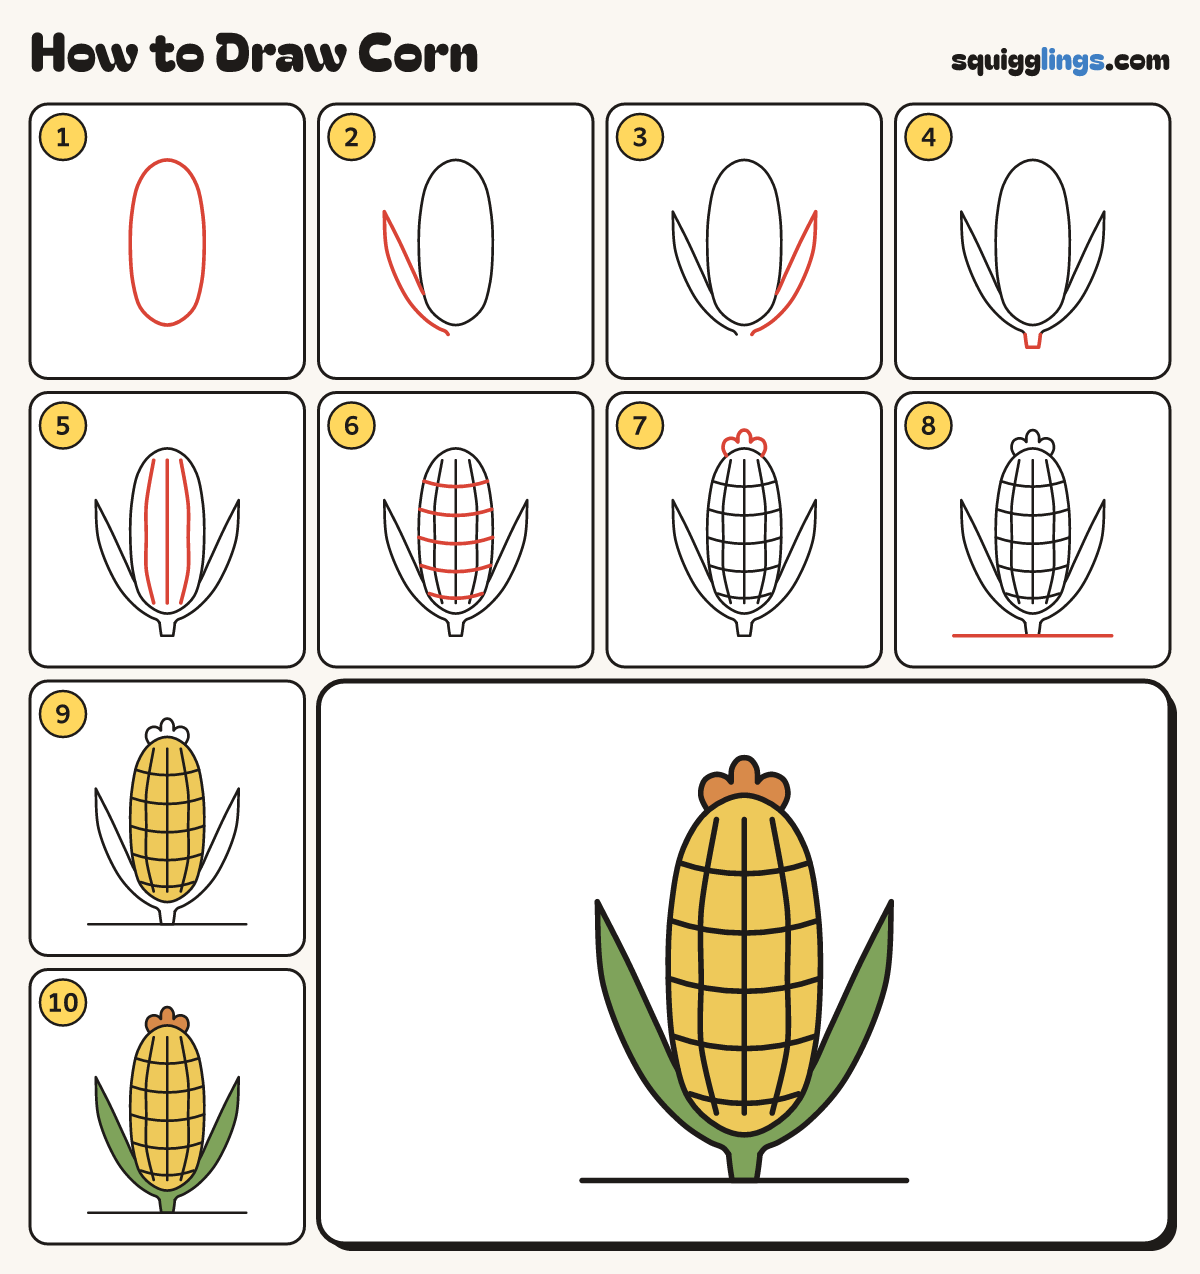
Each picture adds one red line. Draw that line, then scroll to the next picture. Rub out any dashed helper lines at the end. First up: the cob.
Step 1: The cob
In the middle of your paper, draw a tall cob like a long egg standing up, pointy on top.
Tip Much taller than wide, like a fat finger with a pointed tip.
Step 2: Left husk
Start under the cob on the left. Draw a long leaf out to a point, then back to the cob.
Step 3: Right husk
Start under the cob on the right. Draw a long leaf out to a point, then back to the cob.
Step 4: The stalk
Start at the bottom of one husk. Draw a short stalk down, across and up to the other husk.
Step 5: Lines down
Draw 3 lines down the cob from near the top to near the bottom, bowing out with the cob's shape.
Step 6: Lines across
Draw 5 lines across the cob from edge to edge, a finger apart, each bowing down like a smile.
Step 7: Silk
From one side of the tip, draw a small silk tuft with 3 soft bumps, back to the other side.
Step 8: The ground
Draw a ground line under the stalk from well left to well right.
Step 9: Yellow corn
Go over your lines, then colour the cob yellow.
Step 10: Green husks
Colour the husks and the stalk green, and the silk ginger.
Your finished drawing
Follow the steps above and this is where you end up: corn, drawn by you.
Every step in one picture