Watch it draw itself · tap to replay
How to Draw a Chocolate Cake
Draw a chocolate cake in 10 easy steps, about 8 minutes. Free, with a printable worksheet.
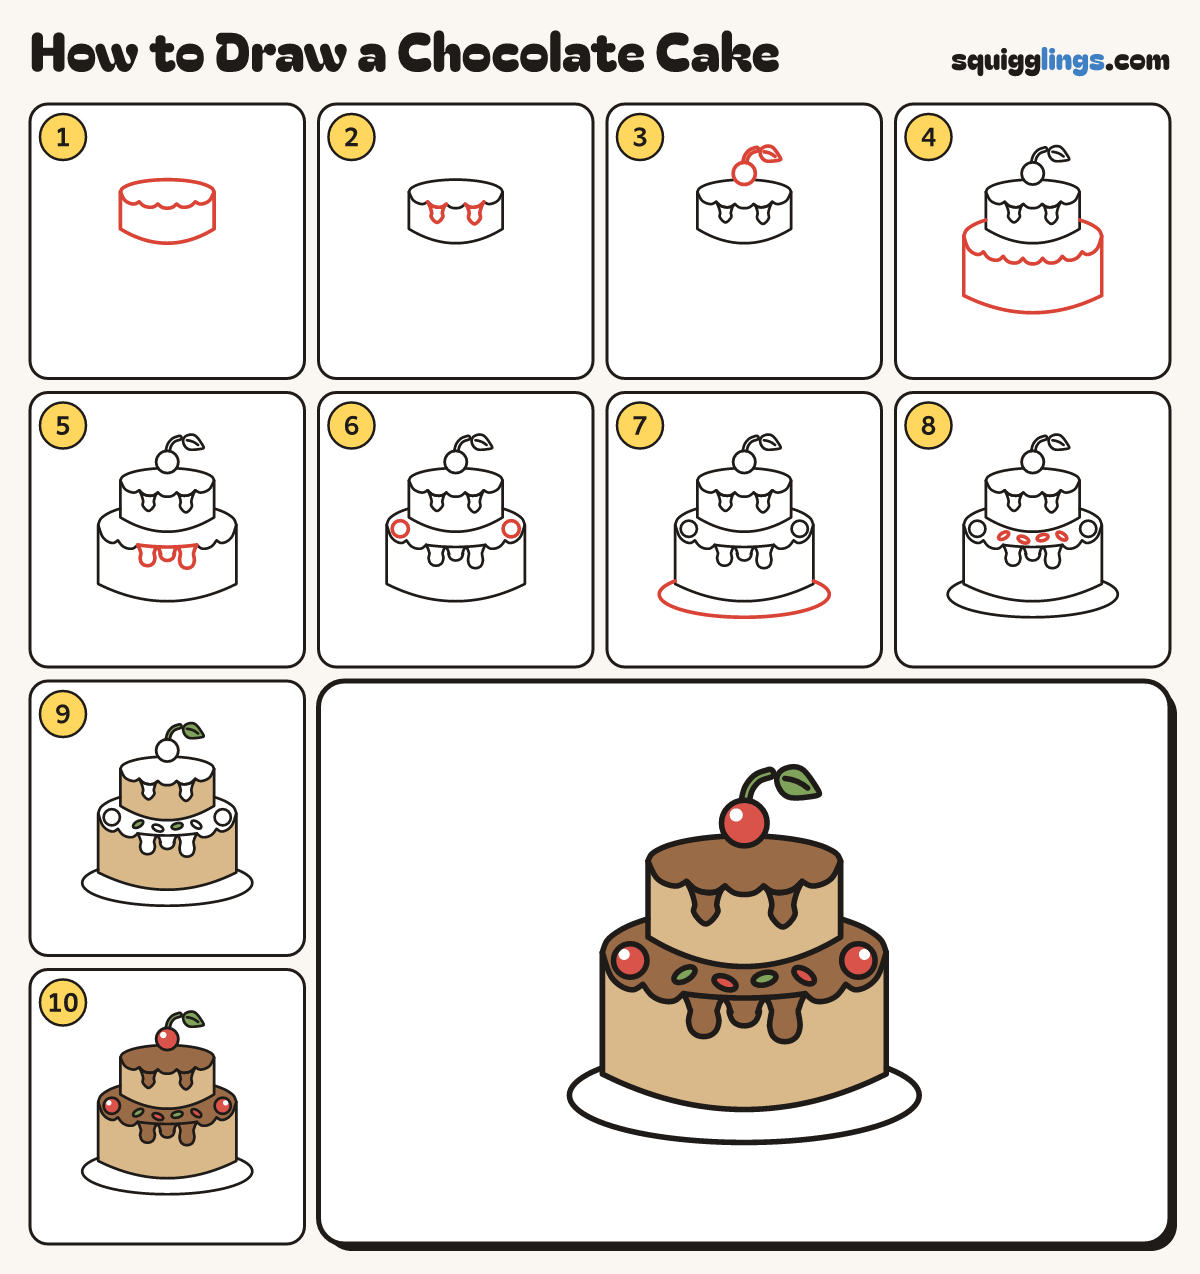
Each picture adds one red line. Draw that line, then scroll to the next picture. Rub out any dashed helper lines at the end. First up: top layer.
Step 1: Top layer
Draw a flat oval with 5 frosting bumps in front. From each end, draw a side down to a smile.
Tip A cake layer is a short round can with frosting bumps over the front.
Step 2: Top layer drips
From the left and right frosting bumps, draw a narrow U drip down with a round blob at the bottom.
Step 3: Cherry on top
Draw a round cherry in the middle of the top. Add a short curved stem with a fat leaf.
Step 4: Big bottom layer
Draw a bigger oval round the top layer, with 7 bumps. From each end, a side down to a smile.
Tip The big oval makes a ledge all round the top layer. Taller sides.
Step 5: Drippy icing
From the 3 middle bumps on the big layer, draw long narrow drips with round blobs, all different lengths.
Step 6: Two cherries
On the ledge, just outside each bottom corner of the top layer, draw a round cherry.
Tip Each cherry sits ON the ledge, resting on the front frosting.
Step 7: A plate
Start low on the cake's left side. Draw a flat oval plate under the cake, back to the right side.
Step 8: Sprinkles
On the ledge between the cherries, draw 4 tiny tilted jelly-bean sprinkles.
Step 9: Tan cake, green leaf
Colour the sides of both layers tan, and the stem, leaf and 2 sprinkles green. Leave the plate white.
Step 10: Red cherries, chocolate icing
Colour 2 sprinkles and the cherries red with a white shine, then the tops, bumps and drips brown around them.
Your finished drawing
Follow the steps above and this is where you end up: a chocolate cake, drawn by you.
Every step in one picture