Watch it draw itself · tap to replay
How to Draw a Cookbook
Draw a cookbook in 11 easy steps, about 8 minutes. Free, with a printable worksheet.
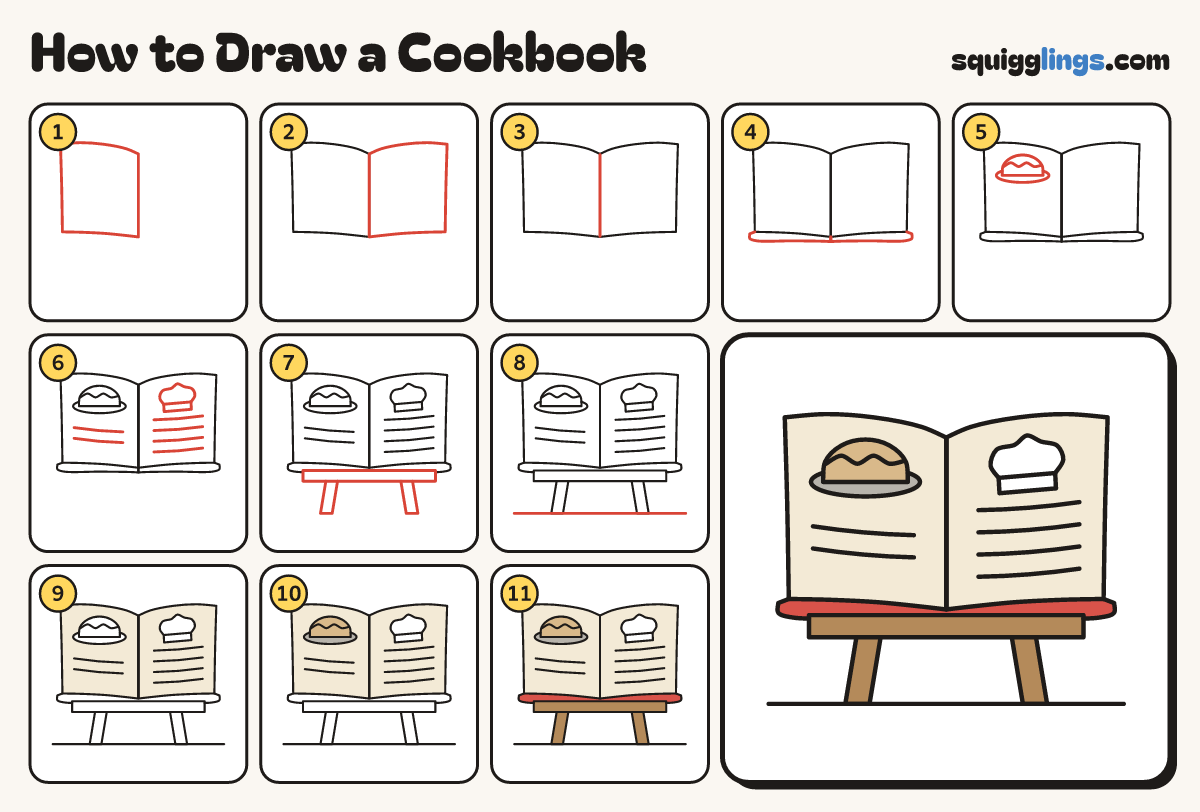
Each picture adds one red line. Draw that line, then scroll to the next picture. Rub out any dashed helper lines at the end. First up: the left page.
Step 1: The left page
Start above the middle of your paper. Draw the left page: curve out left, down, and back to the middle.
Tip A cookbook stands open on a little stand so the cook can read it.
Step 2: The right page
Draw the right page the same way, mirrored, starting and stopping at the same 2 middle points.
Step 3: The spine
Draw a line down the middle between the pages, from the top to the bottom, for the spine.
Step 4: The covers
Under each page, start at its outside bottom corner. Go out a little, down, and back to the middle.
Step 5: A pie picture
On the left page draw a pie: a rounded dome on a flat oval plate, with a wavy crust line.
Step 6: Hat and recipe lines
Puff a hat over a band from end to end. Add 2 lines under the pie, 4 under the hat.
Tip It is a chef's hat on the right page. Draw the flat band first, then puff the top over it.
Step 7: The stand
Under the book draw a little stand: a flat ledge bar across the front, and 2 thick legs leaning out.
Step 8: The table
Draw a table line under the stand's legs, from one side of your paper to the other.
Step 9: Cream pages
Go over your lines, then colour both pages cream, going around the pie, its plate and the hat.
Step 10: Tan pie, grey plate
Colour the pie tan and the plate light grey. Leave the hat white.
Step 11: Red covers, wood stand
Colour the covers red and the stand and legs wood brown. Your cookbook is done!
Your finished drawing
Follow the steps above and this is where you end up: a cookbook, drawn by you.
Every step in one picture