Watch it draw itself · tap to replay
How to Draw a Life Jacket
Draw a life jacket in 11 easy steps, about 8 minutes. Free, with a printable worksheet.
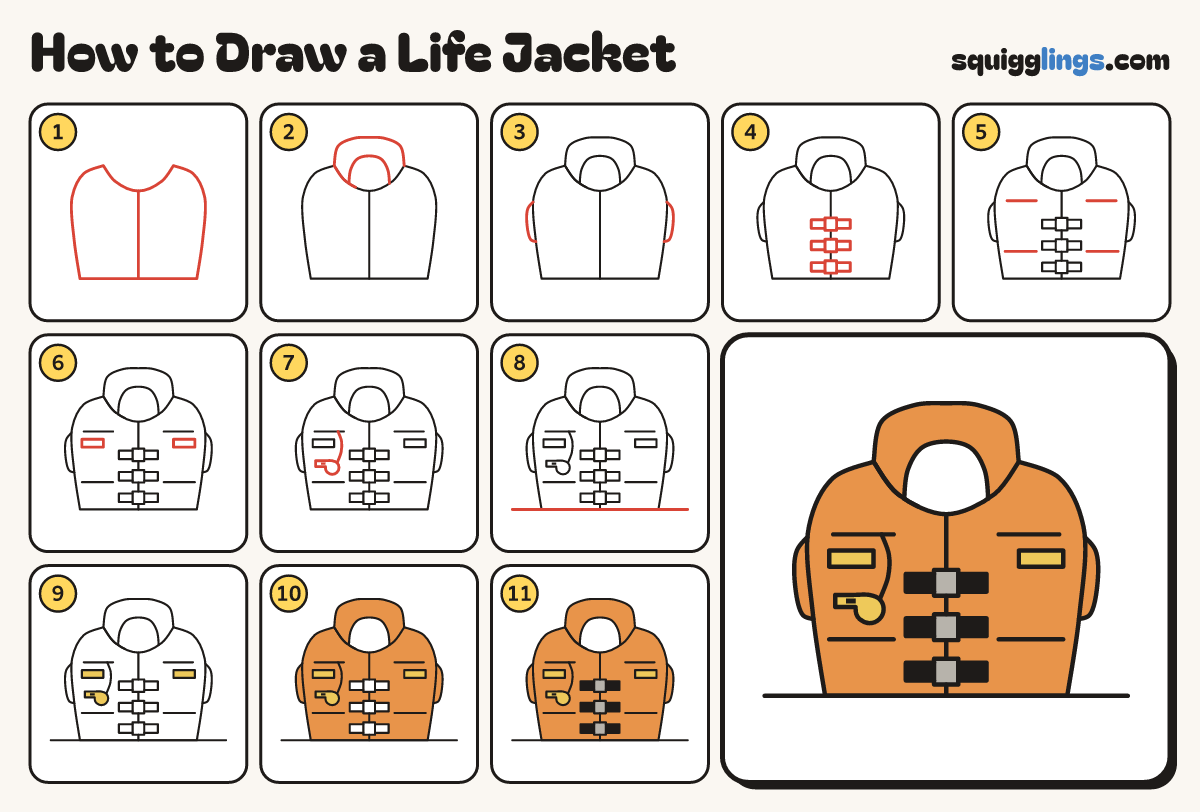
Each picture adds one red line. Draw that line, then scroll to the next picture. Rub out any dashed helper lines at the end. First up: the vest.
Step 1: The vest
Draw a puffy vest: 2 shoulders and a neck dip. Add a line from the dip down to the bottom.
Tip A life jacket is like a pillow you wear: make it wide and rounded.
Step 2: The collar
Draw a puffy arch from shoulder to shoulder. Inside, draw a smaller arch that starts and ends on the dip.
Step 3: The arm holes
On each side draw a curved bump out from the side for the padded arm hole edges.
Step 4: 3 buckle straps
Across the middle line draw 3 short flat bands, one above the other, each with a square buckle.
Step 5: Seams
Draw 2 short lines across each side of the vest, one near the top and one near the bottom.
Step 6: Shiny tape
Draw a short flat band on each side of the vest, between the seams, for the shiny tape.
Step 7: The whistle
Under the left tape draw a whistle with a black hole. Add a cord from it up to the seam.
Step 8: A line under it
Draw a straight line under the jacket, from one side of the paper to the other.
Step 9: Yellow tape and whistle
Colour the tape bands and the whistle yellow, going around the black hole.
Step 10: Orange jacket
Colour the vest, collar and arm pads orange, around the tape and whistle, but not the straps or neck hole.
Step 11: Black straps, grey buckles
Colour the 3 straps black and the buckles grey. Your life jacket is ready for the boat!
Your finished drawing
Follow the steps above and this is where you end up: a life jacket, drawn by you.
Every step in one picture