Watch it draw itself · tap to replay
How to Draw a Chocolate Fountain
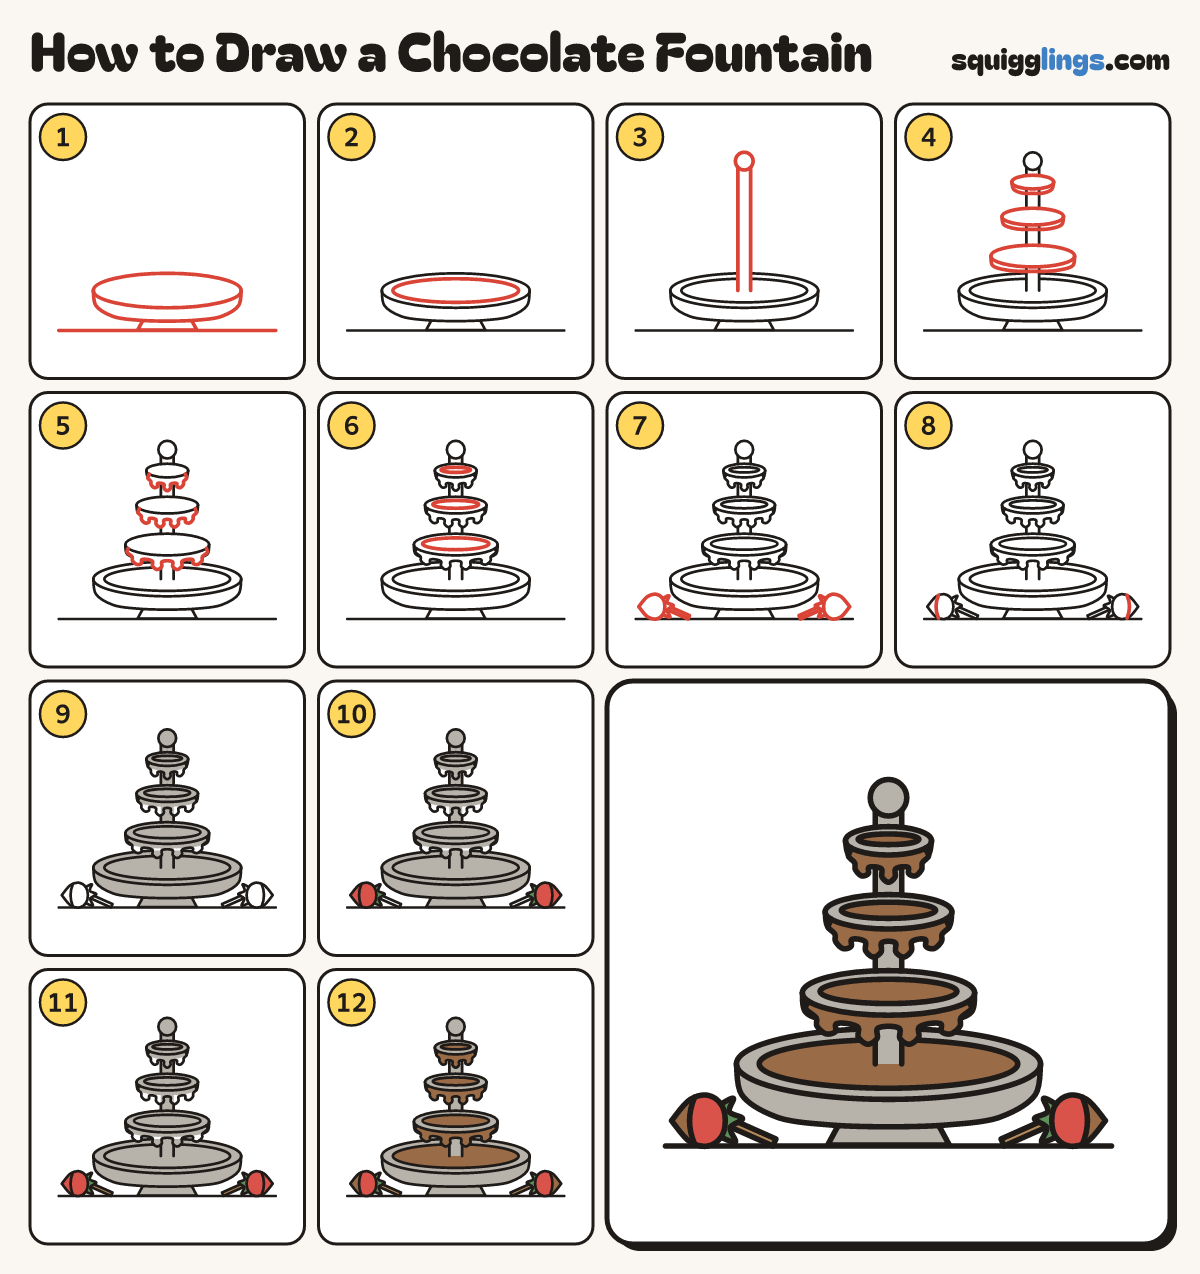
Draw a chocolate fountain in 12 easy steps, about 9 minutes. Free, with a printable worksheet.
Each picture adds one red line. Draw that line, then scroll to the next picture. Rub out any dashed helper lines at the end. First up: the base bowl.
Step 1: The base bowl
Draw a flat oval. Curve a bowl under it from end to end. Add a short foot and table line.
Step 2: Chocolate pool
Inside the rim, draw a smaller flat oval with a finger of space all round. That is the chocolate pool.
Step 3: The column
Start in the pool. Draw 2 lines straight up, close together. End them with a round ball on top.
Step 4: Three trays
Draw 3 flat ovals up the column, smaller near the top. Under each, curve a dip from end to end.
Step 5: Chocolate drips
From the front edge of each tray, draw chocolate spilling over, ending in round drips. Let the column show below.
Step 6: Pools on the trays
On top of each tray, draw a smaller flat oval a finger inside the edge, for the chocolate.
Step 7: Two big strawberries
On each side, draw a big strawberry lying on the table, with a leafy crown and a stick.
Step 8: Dipped tips
Draw a curved line across the pointed end of each strawberry, where it was dipped in chocolate.
Step 9: Grey fountain
Go over your lines. Colour the bowl, foot, column, ball and trays grey, but not the chocolate.
Step 10: Red berries, green leaves
Colour the strawberries red, but not their dipped tips, and the leafy crowns green.
Step 11: Wood sticks
Colour the sticks wood brown.
Step 12: Brown chocolate
Colour the pools, the chocolate drips and the dipped tips brown. Your fountain is done!
Your finished drawing
Follow the steps above and this is where you end up: a chocolate fountain, drawn by you.
Every step in one picture