Watch it draw itself · tap to replay
How to Draw a Pie
Draw a pie in 11 easy steps, about 8 minutes. Free, with a printable worksheet.
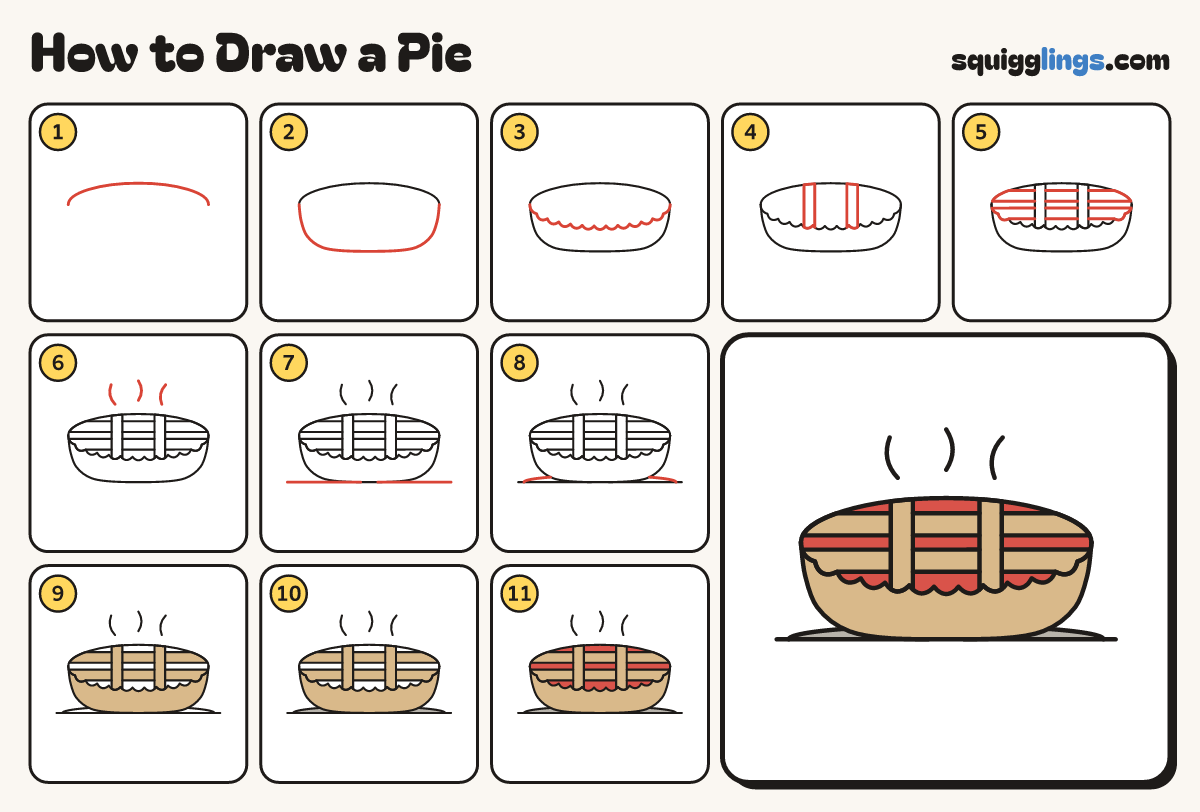
Each picture adds one red line. Draw that line, then scroll to the next picture. Rub out any dashed helper lines at the end. First up: top of the pie.
Step 1: Top of the pie
Above the middle of your paper, start on the left and draw a big flat rainbow, stopping on the right.
Step 2: Dish
From the left end of the rainbow draw a shallow U down and round, up to the right end.
Step 3: Pinched crust
Start at the left end. Draw a smile of little round bumps and stop at the right end.
Tip Pinch, pinch, pinch all along the front.
Step 4: Strips down
On top of the pie draw 2 fat strips straight down, from the back edge to the bumpy edge.
Step 5: Strips across
Draw 2 fat strips across, above and below the middle, stopping at each down strip and starting again past it.
Step 6: Steam
Above the pie draw 3 wiggly steam lines going up.
Step 7: Table
Draw a line under the dish from left to right, just touching its bottom.
Step 8: Shadow
On the table line draw a low flat hump under the dish, peeking out on both sides, for its shadow.
Step 9: Tan crust
Colour the lattice strips and the dish tan, up to the bumpy edge.
Step 10: Grey shadow
Colour the shadow grey, on both sides of the dish.
Step 11: Red filling
Go over your lines, then colour the top of the pie red, between the strips.
Your finished drawing
Follow the steps above and this is where you end up: a pie, drawn by you.
Every step in one picture