Watch it draw itself · tap to replay
How to Draw a Chocolate-Covered Strawberry
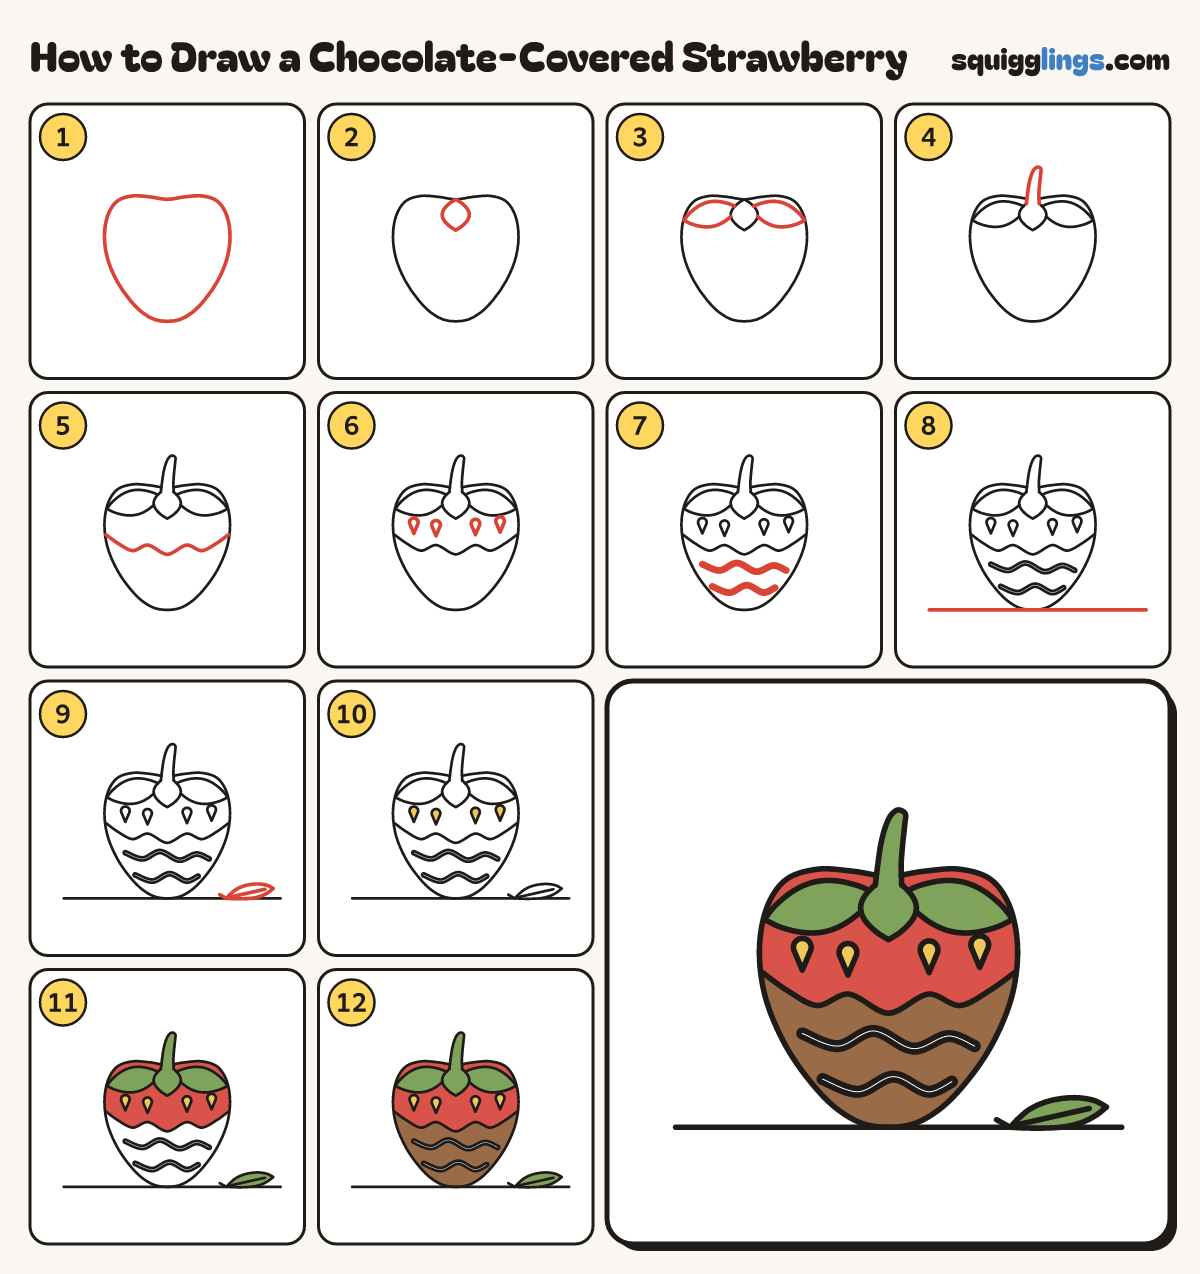
Draw a chocolate-covered strawberry in 12 easy steps, about 9 minutes. Free, with a printable worksheet.
Each picture adds one red line. Draw that line, then scroll to the next picture. Rub out any dashed helper lines at the end. First up: the plump berry.
Step 1: The plump berry
In the middle, draw a big berry: a tiny dip on top, wide shoulders, a soft U bottom.
Tip Widest near the top, never pointy at the bottom.
Step 2: The middle leaf
From the dip on top, draw one pointed leaf hanging straight down, like a fat almond with its point down.
Step 3: Side leaves
Draw a pointed leaf on each side, tucked behind the middle leaf, leaning down over the berry's shoulders.
Step 4: The stalk
Start on the middle leaf's top. Draw a stalk up to a thin round tip, then down to the leaf.
Step 5: Chocolate dip
Start on the left edge below the leaves. Draw a soft wavy line across to the right edge.
Step 6: Seeds
Above the chocolate, draw 4 little teardrop seeds on the red part, spread out.
Step 7: White drizzle
Across the chocolate, draw 2 thin wiggly worms of drizzle, one above the other, stopping short of the edges.
Step 8: The ground
Draw a long straight ground line that just touches the bottom of the berry, from well left to well right.
Step 9: A dropped leaf
To the right of the berry, draw one pointed leaf lying on the ground, with a short vein.
Step 10: Yellow seeds
Colour the 4 little seeds yellow.
Step 11: Red berry, green leaves
Colour the berry red above the wavy line, around the seeds. Colour the leaves, stalk and dropped leaf green.
Step 12: Brown chocolate
Colour the chocolate brown below the wavy line, leaving the drizzles white. Your chocolate strawberry is done!
Your finished drawing
Follow the steps above and this is where you end up: a chocolate-covered strawberry, drawn by you.
Every step in one picture