Watch it draw itself · tap to replay
How to Draw Chips
Draw chips in 11 easy steps, about 8 minutes. Free, with a printable worksheet.
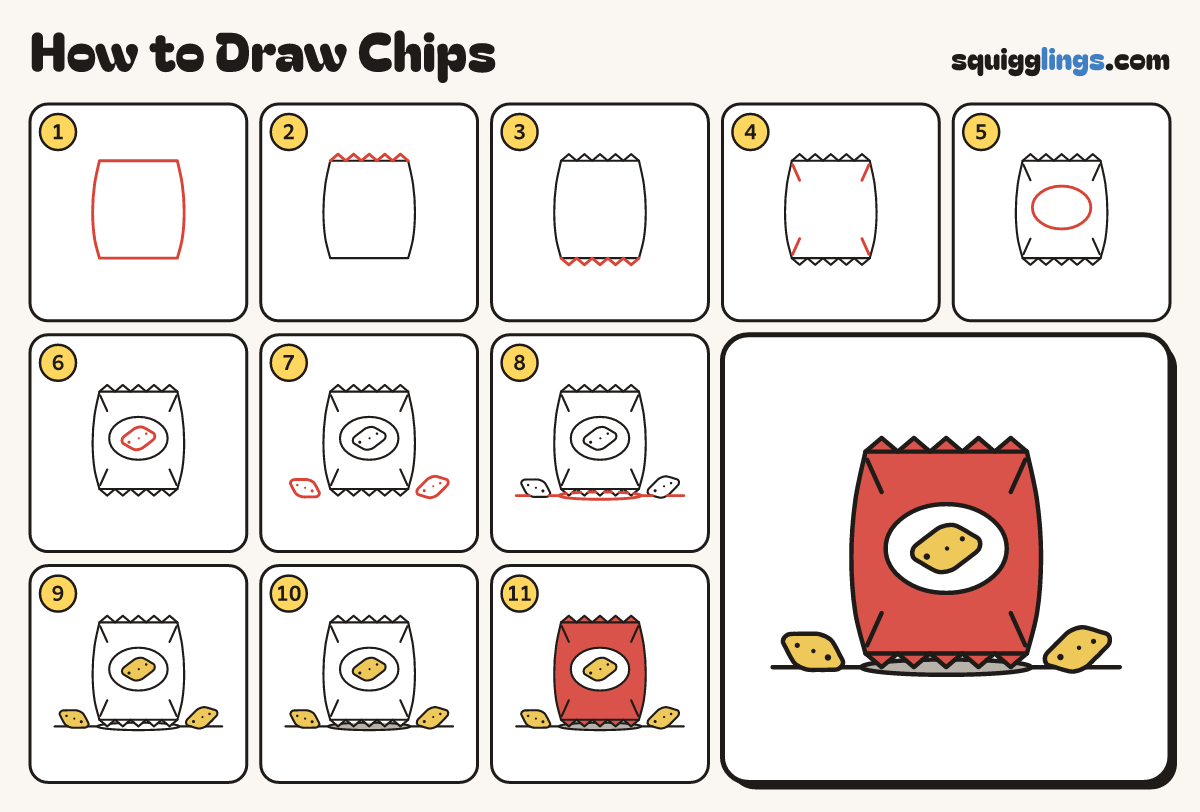
Each picture adds one red line. Draw that line, then scroll to the next picture. Rub out any dashed helper lines at the end. First up: the bag.
Step 1: The bag
In the middle of your paper draw a tall bag like a pillow standing up, taller than it is wide.
Step 2: The top crimp
Along the top edge draw a zigzag like little teeth. Start at the top left, stop at the top right.
Step 3: The bottom crimp
Do the same along the bottom. Start at the bottom left corner and stop at the bottom right.
Step 4: Crease lines
From each corner of the bag draw a short line slanting in toward the middle.
Step 5: The label
In the middle of the bag draw a big oval, as wide as half the bag.
Step 6: A chip picture
Inside the label draw a wavy oval for a chip, tilted a little, with 3 tiny specks.
Step 7: Chips spilling out
Low down on each side of the bag, draw a wavy oval chip lying flat, with 3 tiny specks.
Step 8: Ground and shadow
Under the bag draw a thin flat oval shadow. From each end, draw a ground line out past the chips.
Step 9: Yellow chips
Colour the chip in the label and the 2 chips on the ground yellow.
Step 10: Grey shadow
Colour the shadow grey.
Step 11: Red bag
Go over your lines. Colour the bag red, leaving the label white. Your bag of chips is done!
Your finished drawing
Follow the steps above and this is where you end up: chips, drawn by you.
Every step in one picture