Watch it draw itself · tap to replay
How to Draw a Checkers Board
Draw a checkers board in 11 easy steps, about 8 minutes. Free, with a printable worksheet.
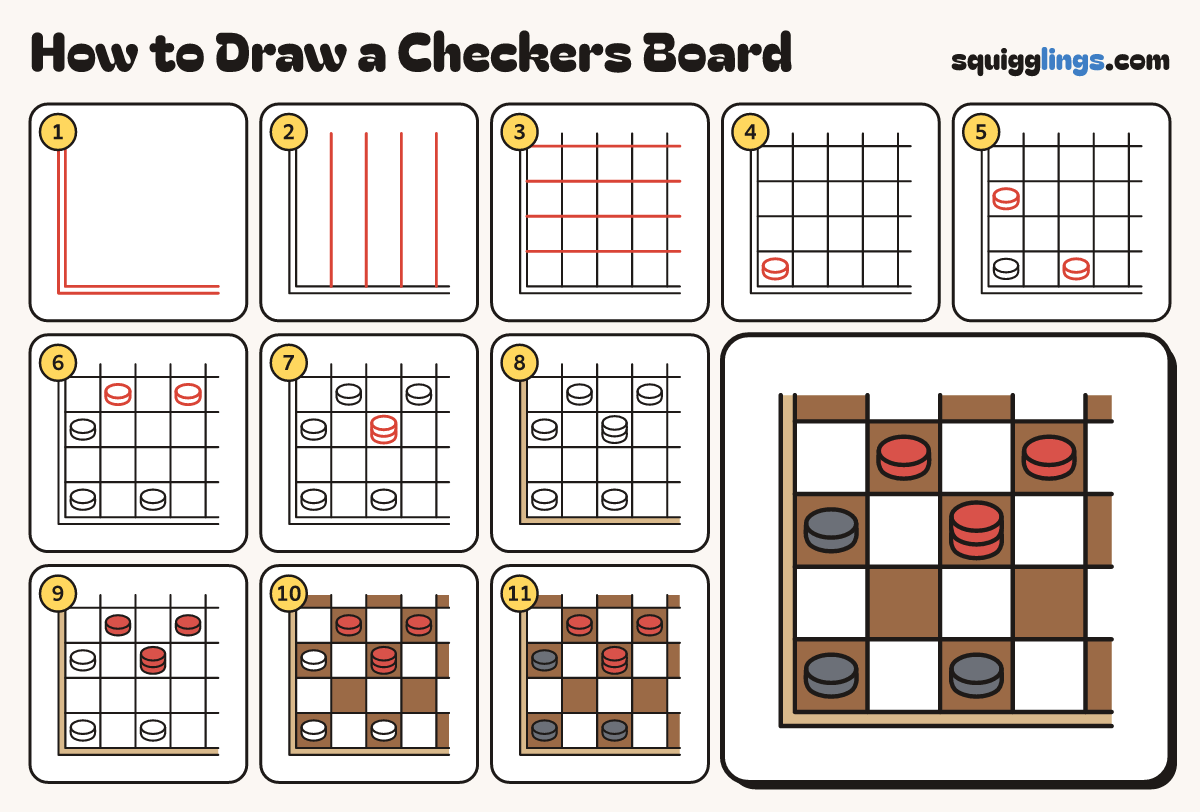
Each picture adds one red line. Draw that line, then scroll to the next picture. Rub out any dashed helper lines at the end. First up: the board corner.
Step 1: The board corner
Start top left, draw a big L down and across to the right. Add a second L just outside.
Tip A checkers board is 8 squares by 8. We draw one corner of it, so the pieces can be big.
Step 2: Lines up
From the bottom edge of the inner L, draw 4 evenly spaced lines straight up to the top.
Step 3: Lines across
From the left edge, draw 4 evenly spaced lines straight across to the right end. Now you have squares.
Tip The squares at the top and right are cut short, because the board carries on.
Step 4: First piece
In the corner square draw a flat oval. Hang a U under it, from one end round to the other.
Tip The U makes the piece look thick, like a little drum.
Step 5: Two more pieces
Draw 2 more pieces, 2 squares right and 2 squares up. Each U starts and ends on its oval.
Step 6: Far pieces
Draw pieces in squares 2 and 4 of the top whole row. Start and end each U on its oval.
Tip Leave an empty square between them.
Step 7: The king
Three squares along and three up, draw a piece. Hang a second U under it, from side round to side.
Tip Two pieces stacked make a king!
Step 8: Tan edge
Colour the strip between the 2 L lines tan, for the wooden edge.
Step 9: Red pieces
Colour the king and the 2 far pieces red.
Step 10: Brown squares
Colour every other square brown, starting in the corner. Go around the pieces. Leave the other squares white.
Tip Brown squares only touch at their corners. Every piece sits on a brown square.
Step 11: Dark grey pieces
Colour the last 3 pieces dark grey. Go over your lines and your checkers board is done!
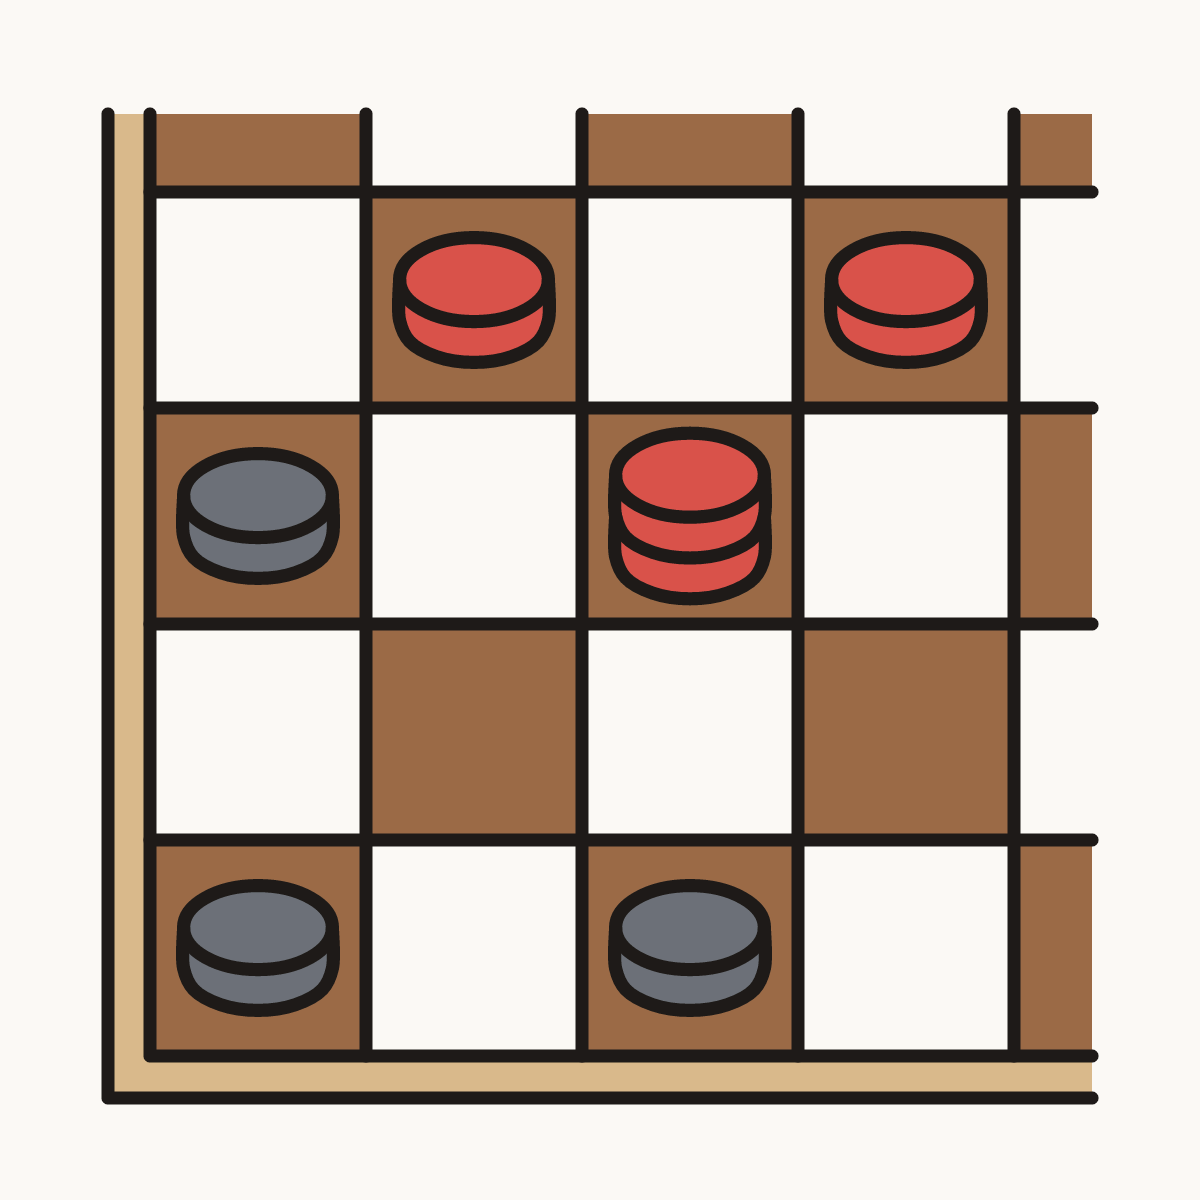
Your finished drawing
Follow the steps above and this is where you end up: a checkers board, drawn by you.
Every step in one picture