Watch it draw itself · tap to replay
How to Draw Charcuterie
Draw charcuterie in 13 easy steps, about 10 minutes. Free, with a printable worksheet.
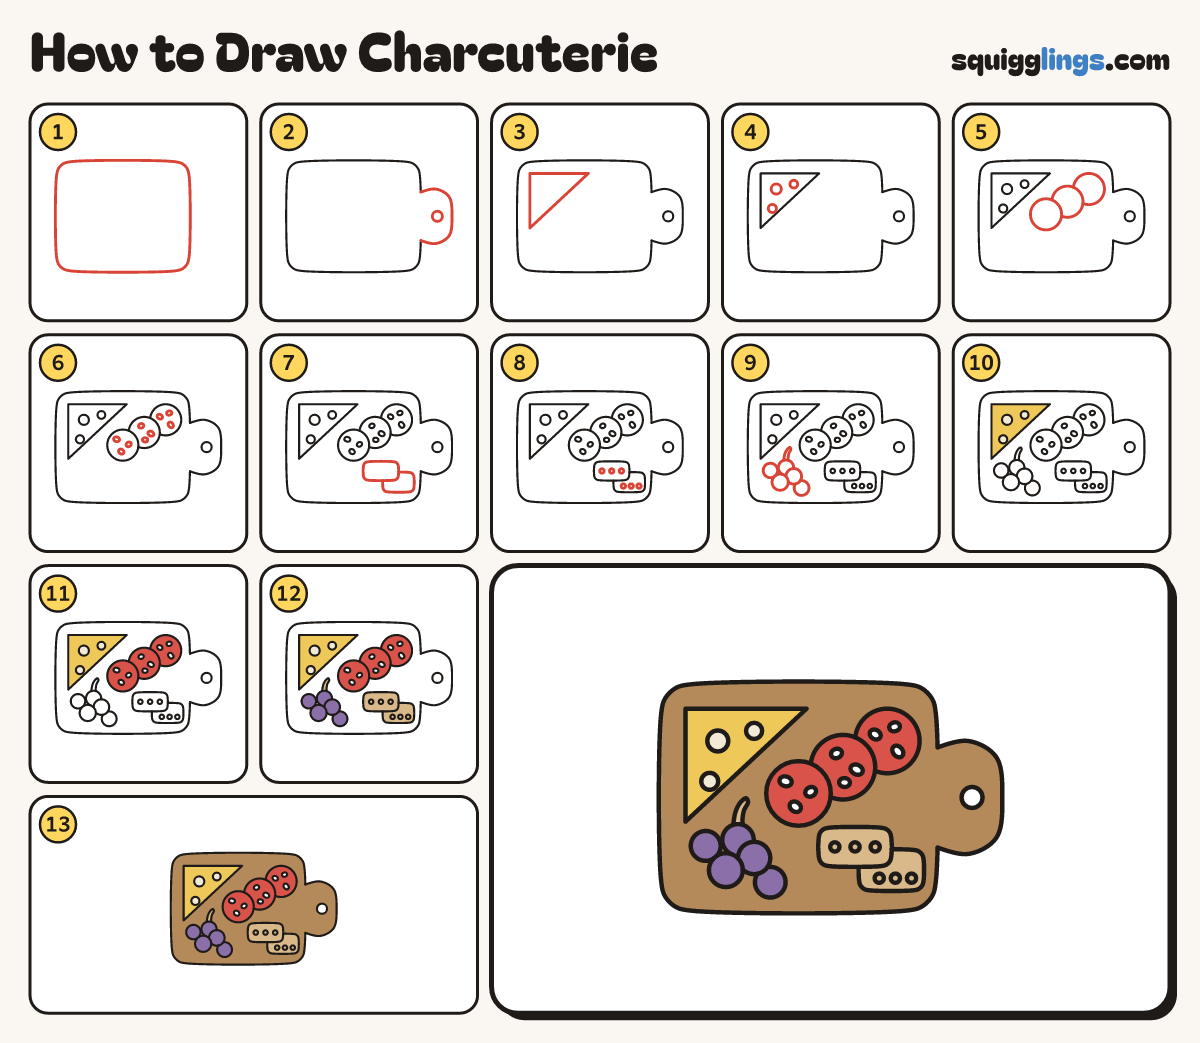
Each picture adds one red line. Draw that line, then scroll to the next picture. Rub out any dashed helper lines at the end. First up: the board.
Step 1: The board
In the middle of your paper draw a big box with soft corners, wider than it is tall.
Step 2: The handle
Start high on the right edge. Draw a stubby handle out and back to the edge. Add a small hole.
Tip Rub out the bit of board edge inside the handle, so they make one shape.
Step 3: A cheese wedge
In the top left corner of the board draw a triangle of cheese.
Step 4: Cheese holes
Draw 3 little rounds in the cheese for the holes.
Step 5: Salami
Across the middle draw 3 round salami slices in a slanting row, each tucked behind the one before.
Step 6: Fat dots
Draw 3 little fat dots of different sizes in each salami slice, spread out unevenly.
Step 7: Crackers
In the bottom right draw 2 long crackers with soft corners, one tucked behind the other.
Step 8: Cracker holes
Dot 3 tiny holes in a row across each cracker.
Step 9: Grapes
In the bottom left draw a bunch of 5 round grapes, with a short stem on the top grape.
Step 10: Yellow cheese
Colour the cheese yellow and its holes cream.
Step 11: Red salami
Colour the salami slices red, leaving the fat dots white.
Step 12: Tan crackers, purple grapes
Colour the crackers and the grape stem tan, and the grapes purple.
Step 13: Wood board
Colour the board and handle wood brown, around the food and the hole. Your board is ready to share!
Your finished drawing
Follow the steps above and this is where you end up: charcuterie, drawn by you.
Every step in one picture