Watch it draw itself · tap to replay
How to Draw a Baked Alaska
Draw a baked Alaska in 11 easy steps, about 8 minutes. Free, with a printable worksheet.
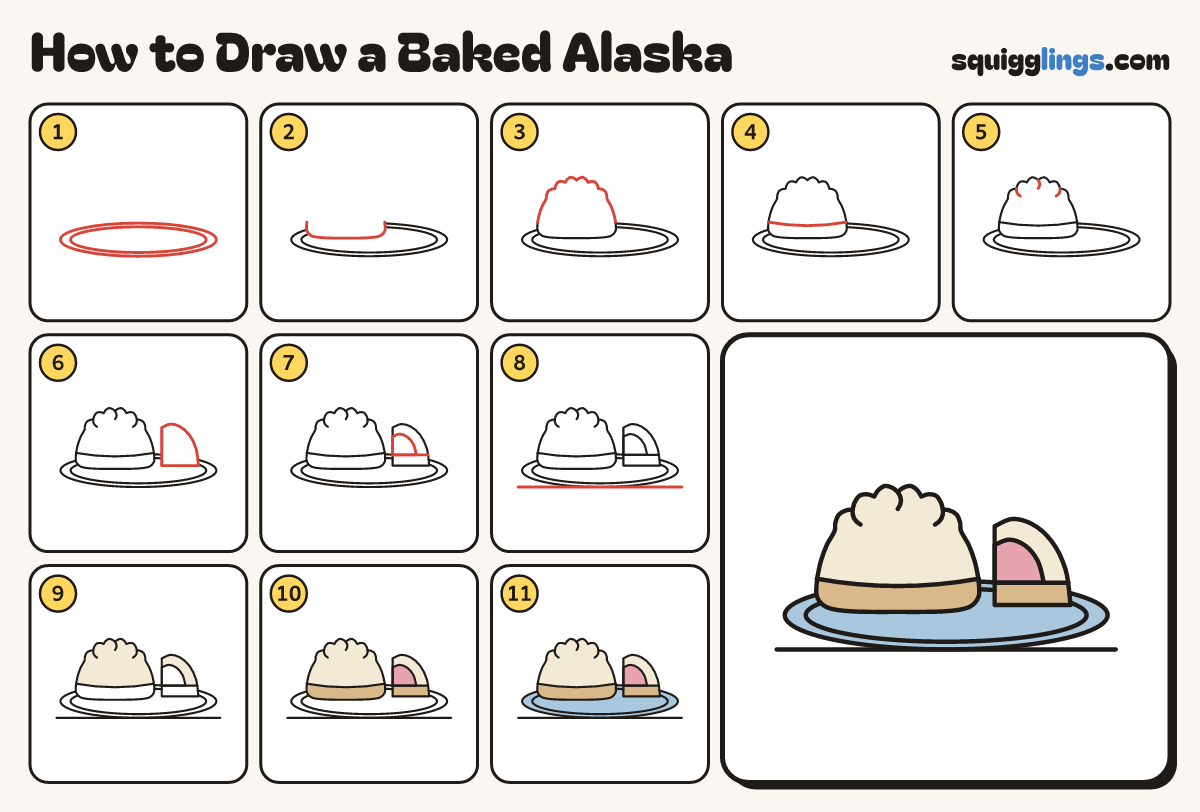
Each picture adds one red line. Draw that line, then scroll to the next picture. Rub out any dashed helper lines at the end. First up: a plate.
Step 1: A plate
Below the middle, draw a long flat oval plate, most of the page wide. Add an oval just inside.
Step 2: Cake base
Start on the plate's left. Draw a wide U for the cake, stopping on the right at the same height.
Tip Baked Alaska is ice cream on cake, covered in meringue and toasted golden.
Step 3: Dome of peaks
Start at the cake's top left. Draw a round dome with soft peaks, and stop at the top right.
Step 4: Base edge
Join the tops of the 2 sides with a gently bowed line, where the dome sits on the cake.
Step 5: Tuck lines
From 3 dips between the peaks draw a short curved line down into the dome, stopping a finger lower.
Tip Start every line on the outline so it looks like a fold.
Step 6: Cut slice
On the right of the plate draw a slice: straight cut edge on the left, quarter dome over the top.
Tip The slice is a quarter dome: a flat left edge and one round curve.
Step 7: Inside the slice
Inside the slice draw a cake line near the bottom, and a smaller quarter dome above it for ice cream.
Step 8: The table
Draw a line under the plate from far left to far right, just touching its bottom.
Step 9: Cream meringue
Go over your lines. Colour the dome and the outside of the slice cream.
Step 10: Pink and tan
Colour the ice cream pink, and the cake base and the slice's cake layer tan.
Step 11: Sky plate
Colour the plate sky blue, around the cake and the slice.
Your finished drawing
Follow the steps above and this is where you end up: a baked Alaska, drawn by you.
Every step in one picture