Watch it draw itself · tap to replay
How to Draw an Ant Farm
Draw an ant farm in 13 easy steps, about 10 minutes. Free, with a printable worksheet.
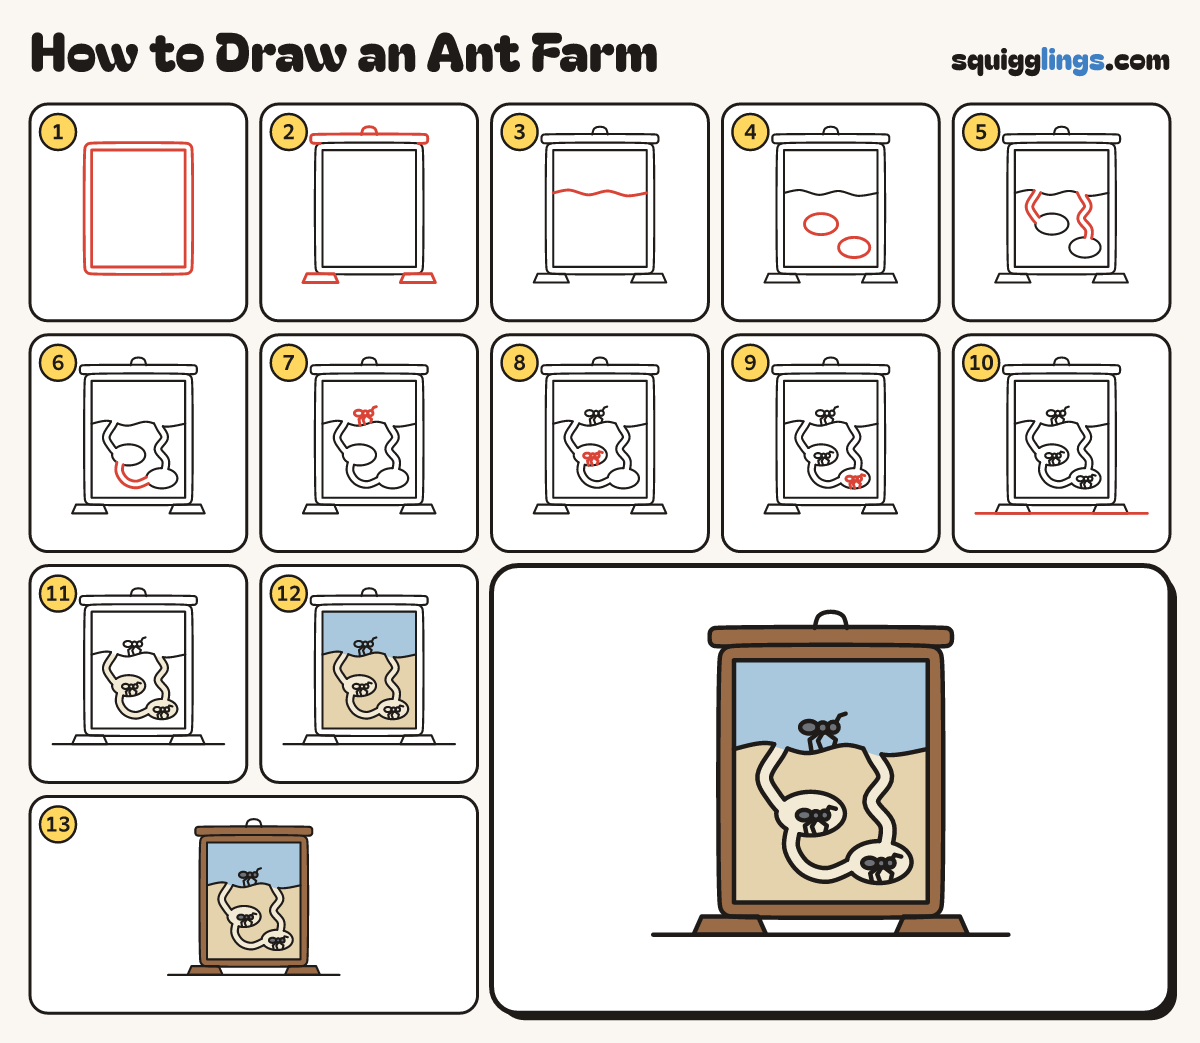
Each picture adds one red line. Draw that line, then scroll to the next picture. Rub out any dashed helper lines at the end. First up: the frame.
Step 1: The frame
In the middle of your paper draw a tall rectangle for the glass. Draw a bigger rounded one around it.
Tip An ant farm is a thin glass sandwich full of sand.
Step 2: Lid and feet
Draw a flat lid on top. Arch a knob from the lid back to the lid. Add 2 feet below.
Step 3: The sand line
Inside the glass, a third of the way down, draw a wavy line from side to side for the sand.
Step 4: Two rooms
In the sand draw 2 smooth rounded rooms, like flat eggs: one in the middle and one lower right.
Step 5: Tunnels
Draw 2 wiggly tunnels of 2 lines each, from the sand line down to each room. Open their ends.
Tip Rub out the line across each tunnel end, so the ants can walk in.
Step 6: A passage
Draw one more wiggly passage of 2 lines from the middle room across to the lower room. Open its ends.
Step 7: An ant on top
On the sand draw a little ant: 3 beads, the biggest at the back, 3 bent legs and a feeler.
Step 8: Ant in a room
Draw a smaller ant in the middle room the same way.
Step 9: One more ant
Draw another small ant in the lower room.
Step 10: The table
Draw a table line under the feet from well left to well right, lifting your pencil across the feet.
Step 11: Pale rooms
Go over your lines. Colour the rooms and tunnels cream, around the ants.
Step 12: Sand and sky
Colour the sand sandy yellow around the rooms and tunnels, and the glass above sky blue around the ant.
Step 13: Brown frame, dark ants
Colour the frame, lid and feet brown, and the 3 ants dark grey. Your ant farm is done!
Your finished drawing
Follow the steps above and this is where you end up: an ant farm, drawn by you.
Every step in one picture