Watch it draw itself · tap to replay
How to Draw a Challah
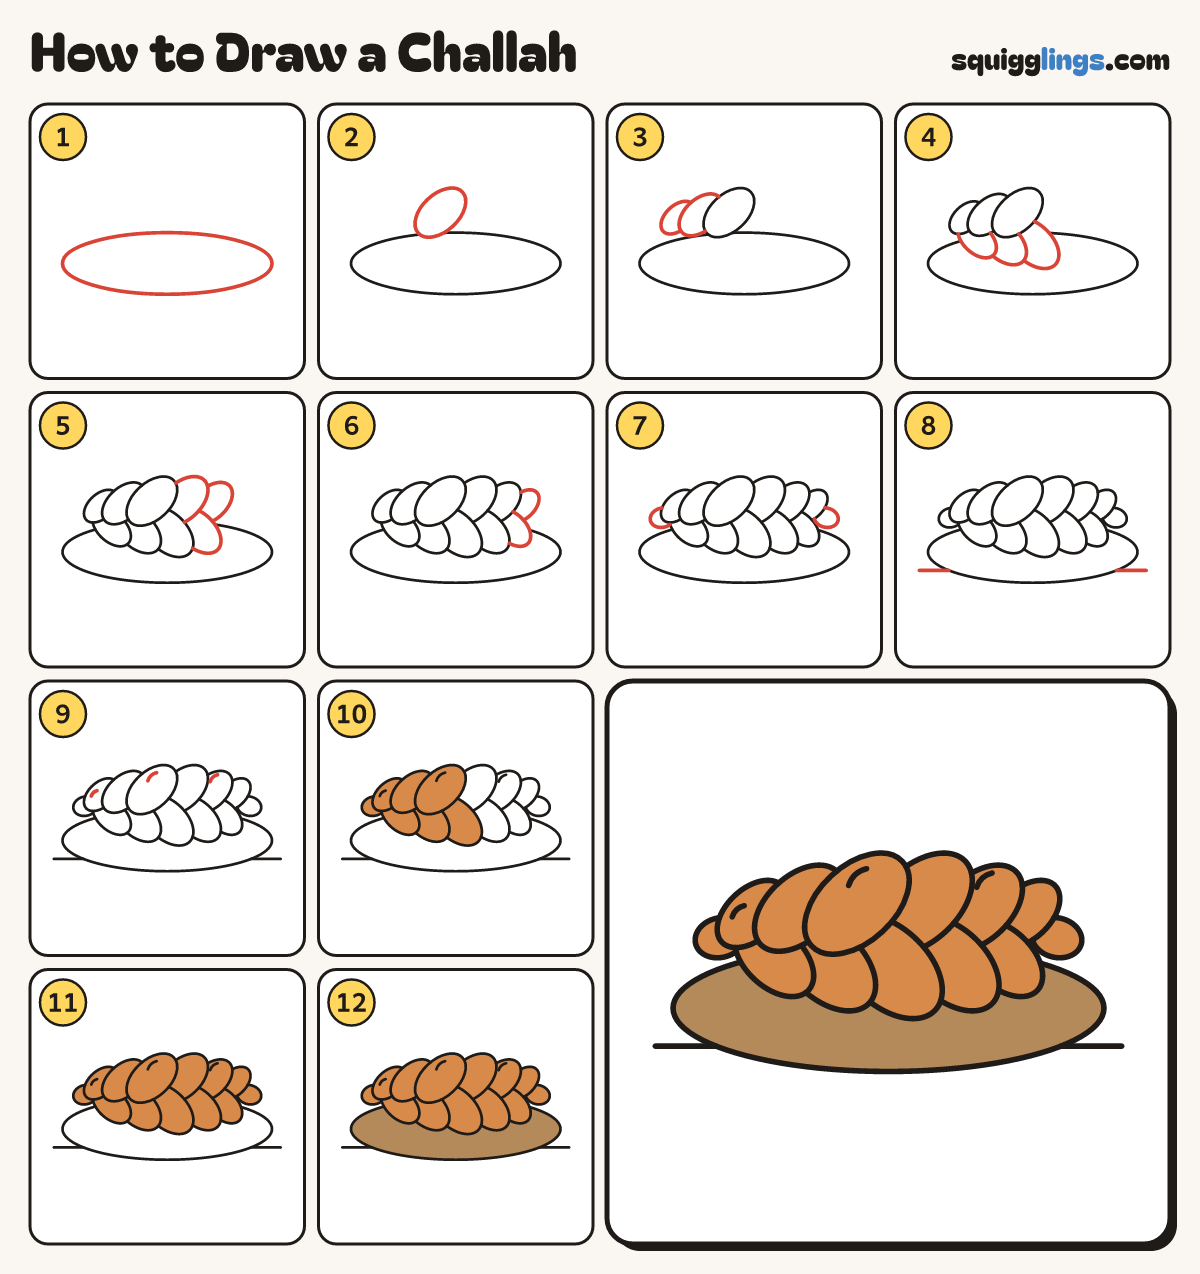
Draw a challah in 12 easy steps, about 9 minutes. Free, with a printable worksheet.
Each picture adds one red line. Draw that line, then scroll to the next picture. Rub out any dashed helper lines at the end. First up: a board.
Step 1: A board
Across the middle of your page draw a big flat oval board, nearly as wide as the page.
Tip Challah is bread made of dough ropes plaited together.
Step 2: Big middle bump
Above the middle of the board draw a big fat egg leaning right: the top of the braid.
Step 3: Left top bumps
On its left draw 2 more leaning eggs, each smaller, each tucked behind the one before.
Step 4: Left bottom bumps
Under them draw 3 eggs leaning the other way, small to big, tucked under the top row.
Step 5: Right side bumps
Now go right: a top bump, a bottom bump, a top bump, each a little smaller.
Step 6: The right end
Finish the two rows with a small bottom bump and a small top bump.
Step 7: Two end knobs
Tuck a little round knob behind each end of the loaf, so both ends match.
Step 8: The table
Draw a short table line on each side of the board, from the board towards the page edge.
Step 9: Shiny crust
Draw a short curved shine line on every other top bump: 3 in all.
Step 10: Golden left half
Go over your lines. Colour the braid bumps on the left half ginger, like golden baked crust.
Step 11: Golden right half
Colour the rest of the braid bumps ginger, all the way to the right end.
Step 12: Wood board
Colour the board wood brown around the loaf, and your challah is done!
Your finished drawing
Follow the steps above and this is where you end up: a challah, drawn by you.
Every step in one picture