Watch it draw itself · tap to replay
How to Draw a Chair
Draw a chair in 11 easy steps, about 8 minutes. Free, with a printable worksheet.
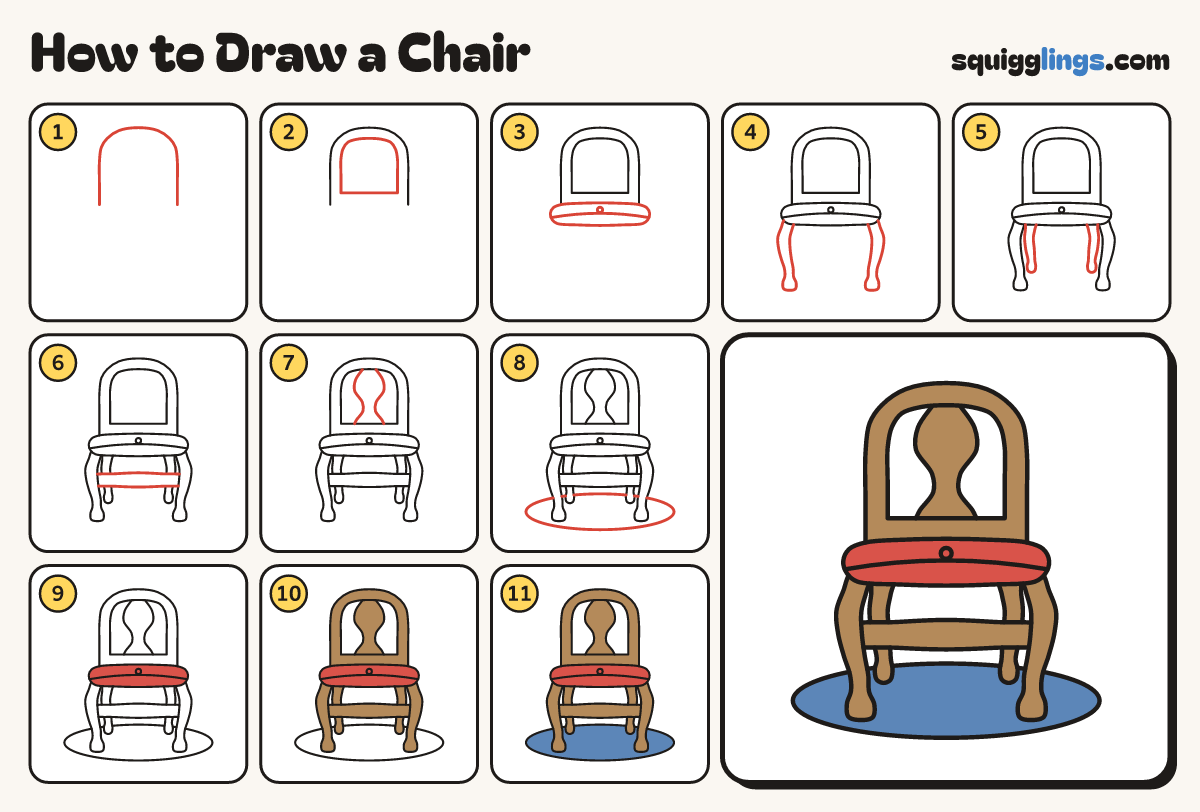
Each picture adds one red line. Draw that line, then scroll to the next picture. Rub out any dashed helper lines at the end. First up: the back.
Step 1: The back
Start below the middle on the left. Draw a tall upside-down U with round shoulders. Stop level with the start.
Tip Leave room underneath for the seat and legs.
Step 2: The window
Inside the back draw a smaller upside-down U with a flat bottom line. Leave a thick frame all round.
Step 3: The seat cushion
Start just left of the back. Draw a plump cushion under it, wider than the back, back to the start.
Tip Add a sagging line across it and a tiny button above.
Step 4: Front legs
Under each end of the cushion draw a curvy leg, like a bent knee, ending in a little foot pad.
Step 5: Back legs
Inside each front leg draw a thinner back leg, from the cushion down to a small foot higher up.
Tip The back legs are further away, so they look thinner.
Step 6: The bar
Under the knees draw a soft bar across from the left leg to the right leg, fatter in the middle.
Step 7: The vase
In the window, start on the top line. Draw a curvy vase shape down and stop on the bottom line.
Step 8: A round rug
Start on the left. Draw a long flat oval rug round all 4 feet, and back to the start.
Step 9: Red cushion
Colour the cushion a warm red.
Step 10: Colour the wood
Colour the back, the vase, the legs and the bar wood brown. Leave the window white.
Step 11: Blue rug
Colour the rug blue around the feet and you are done!
Your finished drawing
Follow the steps above and this is where you end up: a chair, drawn by you.
Every step in one picture