Watch it draw itself · tap to replay
How to Draw a Tower
Draw a tower in 12 easy steps, about 9 minutes. Free, with a printable worksheet.
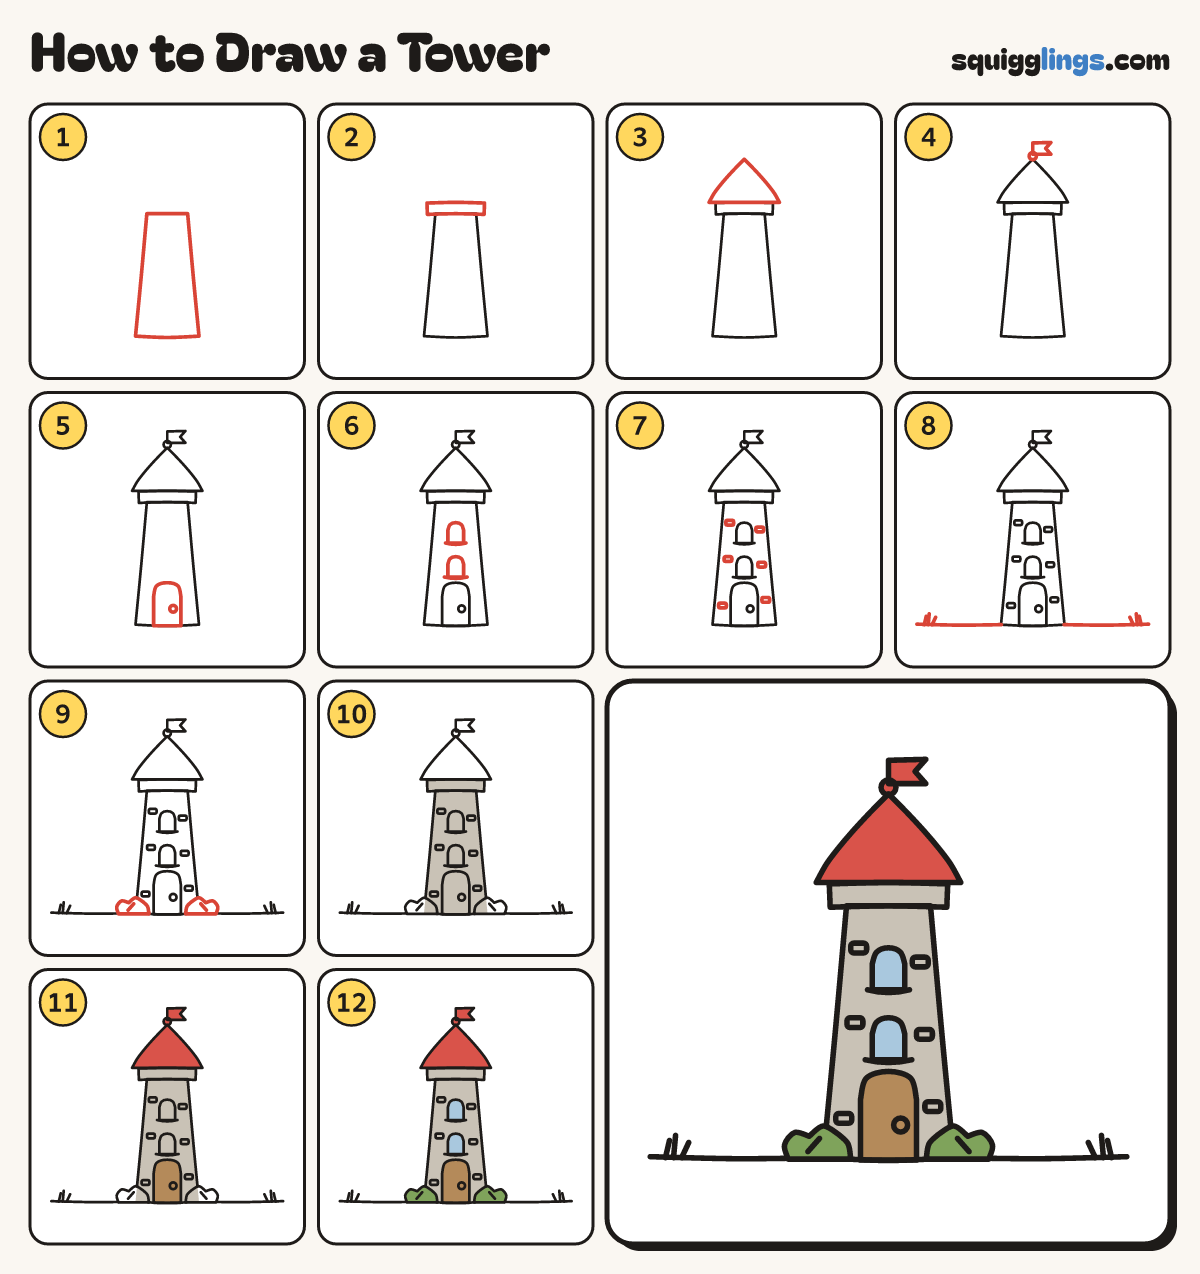
Each picture adds one red line. Draw that line, then scroll to the next picture. Rub out any dashed helper lines at the end. First up: tall tower.
Step 1: Tall tower
In the middle of your paper draw a tall tower, a little narrower at the top than the bottom.
Tip Make it tall: 3 times as tall as it is wide.
Step 2: Hat band
On top of the tower draw a flat band poking out a little past both sides.
Step 3: Witch hat roof
Start at the left end of the band. Sweep up to a point high above, down to the right end.
Step 4: Ball and flag
On the point draw a little ball. From the ball draw a pole straight up and stop. Add a flag.
Step 5: The door
At the bottom draw a door: start on the bottom line, go up, a rainbow over the top, straight down.
Step 6: Rainbow windows
Up the tower draw 2 windows, one above the other, each with a rainbow top and a shelf under it.
Step 7: Stone blocks
Here and there on the tower draw 6 little rounded bricks: 2 beside each window and 2 near the door.
Step 8: The ground
Draw the ground line from each bottom corner out towards the paper's edge. Add 3 grass blades at each end.
Step 9: Bumpy bushes
At each bottom corner draw a bumpy bush, starting and stopping on the ground, with a leaf line inside.
Step 10: Stone tower
Colour the tower and the hat band grey like stone, going around the windows and the door.
Step 11: Red hat and flag
Colour the witch hat, the flag and the little ball red, and the door wood brown.
Step 12: Sky windows, green bushes
Colour the windows sky blue and the bushes leaf green. Go over all your lines and your tower is done!
Your finished drawing
Follow the steps above and this is where you end up: a tower, drawn by you.
Every step in one picture