Watch it draw itself · tap to replay
How to Draw a Castle Keep
Draw a castle keep in 12 easy steps, about 9 minutes. Free, with a printable worksheet.
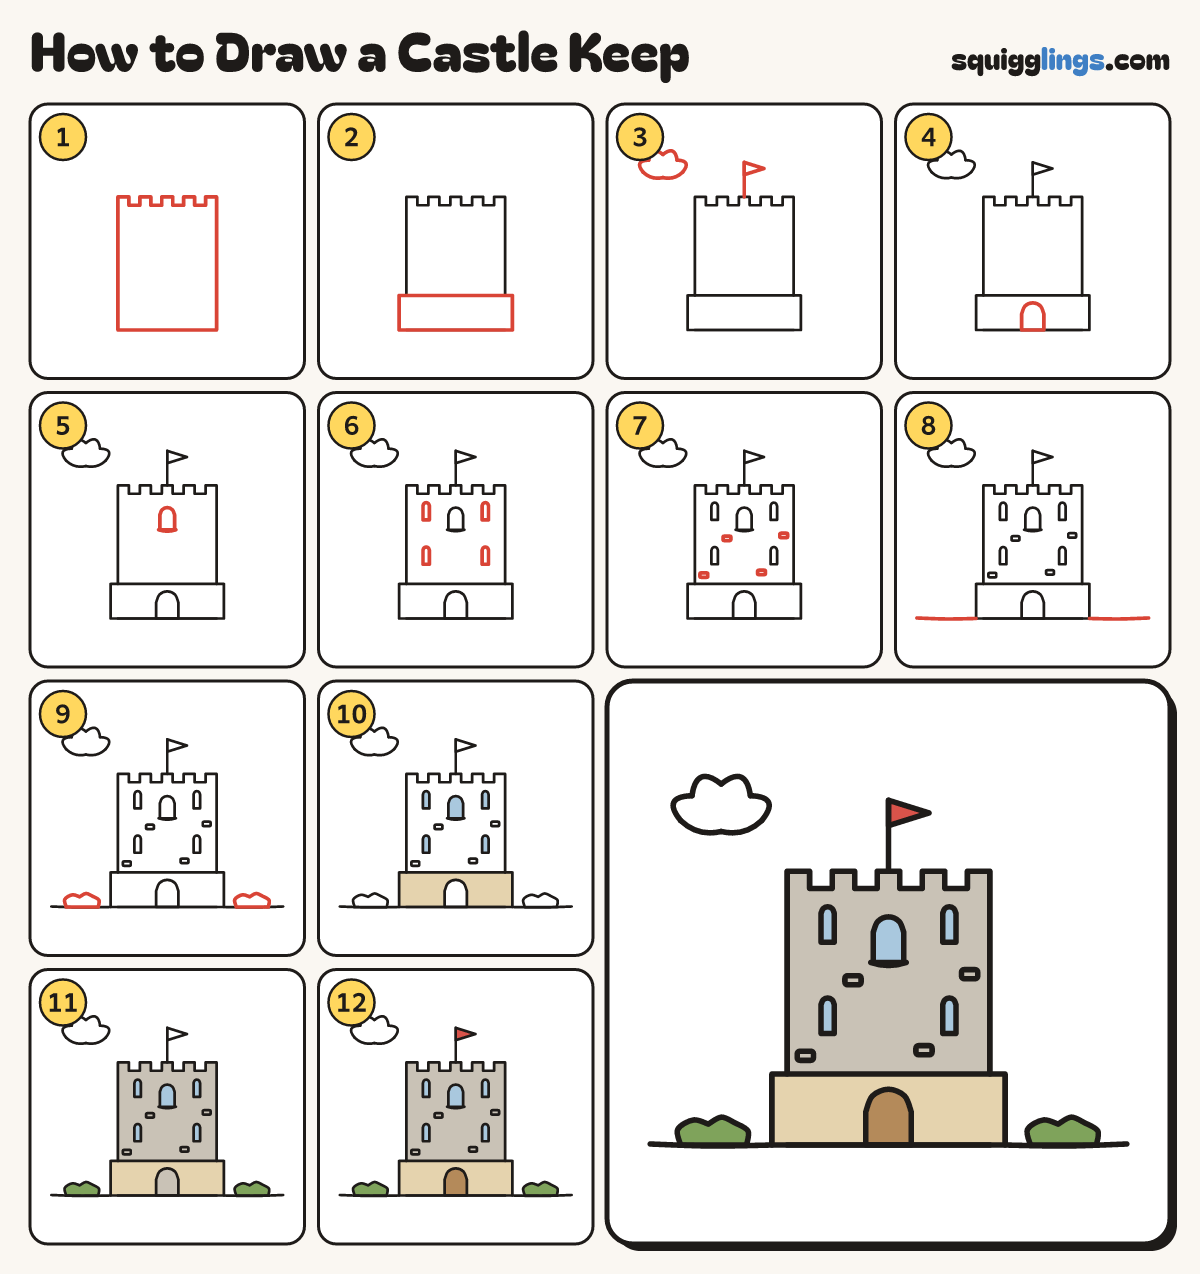
Each picture adds one red line. Draw that line, then scroll to the next picture. Rub out any dashed helper lines at the end. First up: the square keep.
Step 1: The square keep
In the middle, draw a tall square tower. Put 5 square teeth along the top, all the same size.
Step 2: The wide base
Around the bottom of the tower, draw a wider low box for the stone base.
Step 3: Flag and a cloud
From the middle tooth, draw a pole up, stopping high above. Add a flag and a cloud up on the left.
Step 4: The door
In the middle of the base, draw an arched door standing on the ground. Keep its top inside the base.
Step 5: A window
Above the door, draw an arched window with a curved sill under it.
Step 6: Arrow slits
Draw 4 thin arched slits: 2 on each side of the window, one above the other.
Step 7: Stone blocks
Draw 4 small, thin stone blocks on the tower walls, well away from the windows and slits.
Step 8: The ground
Start at a bottom corner of the base and draw the ground line out to the edge. Do both sides.
Step 9: Two bushes
Draw a round bumpy bush on the ground on each side, with a gap between it and the base.
Step 10: Blue windows, sandy base
Colour the window and slits sky blue, the base sandy around the door, and the cloud white.
Step 11: Grey keep, green bushes
Colour the tower stone grey around the blue windows, and the bushes green.
Step 12: Red flag, wooden door
Colour the flag red and the door wood brown. Go over your lines. Done!
Your finished drawing
Follow the steps above and this is where you end up: a castle keep, drawn by you.
Every step in one picture