Watch it draw itself · tap to replay
How to Draw a Caramel
Draw a caramel in 11 easy steps, about 8 minutes. Free, with a printable worksheet.
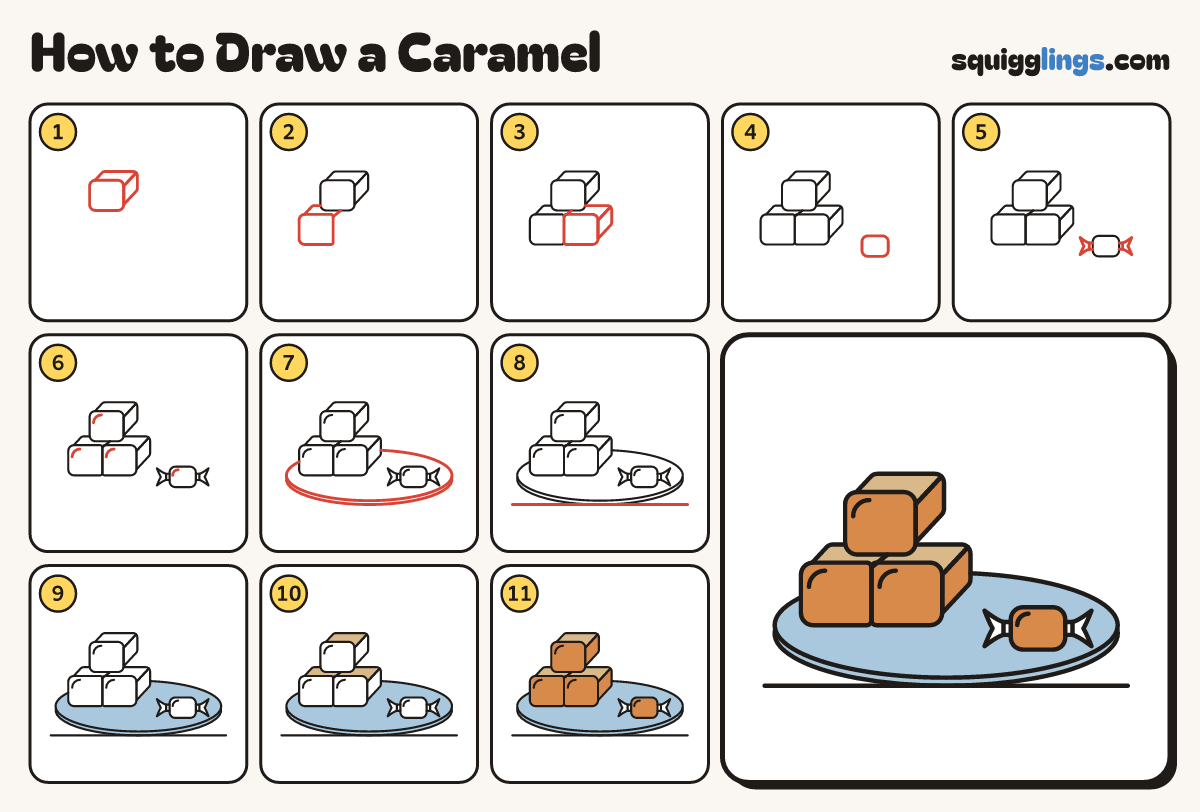
Each picture adds one red line. Draw that line, then scroll to the next picture. Rub out any dashed helper lines at the end. First up: top caramel.
Step 1: Top caramel
Above the middle, draw a soft square with round corners. Add a slanted top and a side.
Tip Round every corner a little, so it looks soft and chewy, not like a box.
Step 2: Left caramel
Below it on the left, draw a soft square the same size. Its slanted top tucks under the top caramel.
Step 3: Right caramel
Right beside it, touching, draw one more with its top and a side. Lift your pencil at the top caramel.
Step 4: Wrapped caramel
To the right, a little lower, draw a smaller soft square for one more caramel, still in its wrapper.
Step 5: Twisted ends
On each side, draw a short neck, then a fan with a V cut in its end, for the twists.
Step 6: Shines
In the top left corner of each caramel, draw a short curved line for a shine.
Step 7: A plate
Draw a flat oval plate under the caramels. Curve an edge under its front, starting and stopping at its sides.
Tip Lift your pencil where the plate goes behind the caramels.
Step 8: The table
Start left of the plate and draw a straight table line along its bottom, stopping past the right side.
Step 9: Sky plate
Go over your lines, then colour the plate and its edge sky blue, around the caramels.
Step 10: Light tops
Colour the tops of the 3 caramels tan.
Step 11: Golden caramels
Colour the fronts, the sides and the wrapped caramel ginger. Leave the wrapper ends white.
Your finished drawing
Follow the steps above and this is where you end up: a caramel, drawn by you.
Every step in one picture