Watch it draw itself · tap to replay
How to Draw a Key
Draw a key in 11 easy steps, about 8 minutes. Free, with a printable worksheet.
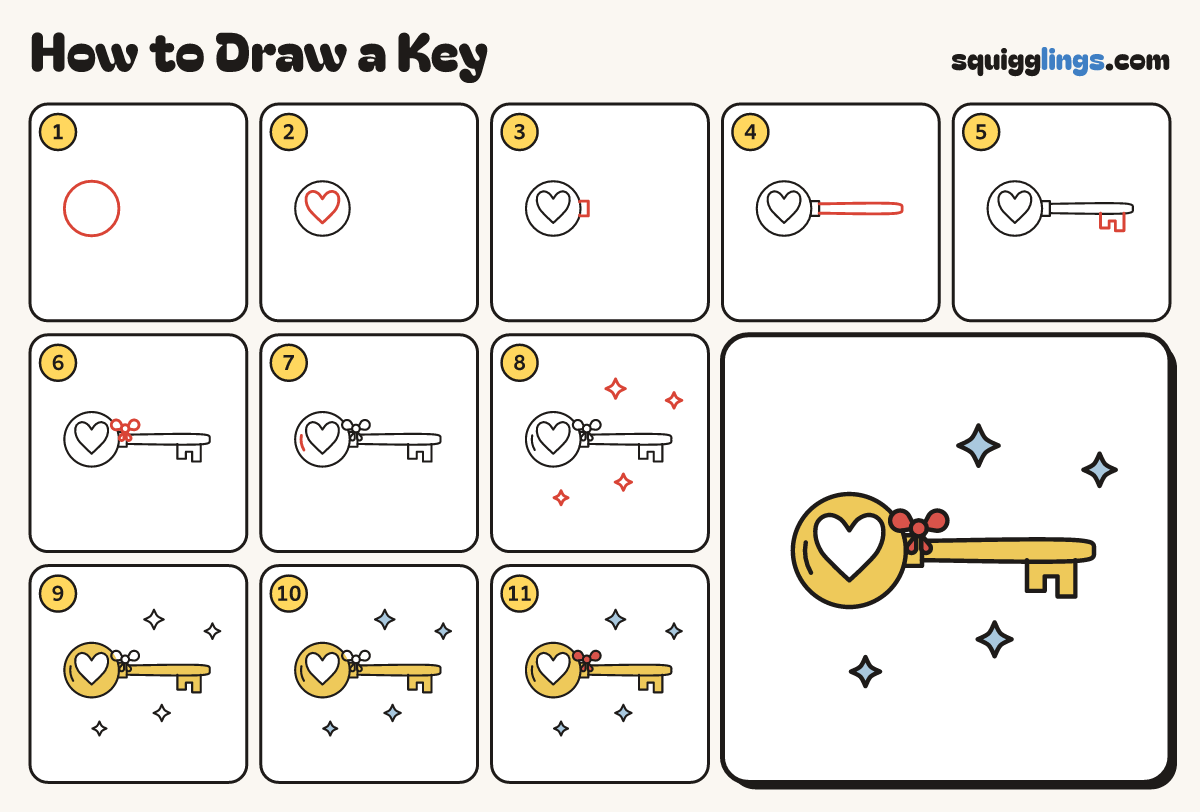
Each picture adds one red line. Draw that line, then scroll to the next picture. Rub out any dashed helper lines at the end. First up: round handle.
Step 1: Round handle
On the left of your paper, halfway down, draw one big round circle for the handle.
Step 2: The hole
Inside the circle draw a heart-shaped hole.
Step 3: The collar
On the right side of the circle draw a short square collar sticking out.
Step 4: The shaft
Start on the collar. Draw 2 long lines out to the right, joined by a round end.
Step 5: The teeth
Near the round end, start on the bottom line. Draw 2 square teeth hanging down and stop on the shaft.
Step 6: A ribbon
On the collar, draw a little bow, a round knot with a loop on each side and 2 short tails.
Step 7: A shine
Draw a short curved shine line on the left of the handle, near the edge.
Step 8: Sparkle stars
Draw 4 small sparkle stars around the key, not touching it.
Step 9: Golden key
Colour the whole key yellow, going around the heart hole and the ribbon.
Step 10: Sky blue stars
Colour the 4 sparkle stars sky blue.
Step 11: Red ribbon
Colour the ribbon red. Go over all your lines and your key is done!
Your finished drawing
Follow the steps above and this is where you end up: a key, drawn by you.
Every step in one picture