Watch it draw itself · tap to replay
How to Draw a Science Lab
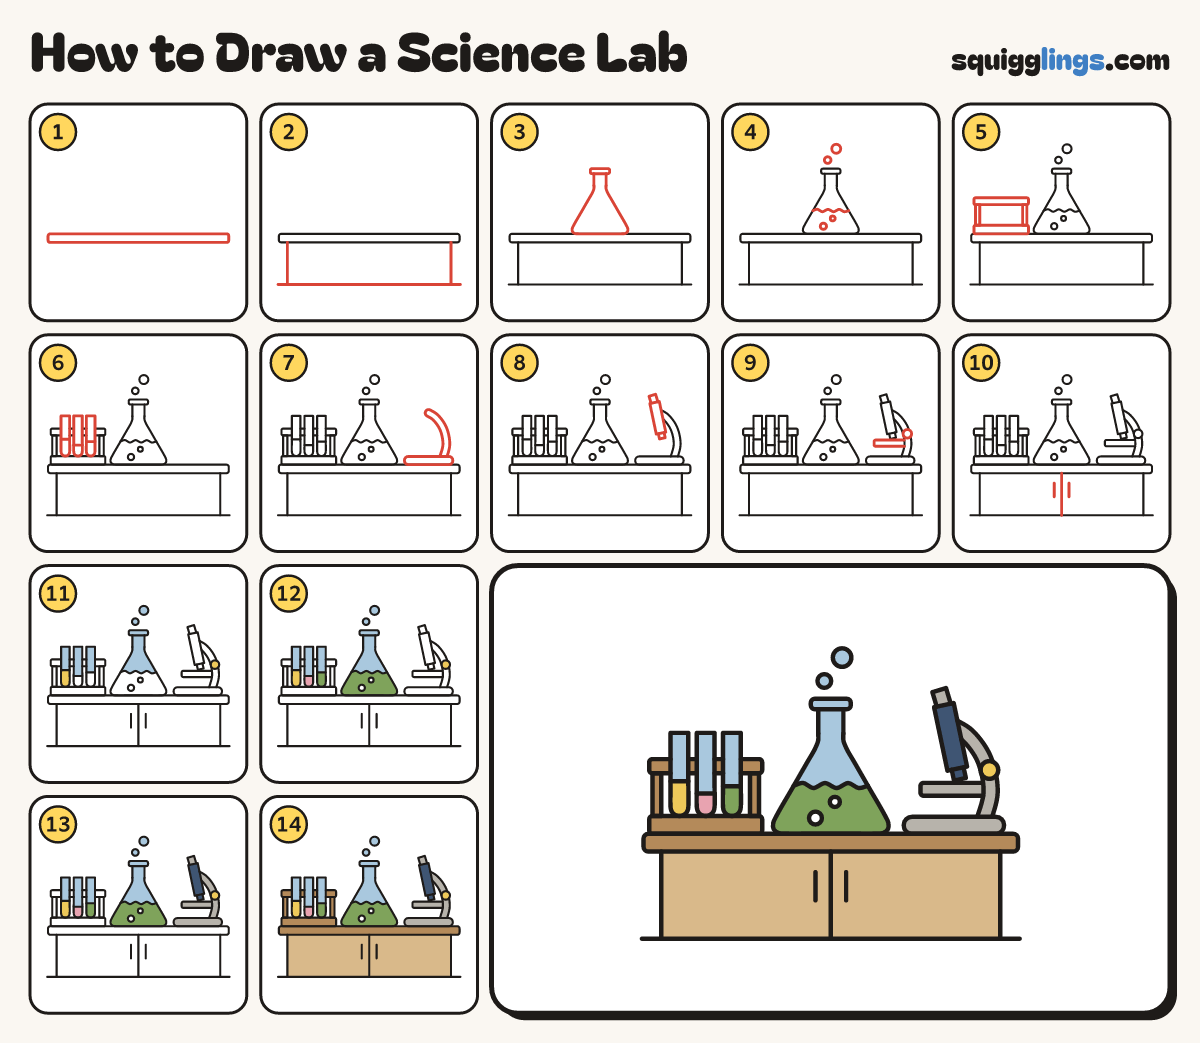
Draw a science lab in 14 easy steps, about 11 minutes. Free, with a printable worksheet.
Each picture adds one red line. Draw that line, then scroll to the next picture. Rub out any dashed helper lines at the end. First up: the bench top.
Step 1: The bench top
Just below the middle of your paper, draw a long thin slab from far left to far right.
Step 2: The cupboard
Start under the slab near each end. Draw a line straight down, and stop on a long floor line.
Tip Draw the floor line first if that is easier.
Step 3: The flask
Start above the bench. Slope down and out, along the bench, back up and stop. Add a neck and rim.
Tip Make both sides slope the same.
Step 4: Liquid and bubbles
Start on the flask's left side. Draw a wavy line across, stop on the right side. Add 4 bubbles.
Tip 2 bubbles sit in the liquid and 2 float out of the top.
Step 5: The tube rack
On the left of the bench draw 2 flat bars, one above the other. Join them with 2 posts.
Step 6: Three test tubes
Draw 3 tall thin tubes with round bottoms standing on the lower bar. Draw a line across each.
Tip Rub out the top bar where it passes behind the tubes.
Step 7: Microscope foot
On the right of the bench draw a long flat foot. From it draw a thick arm curving up.
Step 8: Microscope tube
From the arm's top draw a fat tube leaning down. Add a short eyepiece above and a lens below.
Step 9: Stage and knob
Under the lens draw a flat bar across to the arm. Add a round knob on the arm above it.
Tip The stage is where the glass slide goes.
Step 10: Cupboard doors
Start under the middle of the slab. Draw a line down, stop at the floor. Add 2 short handles.
Step 11: Pale glass, yellow liquid
Colour the empty glass and the 2 floating bubbles light blue. Colour the first tube's liquid and the knob yellow.
Step 12: Pink and green
Colour the middle tube's liquid pink. Colour the last tube's liquid and the flask's liquid green, around the bubbles.
Tip Leave the 2 bubbles inside the flask white.
Step 13: Grey microscope
Colour the microscope's foot, arm, stage and eyepiece grey. Colour its tube and lens dark blue.
Step 14: Wooden bench
Colour the cupboard light brown. Colour the bench top and the tube rack darker brown. Your science lab is done!
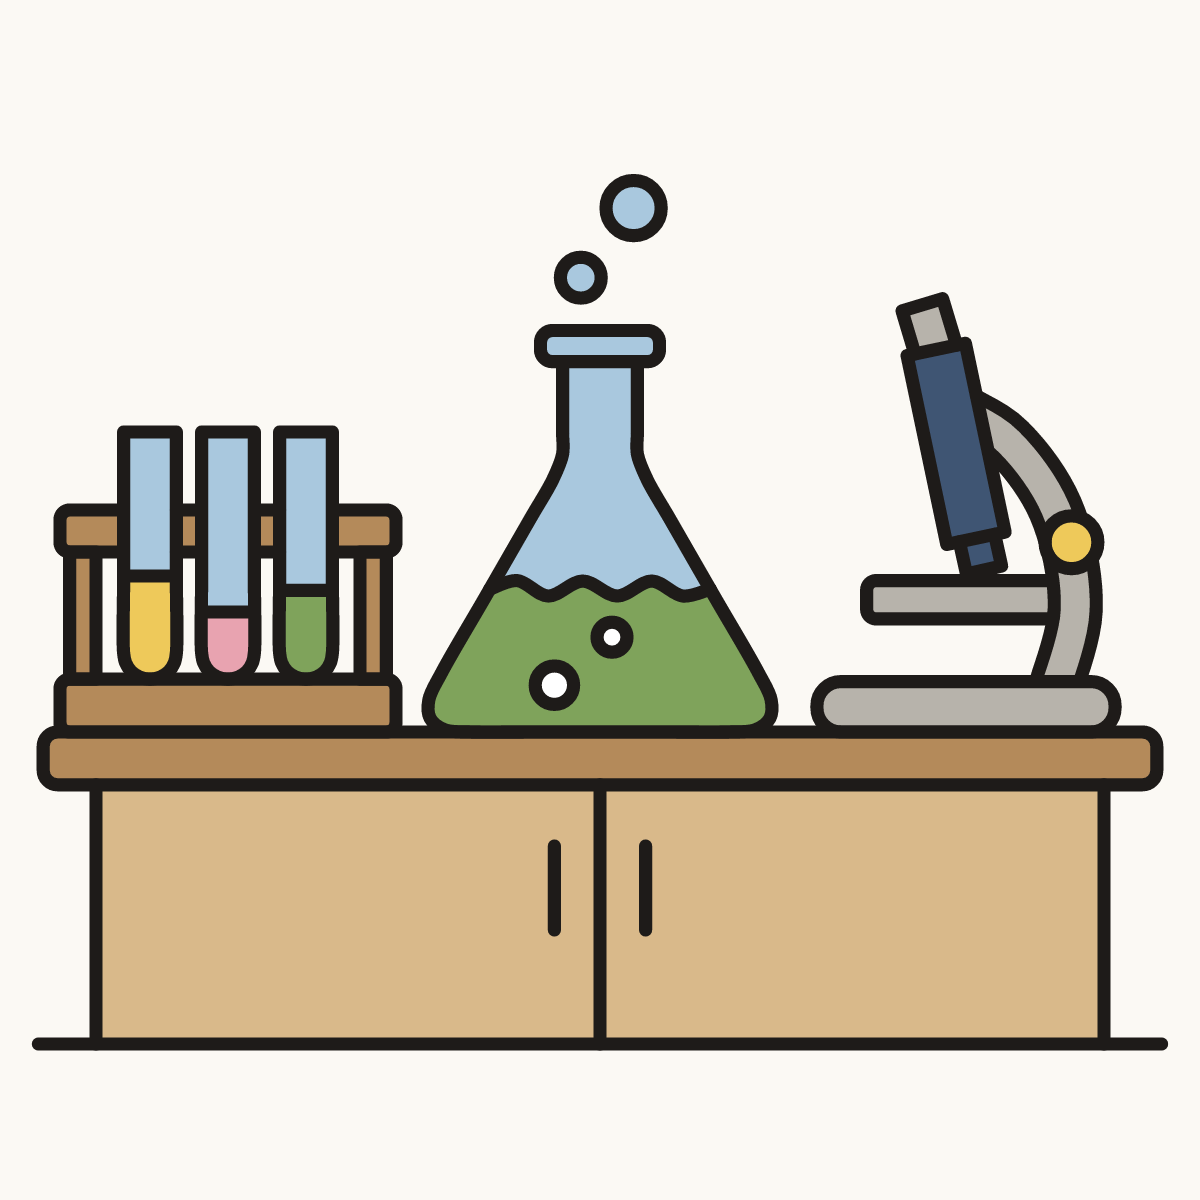
Your finished drawing
Follow the steps above and this is where you end up: a science lab, drawn by you.
Every step in one picture