Watch it draw itself · tap to replay
How to Draw a Bumper Boat
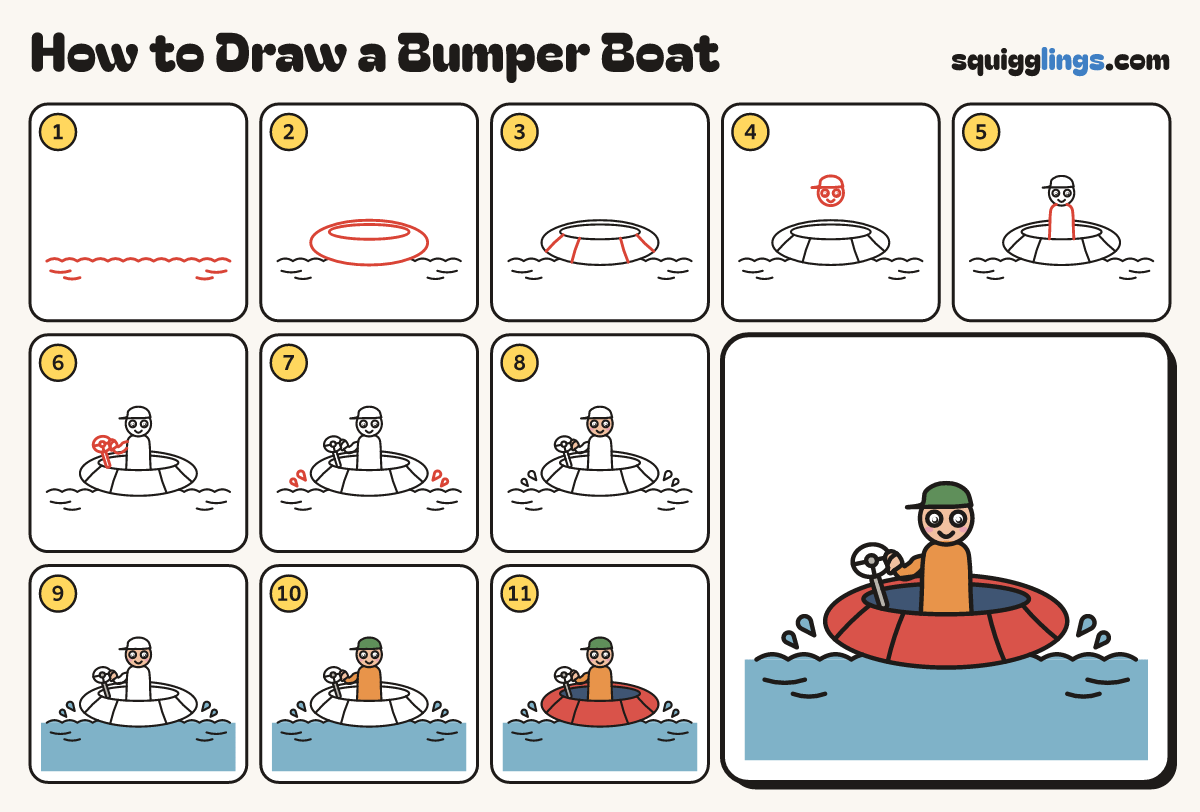
Draw a bumper boat in 11 easy steps, about 8 minutes. Free, with a printable worksheet.
Each picture adds one red line. Draw that line, then scroll to the next picture. Rub out any dashed helper lines at the end. First up: the waves.
Step 1: The waves
Start at the left edge below the middle. Draw gentle wave bumps across to the right edge. Add 4 ripples.
Step 2: Fat tube
Draw a big wide oval dipping into the waves. Draw a smaller oval inside it, higher up, for the hole.
Tip Rub out the wave line inside the tube.
Step 3: Tube sections
Across the tube, draw 4 short curved lines from the outer oval to the inner one, like spokes.
Step 4: Driver's head and cap
Above the hole, draw a round head with a cap, peak to the left. Add 2 eyes and a smile.
Step 5: Body in the tube
Start low on the inner oval. Draw the shirt up over round shoulders and back down to the oval.
Tip Rub out the oval line inside the shirt.
Step 6: Wheel and arm
Left of the driver, draw a wheel with a T and dot inside, a stick below and a gripping arm.
Tip The wheel rim disappears behind the fist.
Step 7: Splashes
On each side of the tube, draw 2 little drops leaping from the waves, pointy ends down.
Step 8: Peach face, pink cheeks
Colour the face and fist peach around the cheeks, then the cheeks pink. Leave the eyes white.
Step 9: Grey stick, blue sea
Colour the stick and the wheel's middle dot grey, and the sea and the drops blue.
Step 10: Orange shirt, green cap
Colour the driver's shirt and sleeve orange and the cap green.
Step 11: Red tube, dark hole
Colour the tube red and the hole dark blue, around the driver and stick. Ready to bump!
Your finished drawing
Follow the steps above and this is where you end up: a bumper boat, drawn by you.
Every step in one picture