Watch it draw itself · tap to replay
How to Draw a Soursop
Draw a soursop in 10 easy steps, about 8 minutes. Free, with a printable worksheet.
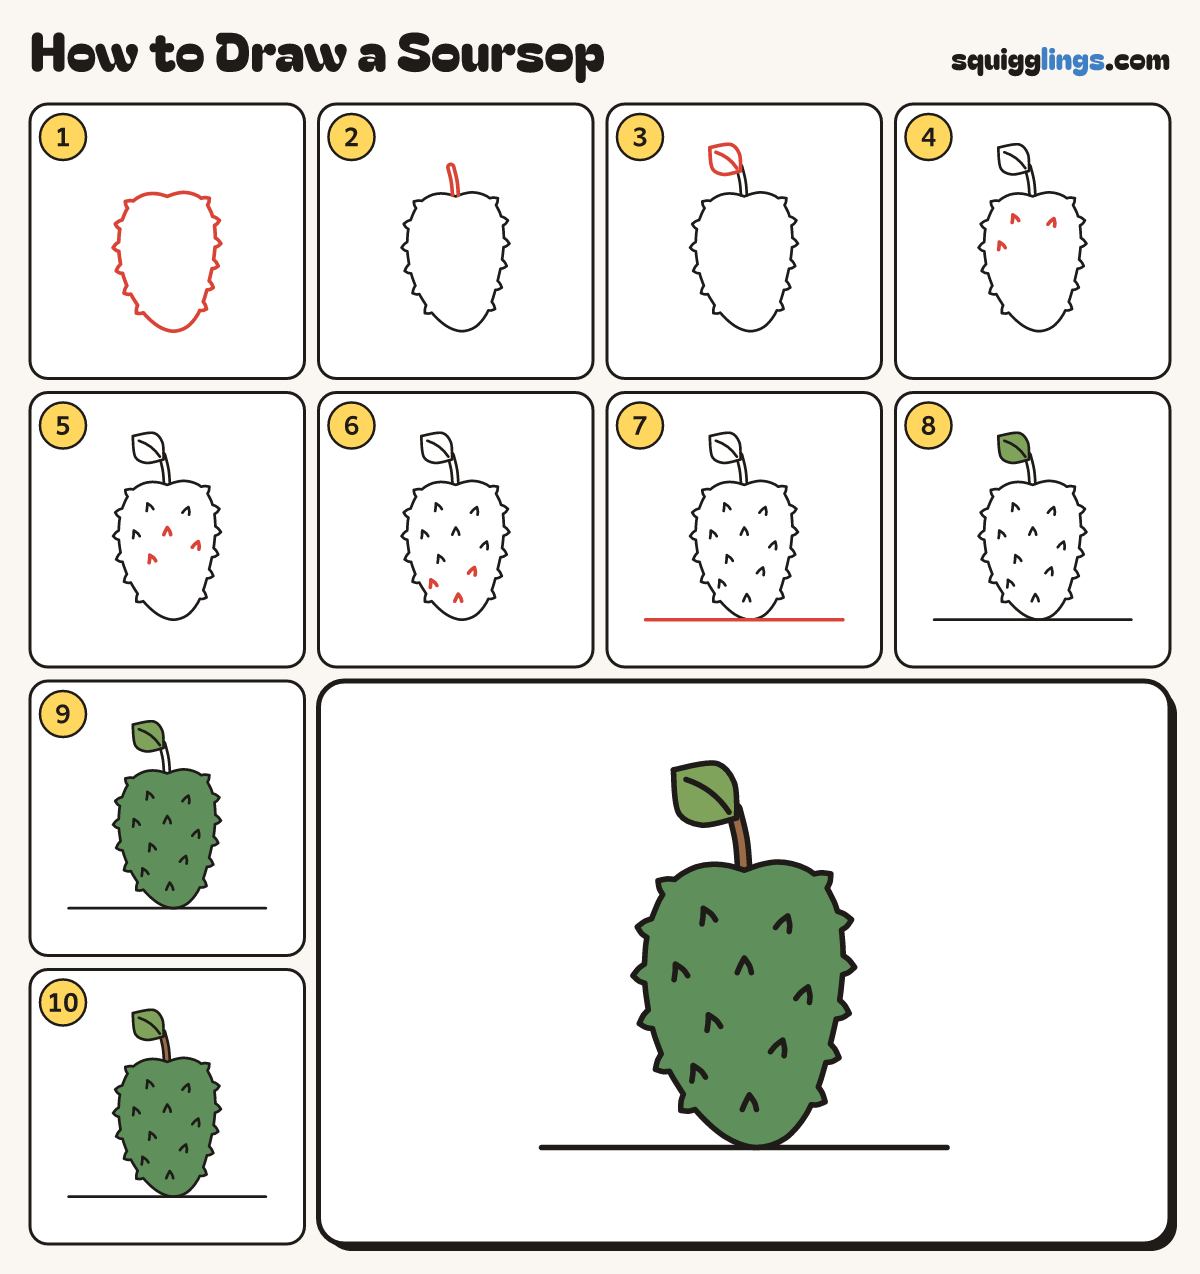
Each picture adds one red line. Draw that line, then scroll to the next picture. Rub out any dashed helper lines at the end. First up: the fruit.
Step 1: The fruit
In the middle draw a tall egg, wider at the top, with soft little points up both sides.
Tip Soursop is a big green fruit with soft spines and creamy white inside.
Step 2: The stem
Start at the dip on top and draw a short stem going up, leaning a little left.
Step 3: A leaf
From the tip of the stem draw a fat pointed leaf leaning left, with a vein down the middle.
Step 4: Soft spines
Near the top of the fruit draw 3 little soft spikes, like upside-down Vs, leaning outward.
Step 5: More spines
Across the middle draw 3 more soft spikes in the gaps, leaning outward.
Step 6: Last spines
Near the bottom draw 3 last soft spikes, well apart and leaning outward.
Step 7: The ground
Draw a ground line under the fruit that just touches its bottom, from well left of it to well right.
Step 8: Light green leaf
Go over your lines, then colour the leaf light green.
Step 9: Green fruit
Colour the whole fruit green, right out to the tips of the soft points.
Step 10: Brown stem
Colour the stem brown, and your soursop is done!
Your finished drawing
Follow the steps above and this is where you end up: a soursop, drawn by you.
Every step in one picture