Watch it draw itself · tap to replay
How to Draw the Brooklyn Bridge
Draw the Brooklyn Bridge in 12 easy steps, about 9 minutes. Free, with a printable worksheet.
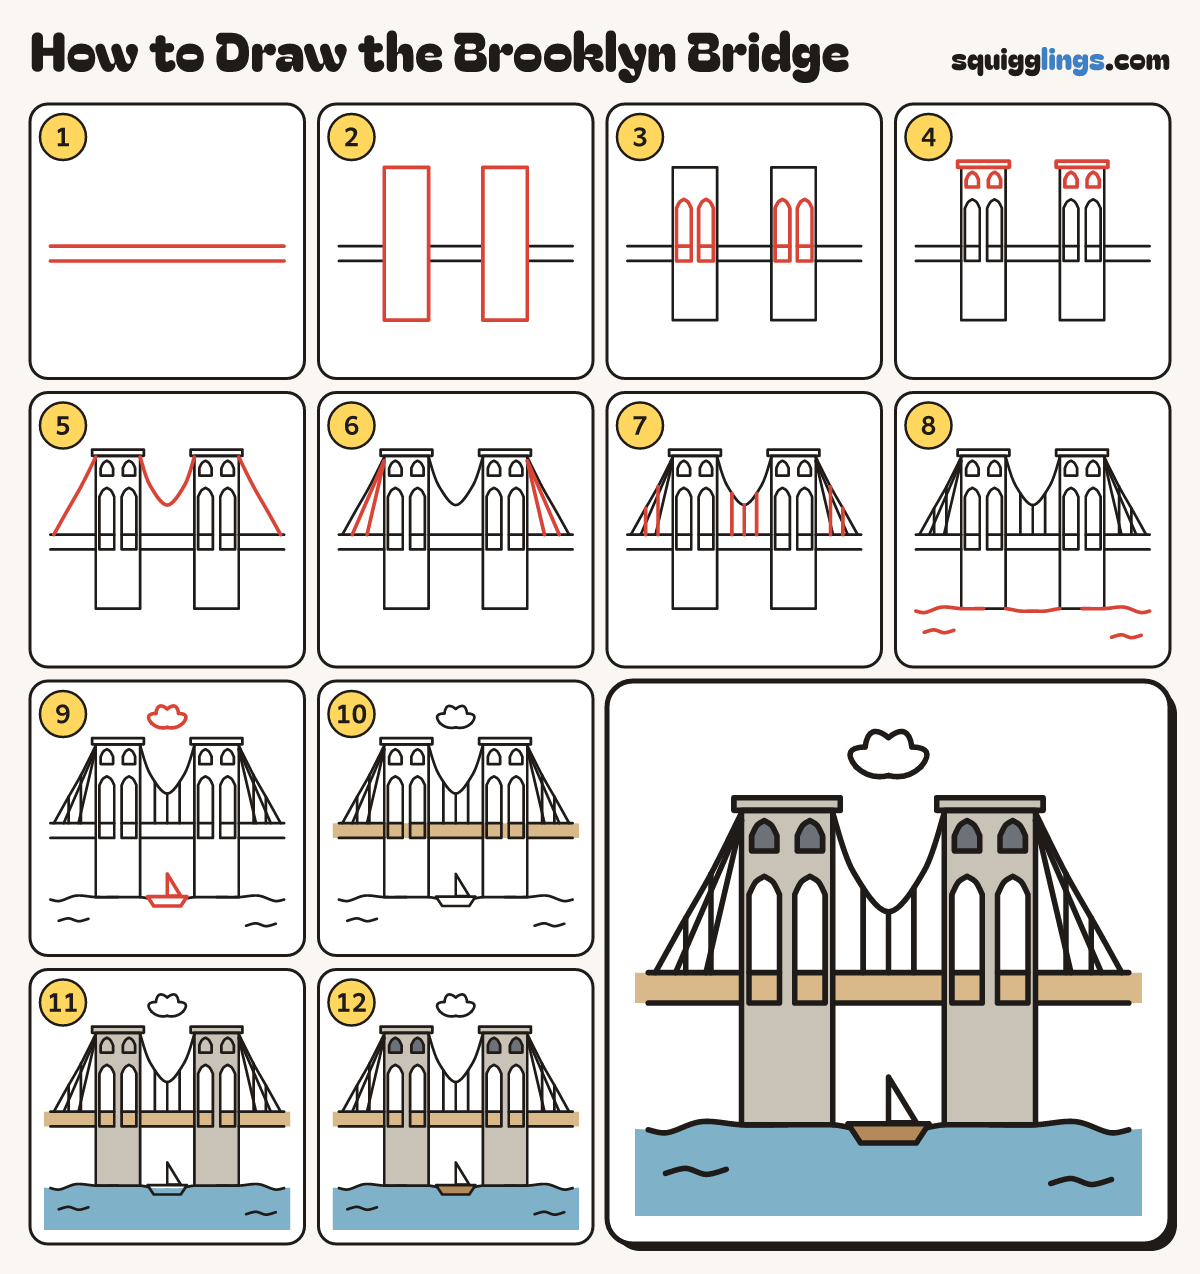
Each picture adds one red line. Draw that line, then scroll to the next picture. Rub out any dashed helper lines at the end. First up: the deck.
Step 1: The deck
Across the middle, draw 2 long lines a finger apart. Start at the left edge and stop at the right.
Step 2: Two stone towers
Draw 2 wide towers standing through the deck, a third in from each side, with flat tops high above it.
Step 3: Pointed arches
In each tower, draw 2 tall pointed arches, flat along the deck bottom. Add the deck's top line across each.
Step 4: Caps and small arches
On each tower, draw a thin flat cap sticking out both sides. Add 2 little pointed arches under it.
Step 5: The cables
From the deck near the left edge, swoop a cable over both towers, sagging between, and stop near the right.
Step 6: The stays
From the outer top corner of each tower, draw 2 straight lines fanning down to the deck, like harp strings.
Step 7: The hangers
Draw straight lines down from the cables to the top of the deck, to hang the deck.
Step 8: The river
Draw a wavy water line from edge to edge at the tower feet. Add 2 little ripples below.
Step 9: Sailboat and cloud
Sitting on the water, draw a melon-slice boat with a triangle sail. Add a cloud high between the towers.
Step 10: Tan deck, white cloud
Colour the deck tan, through the arches too, and colour the cloud white.
Step 11: Stone towers, blue river
Colour the towers and caps grey stone, around the arches. Colour the river blue, around the boat.
Step 12: Brown boat, slate arches
Colour the boat brown and the little arches slate grey. Your Brooklyn Bridge is done!
Your finished drawing
Follow the steps above and this is where you end up: the Brooklyn Bridge, drawn by you.
Every step in one picture