Watch it draw itself · tap to replay
How to Draw a Wind Pump
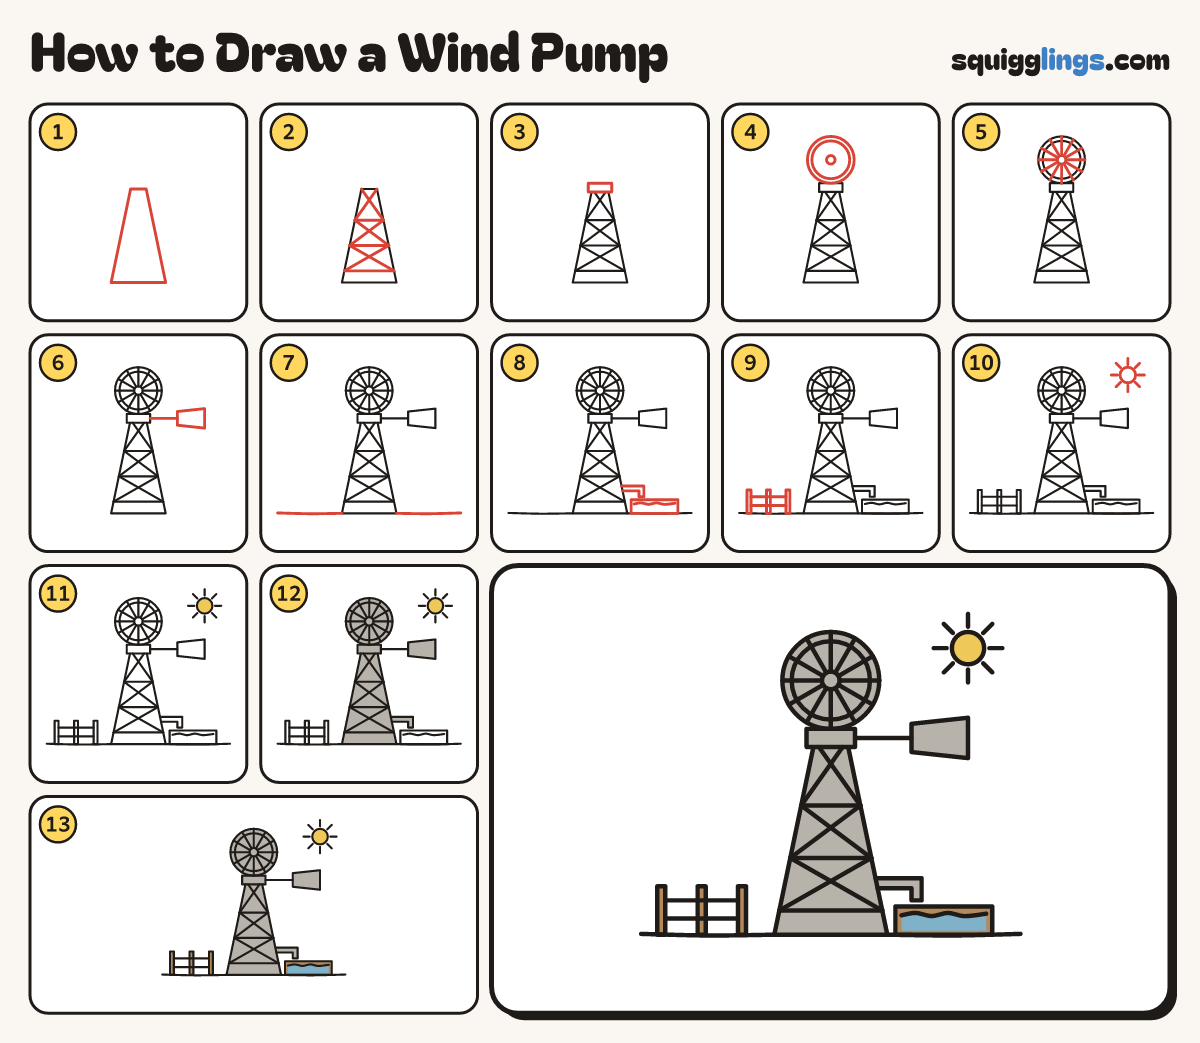
Draw a wind pump in 13 easy steps, about 10 minutes. Free, with a printable worksheet.
Each picture adds one red line. Draw that line, then scroll to the next picture. Rub out any dashed helper lines at the end. First up: the tower.
Step 1: The tower
In the middle of your paper draw a tall thin tower, wide at the bottom and narrow at the top.
Tip A wind pump's tower is much taller and thinner than a windmill.
Step 2: Cross braces
Inside the tower draw 3 flat rungs. Draw an X in each gap from the top to the lowest rung.
Step 3: The head
On the tower top draw a small flat box, a little wider than the tower.
Step 4: The wheel
Sitting on the box, draw a big circle. Add a small hub in the middle and a thin ring inside.
Step 5: Many blades
From the hub draw 12 straight lines out to the rim, evenly spaced, like bicycle spokes.
Step 6: The tail
From the box's right side draw a bar straight out. End it with a tail fin, wider at the back.
Step 7: The ground
Draw the ground line from the tower's feet out to each edge of the paper.
Step 8: Pipe and trough
From the tower's right leg draw a thin bent pipe. Under its end draw a low trough with wavy water.
Step 9: A fence
On the left draw 3 fence posts. Start 2 rails at the left post and stop at the right post.
Step 10: The sun
Draw a small sun with short rays near the top right corner.
Step 11: Yellow sun
Colour the sun yellow.
Step 12: Grey tower and wheel
Colour the tower, box, wheel, tail and pipe grey, pressing softly so the lines show.
Step 13: Wooden trough, blue water
Colour the trough and fence brown and the water blue. Go over your lines and your wind pump is done!
Your finished drawing
Follow the steps above and this is where you end up: a wind pump, drawn by you.
Every step in one picture