Watch it draw itself · tap to replay
How to Draw a Brooch
Draw a brooch in 10 easy steps, about 8 minutes. Free, with a printable worksheet.
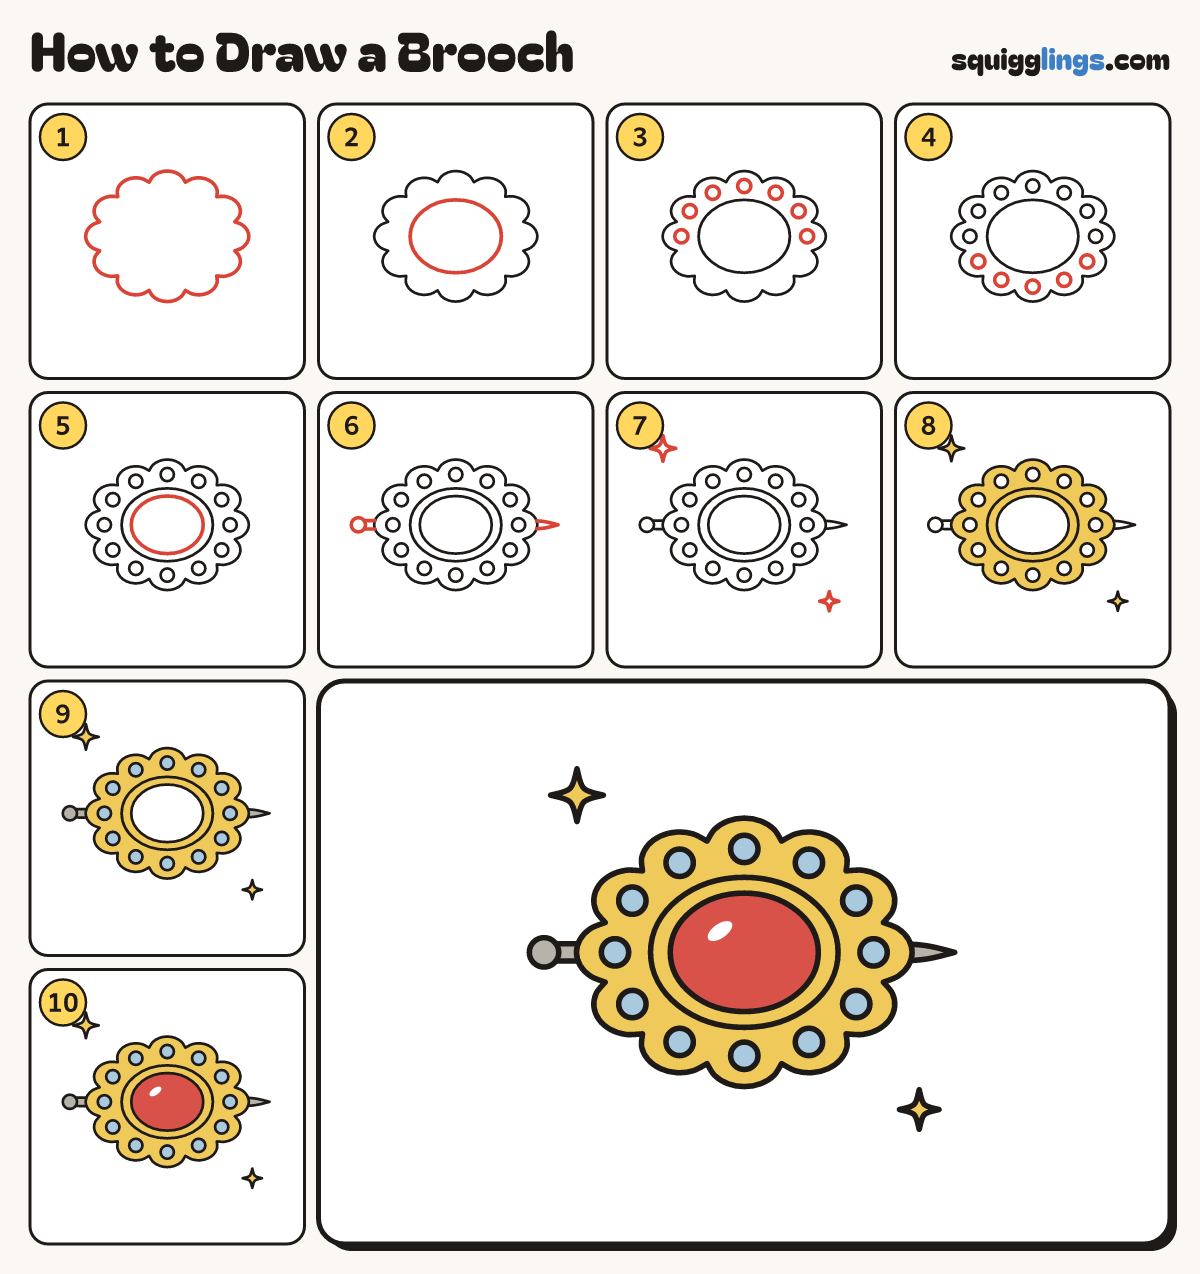
Each picture adds one red line. Draw that line, then scroll to the next picture. Rub out any dashed helper lines at the end. First up: the frame.
Step 1: The frame
Draw a wide oval made of 12 round bumps, like the edge of a cloud.
Tip Start with a bump at the top and one at the bottom. Then fit 5 down each side.
Step 2: The rim
In the middle of the frame draw a big oval, well inside the bumps.
Step 3: Top beads
Draw a small round bead inside each bump along the top half, 7 beads in all.
Step 4: Bottom beads
Draw a bead inside each of the 5 bumps along the bottom, so every bump has one.
Step 5: The gem
Just inside the big oval draw another oval, to make a thin rim around the gem.
Tip Keep the rim the same width all the way round.
Step 6: The pin
Draw a thin pin poking out both sides: a round knob on the left, a sharp point on the right.
Tip The middle of the pin hides behind the brooch.
Step 7: Sparkles
Draw 2 sparkle stars near the corners, like plus signs with curvy arms. Make one bigger.
Step 8: Yellow gold
Go over your lines. Colour the bumpy frame, the rim and the sparkles yellow, around the beads.
Step 9: Blue beads, grey pin
Colour the 12 beads light blue. Colour the pin and its knob light grey.
Step 10: Red gem
Colour the gem red, leaving a small white shine. Your brooch is ready!
Your finished drawing
Follow the steps above and this is where you end up: a brooch, drawn by you.
Every step in one picture