Watch it draw itself · tap to replay
How to Draw a Borobudur
Draw a borobudur in 13 easy steps, about 10 minutes. Free, with a printable worksheet.
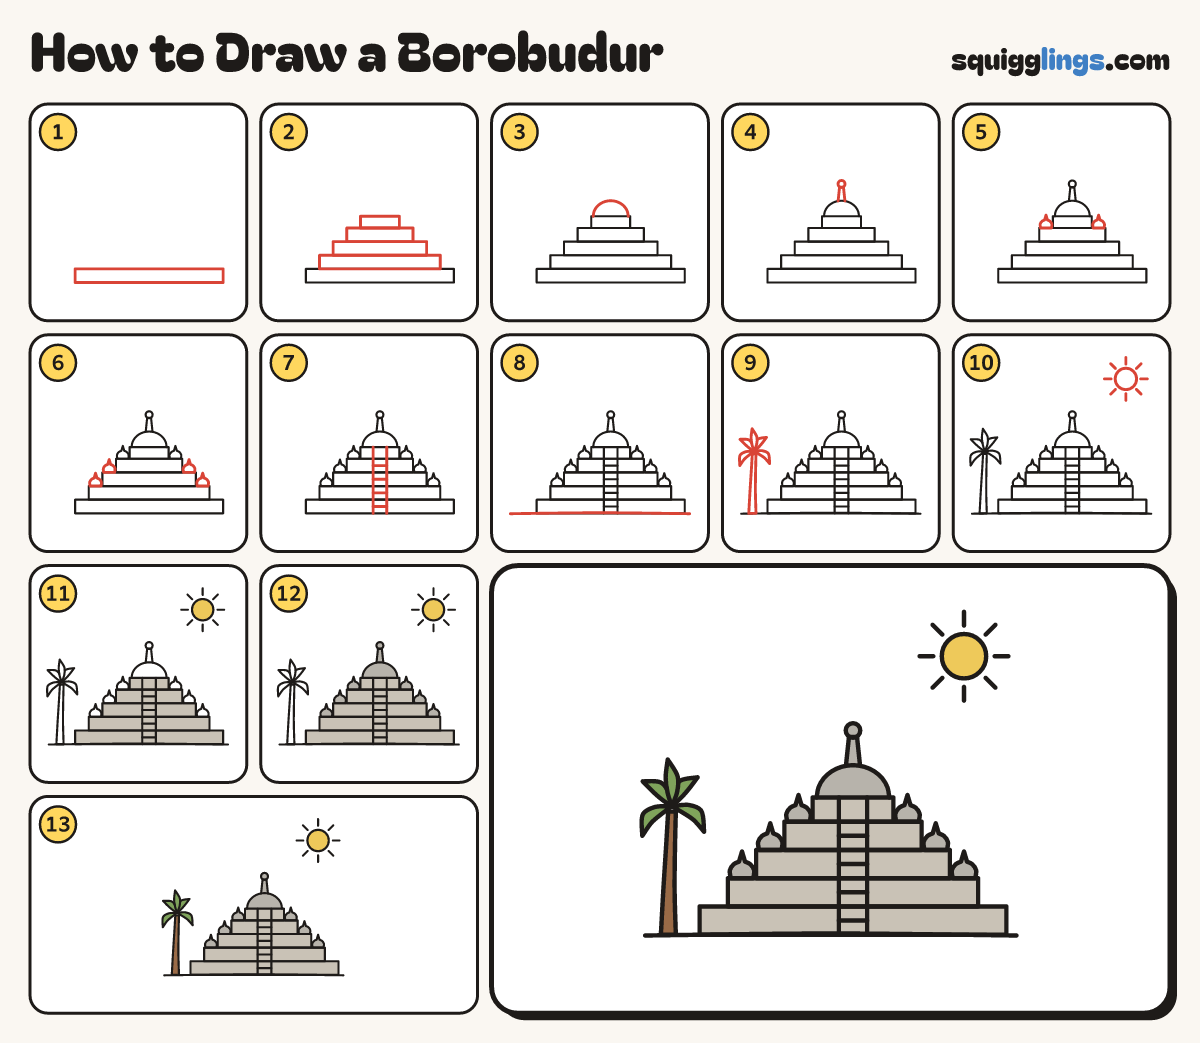
Each picture adds one red line. Draw that line, then scroll to the next picture. Rub out any dashed helper lines at the end. First up: the bottom step.
Step 1: The bottom step
Low on your paper draw a long flat box for the bottom step. Leave a gap on the left for a tree.
Step 2: Four more steps
Stack 4 more flat boxes on top, each shorter at both ends than the one below, like a wide staircase.
Tip Borobudur is a mountain of steps with bells on every level.
Step 3: The big bell
On the top step draw a big upside-down bowl: start at the left, curve over, stop at the right.
Step 4: Spire and ball
On top of the big bell draw a short thin spire with a round ball on its tip.
Step 5: Bells up top
On the fourth step draw a small bell at each end, each with a little point on top.
Step 6: More bells
Draw the same little bells at the ends of the third and second steps, 2 on each.
Step 7: The stairs
Down the middle draw 2 upright lines from the top step, stopping on the ground. Add short lines across.
Step 8: The ground
Draw the ground line across the bottom of the page.
Step 9: A palm tree
On the left draw a tall trunk up from the ground, thinner at the top. Add 5 pointed leaves fanning out.
Step 10: The sun
High on the right draw a round sun with 8 short rays, keeping clear of the top edge.
Step 11: Stone steps, yellow sun
Colour the 5 steps stone grey, pressing softly, and the sun yellow.
Step 12: Grey bells
Colour the big bell, the spire and all the little bells grey.
Step 13: Green palm, brown trunk
Colour the palm leaves green and the trunk brown. Go over all your lines and your Borobudur is done!
Your finished drawing
Follow the steps above and this is where you end up: a borobudur, drawn by you.
Every step in one picture