Watch it draw itself · tap to replay
How to Draw a Fort
Draw a fort in 11 easy steps, about 8 minutes. Free, with a printable worksheet.
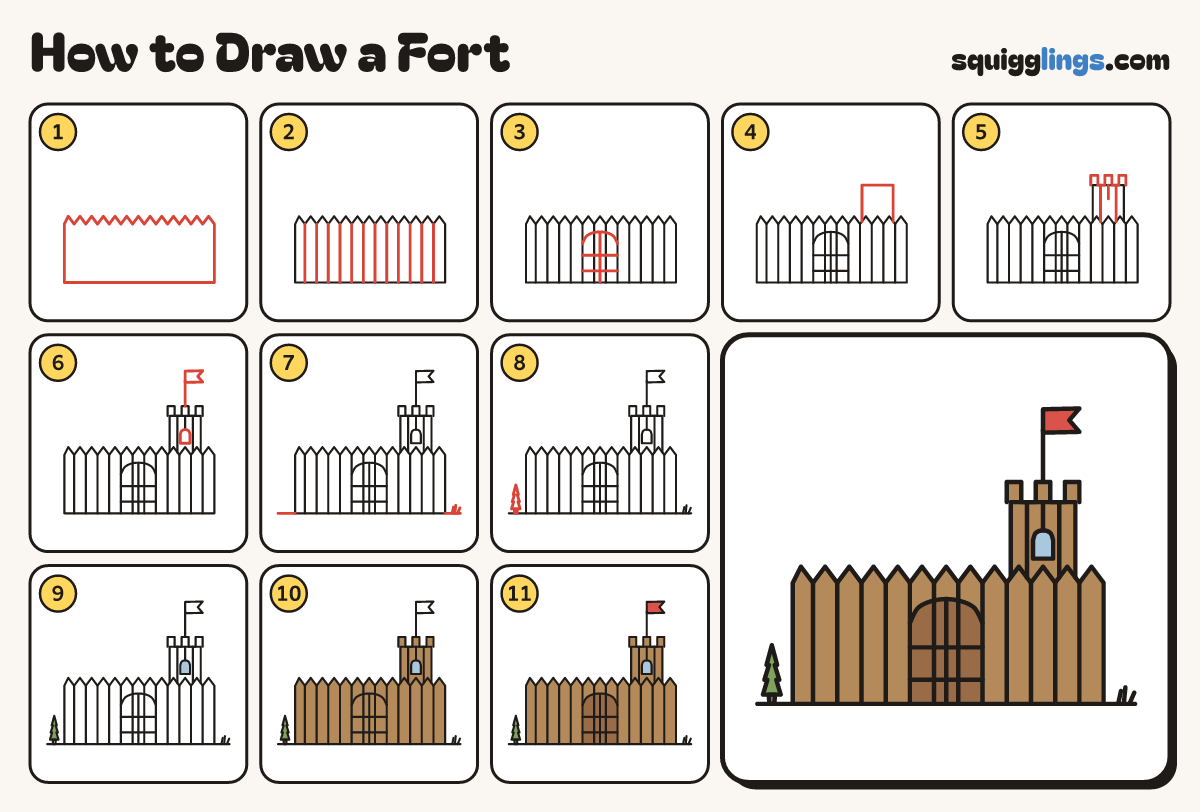
Each picture adds one red line. Draw that line, then scroll to the next picture. Rub out any dashed helper lines at the end. First up: log wall.
Step 1: Log wall
Start low on the left. Go up, zigzag across the top, down the right side and back along the bottom.
Tip Every point is the sharp top of a log.
Step 2: The logs
From each dip between the points draw a line straight down to the ground. Now the wall is logs.
Step 3: The gate
Draw a rainbow over the middle 3 logs, starting and stopping on log lines. Add a middle line and bars.
Step 4: Watchtower
On the right, start on the wall top. Draw a square tower up, across, and down to the wall top.
Step 5: Tower teeth
Start at the tower's top left corner. Draw 3 square teeth across, stop at the top right corner.
Step 6: Flag and window
From the middle of the tower top draw a pole straight up and stop. Add a flag and a window.
Step 7: The ground
From each bottom wall corner draw the ground out almost to the paper's edge. Add 3 grass blades.
Step 8: Pine tree
At the far left draw a little pine tree: 3 triangles stacked up, biggest at the bottom, on a trunk.
Step 9: Sky window, green tree
Colour the window sky blue and the pine tree leaf green.
Step 10: Wooden fort
Colour the wall, tower and tree trunk wood brown, around the window and the gate.
Step 11: Red flag, brown gate
Colour the flag red and the gate a darker brown. Go over all your lines and your fort is done!
Your finished drawing
Follow the steps above and this is where you end up: a fort, drawn by you.
Every step in one picture