Watch it draw itself · tap to replay
How to Draw a Bobsled
Draw a bobsled in 11 easy steps, about 8 minutes. Free, with a printable worksheet.
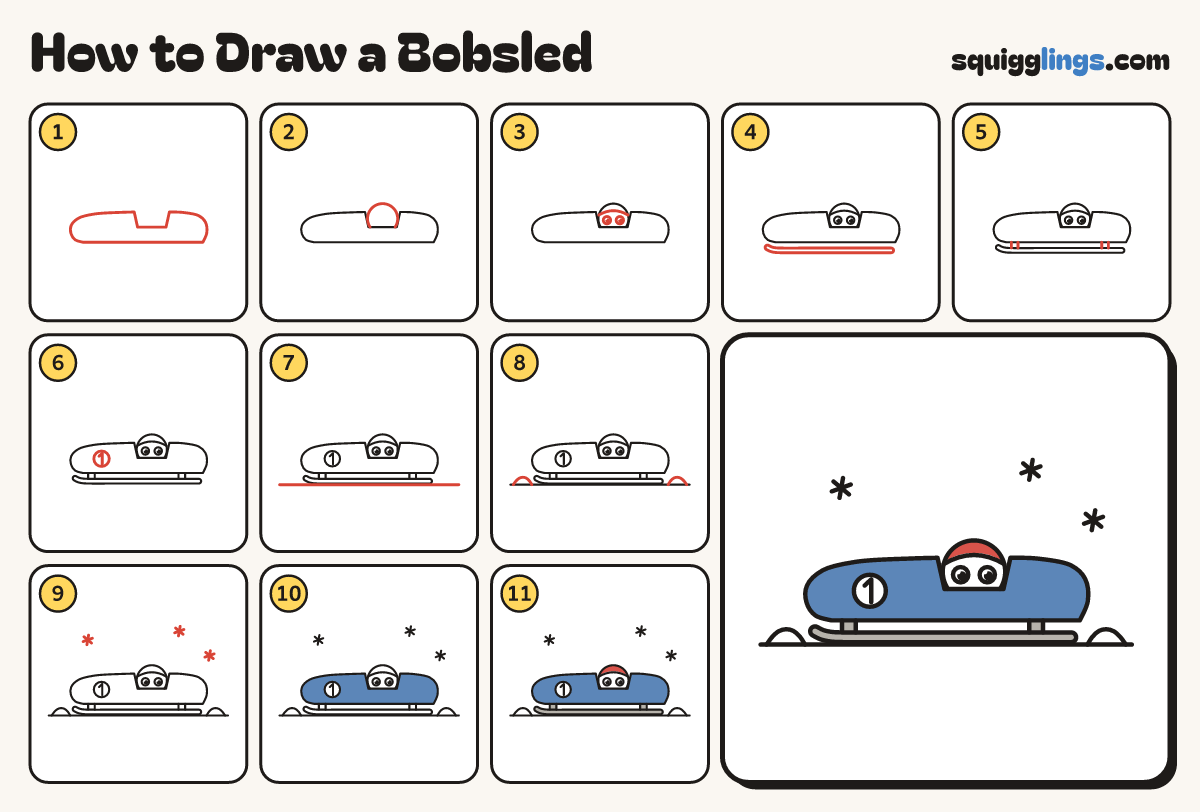
Each picture adds one red line. Draw that line, then scroll to the next picture. Rub out any dashed helper lines at the end. First up: the pod.
Step 1: The pod
Below the middle, draw a long low pod with a round nose on the left. Notch the top.
Step 2: Helmet in the cockpit
In the notch, draw a big round helmet, a bit wider than the notch, poking up above the pod.
Tip Only the top of the helmet shows: the rider is tucked inside.
Step 3: Visor and big eyes
Start on the helmet's left edge. Draw a low rainbow across to the right edge. Add 2 big eyes below.
Step 4: The runner blade
Start just under the back of the pod. Draw a long blade forward, tipping up a little at the nose.
Step 5: Two stubby posts
Draw 2 little stubby posts from the pod down to the blade, one near the front, one near the back.
Step 6: Number on the side
On the side of the pod, near the nose, draw a circle bigger than a coin. Write a 1 inside.
Step 7: The ground
Draw a ground line right across the paper, just touching the bottom of the blade.
Step 8: Snow mounds
Draw 2 low snow mounds on the ground line, one in front of the nose and one behind the tail.
Step 9: Snowflakes
Draw 3 little snowflakes in the air: each is 3 short lines crossing in the middle, like a star.
Step 10: Blue pod
Go over your lines. Colour the whole pod blue, going around the number circle so it stays white.
Step 11: Grey runner, red helmet
Colour the runner and posts grey. Colour the helmet red above the visor line, leaving the visor and eyes white.
Your finished drawing
Follow the steps above and this is where you end up: a bobsled, drawn by you.
Every step in one picture