Watch it draw itself · tap to replay
How to Draw a Bird Feeder
Draw a bird feeder in 10 easy steps, about 8 minutes. Free, with a printable worksheet.
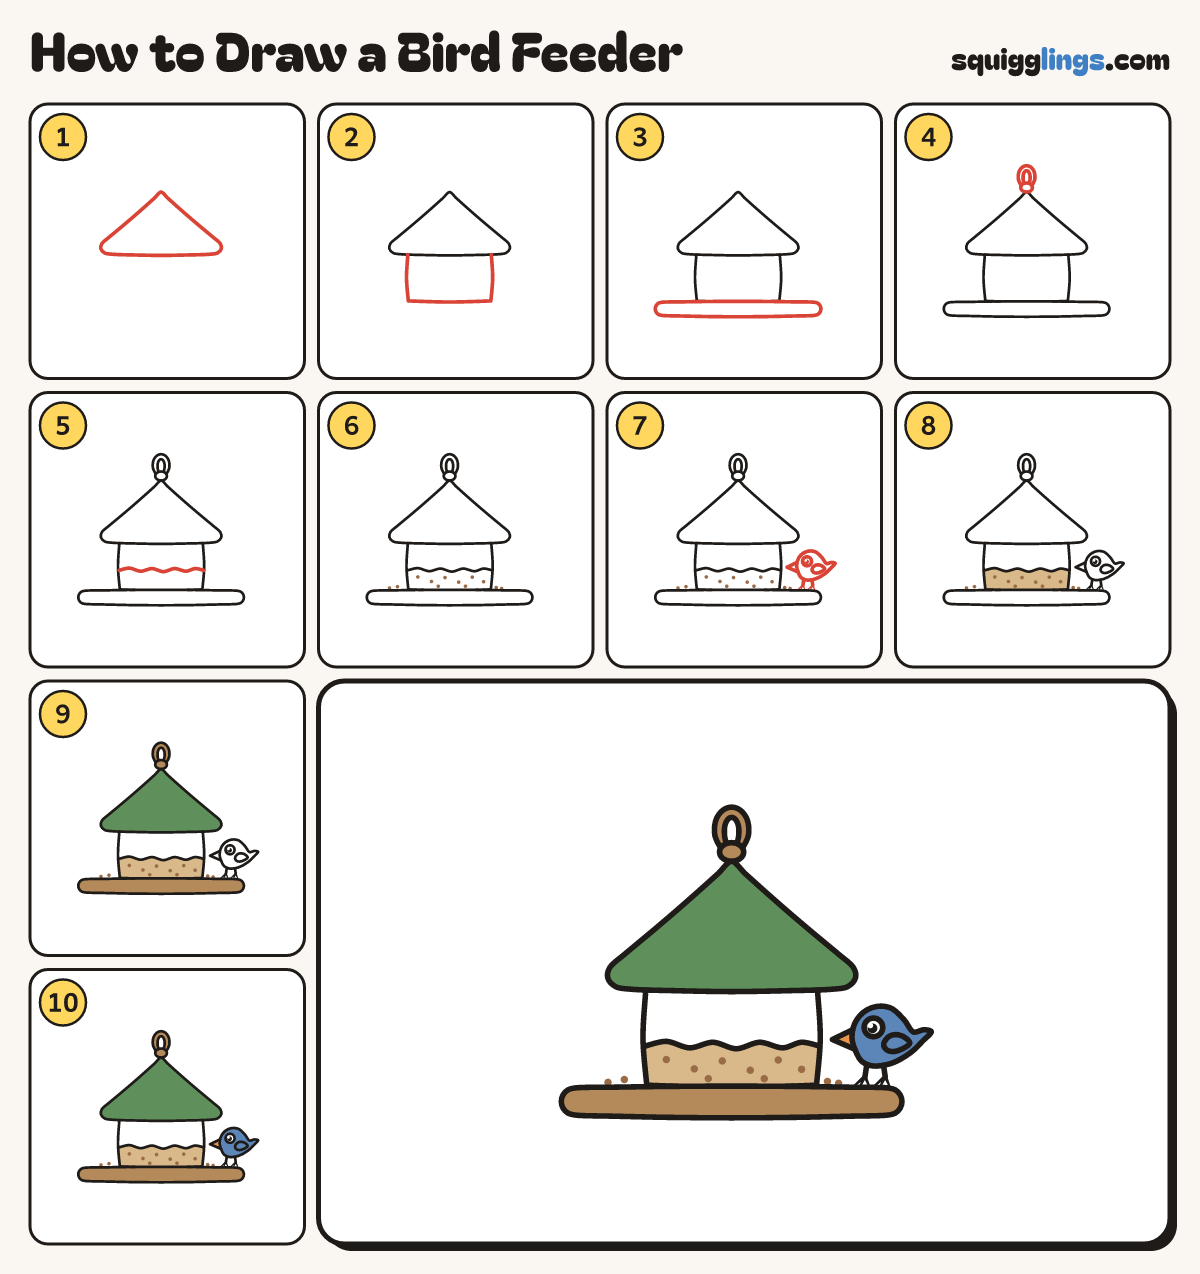
Each picture adds one red line. Draw that line, then scroll to the next picture. Rub out any dashed helper lines at the end. First up: the roof.
Step 1: The roof
Draw a big pointy roof: 2 slopes down from the point to a thick brim with rounded ends.
Step 2: Seed box
Start on the brim's bottom, near the left. Draw a box down and across, and stop back on the brim.
Step 3: The tray
Under the box, draw a long thin flat bar with rounded ends, sticking out a hand on each side.
Step 4: Knot and rope loop
Put a knot on the roof's point. From the knot, loop 2 upside-down U's back to it, one inside another.
Step 5: Seed line
Start on the box's left side, below the middle. Draw a wobbly line and stop on the right side.
Step 6: Seeds
Dot 2 rows of little seeds under the seed line, and 2 more seeds on the tray each side.
Step 7: Little bird
Beside the box, draw a plump bird with a pointy tail. Add legs from its tummy down to the tray.
Tip Give it a wing, an eye, a beak and 3 little toes on each foot, on the tray.
Step 8: Tan seed
Colour the seed tan, up to the wobbly line. Leave the rest of the box clear.
Step 9: Green roof, wood tray
Colour the roof green. Colour the tray, the knot and the rope loop wood brown.
Step 10: Blue bird
Colour the bird blue with an orange beak. Go over your lines and your bird feeder is done!
Tip Leave the eye white.
Your finished drawing
Follow the steps above and this is where you end up: a bird feeder, drawn by you.
Every step in one picture