Watch it draw itself · tap to replay
How to Draw a Bill of Rights
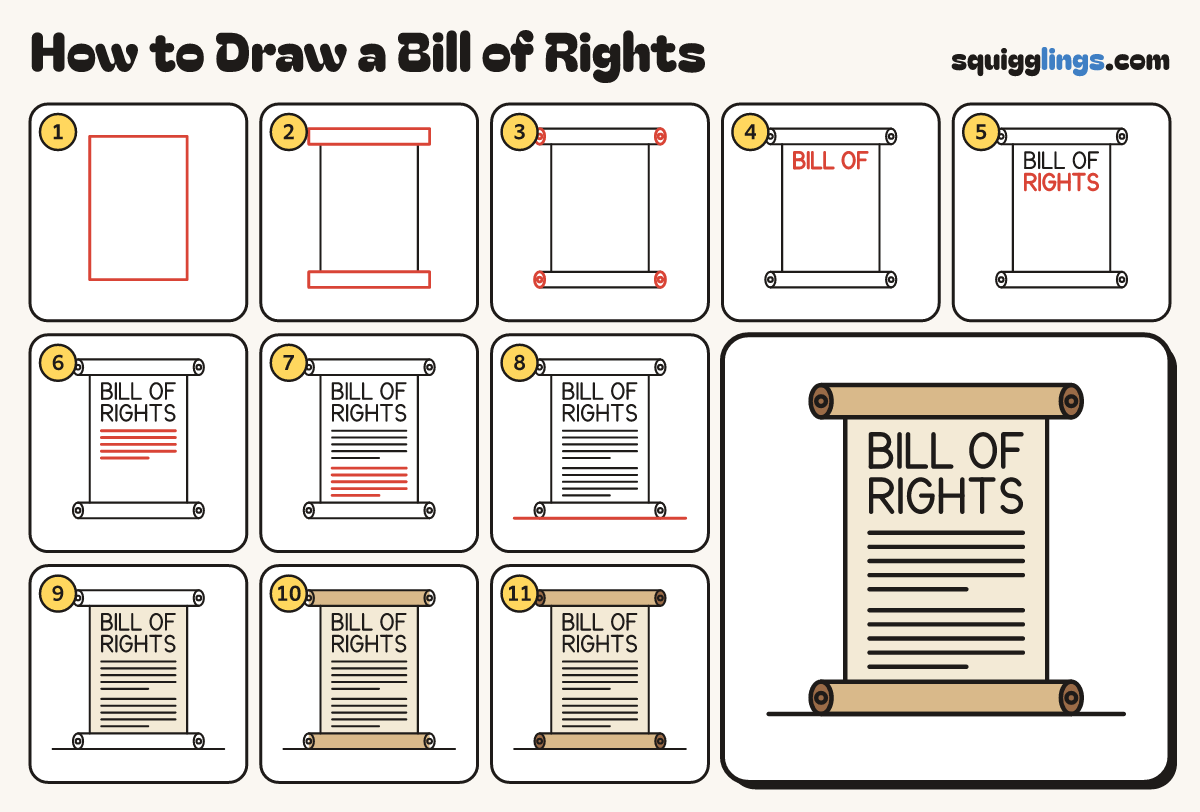
Draw a bill of rights in 11 easy steps, about 8 minutes. Free, with a printable worksheet.
Each picture adds one red line. Draw that line, then scroll to the next picture. Rub out any dashed helper lines at the end. First up: the paper.
Step 1: The paper
In the middle of your paper draw a big tall box for the page, taller than wide.
Tip Use a ruler if you like. The real page is old parchment, more than 200 years old.
Step 2: Two rolls
Across the top of the page draw a long flat bar poking out both sides. Same across the bottom.
Tip The page is rolled up at both ends, like a scroll.
Step 3: Roll ends
On each end of each roll draw a small upright oval with a tiny circle inside.
Step 4: Bill of
At the top of the page write BILL OF in big capital letters, right in the middle.
Tip Keep every letter the same height.
Step 5: Rights
Under it write RIGHTS in capital letters, so the title says Bill of Rights.
Tip A right is something everyone is allowed to do, like speaking freely.
Step 6: Five lines
Under the title rule 5 lines of writing across the page. Make the last one short.
Tip Leave a little space at each side of the page.
Step 7: Five more lines
Leave a small gap, then rule 5 more lines the same way. That makes 10.
Tip The Bill of Rights is a list of 10 rights.
Step 8: Ground line
Draw a ground line under the bottom roll, from well left to well right.
Step 9: Cream page
Go over your lines. Colour the page cream, the palest colour you have, around all the writing.
Step 10: Tan rolls
Colour the 2 rolls tan, a light brown, from end to end.
Step 11: Brown ends
Colour the 4 roll ends brown. Your Bill of Rights is ready to read!
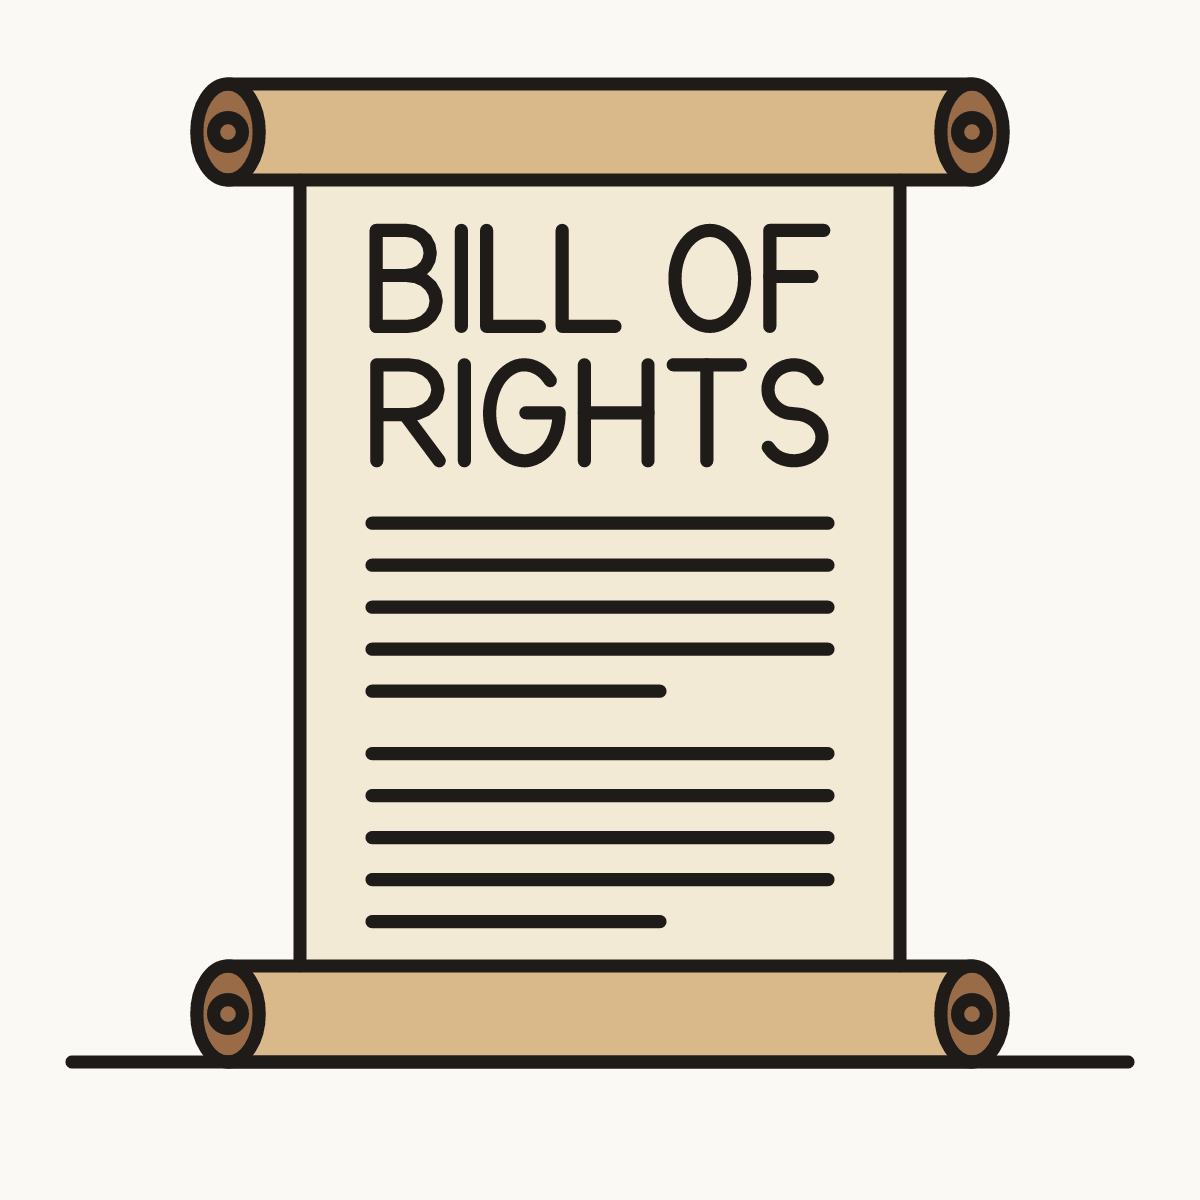
Your finished drawing
Follow the steps above and this is where you end up: a bill of rights, drawn by you.
Every step in one picture