Watch it draw itself · tap to replay
How to Draw a Bench
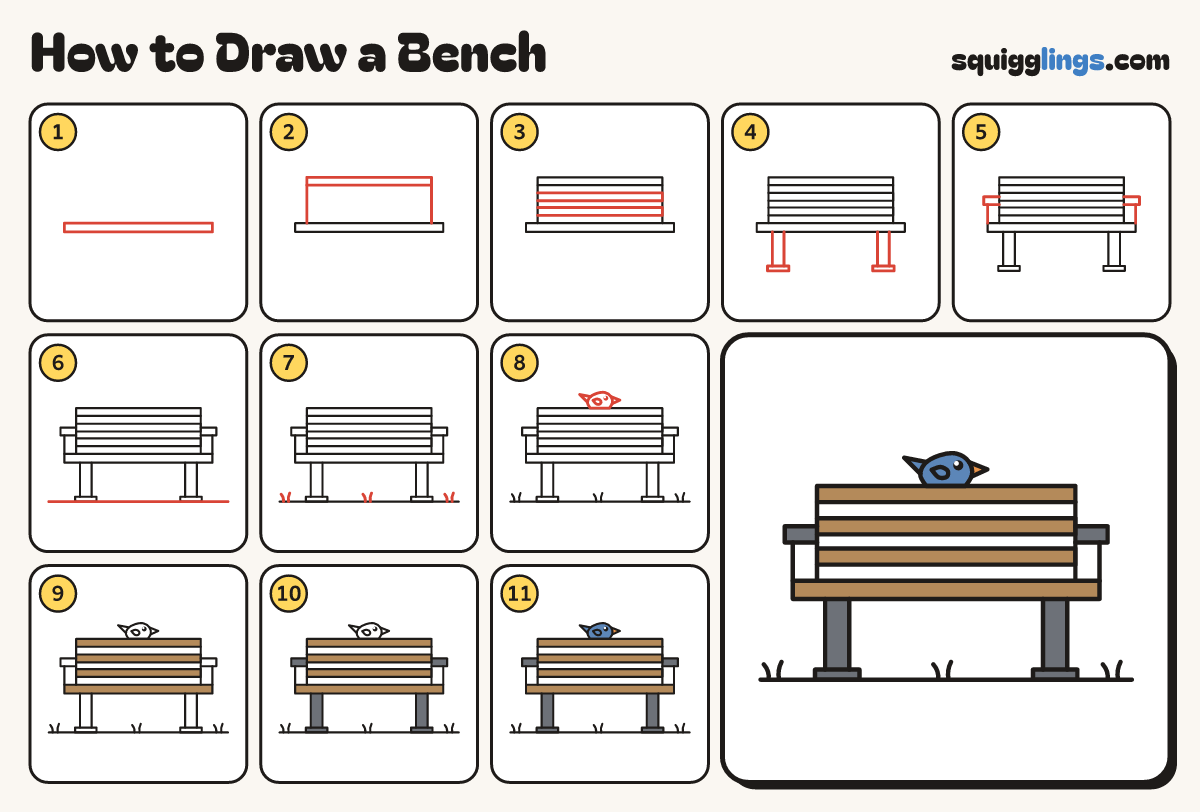
Draw a bench in 11 easy steps, about 8 minutes. Free, with a printable worksheet.
Each picture adds one red line. Draw that line, then scroll to the next picture. Rub out any dashed helper lines at the end. First up: the seat.
Step 1: The seat
Across the middle draw a long thin plank, nearly edge to edge and a finger tall. This is the seat.
Step 2: Back posts
From the seat near each end draw a post up to a hand high. Join the tops with a bar.
Step 3: Two back slats
Draw 2 flat slats between the posts, one above the other, each from the left post across to the right.
Step 4: The legs
Under each end, start on the seat and draw a leg down to a flat foot poking out both ways.
Step 5: Arm rests
Start on each back post. Draw an arm rest out sideways, then a line down to the seat end.
Step 6: The ground
Draw a long ground line under the feet from the left edge of the paper to the right edge.
Step 7: Grass
Draw 3 tufts of grass along the ground: 2 short curved blades leaning apart from the ground line.
Step 8: A little bird
On the top bar draw a round bird with a pointy tail, a beak, a dot eye and a wing.
Step 9: Wooden bench
Colour the seat, the back bar and the 2 slats wood brown.
Step 10: Slate legs and arms
Colour the legs, feet and arm rests slate grey.
Step 11: Blue bird
Colour the bird blue and its beak orange. Go over all your lines and your bench is done!
Your finished drawing
Follow the steps above and this is where you end up: a bench, drawn by you.
Every step in one picture