Watch it draw itself · tap to replay
How to Draw a Bay Window
Draw a bay window in 13 easy steps, about 10 minutes. Free, with a printable worksheet.
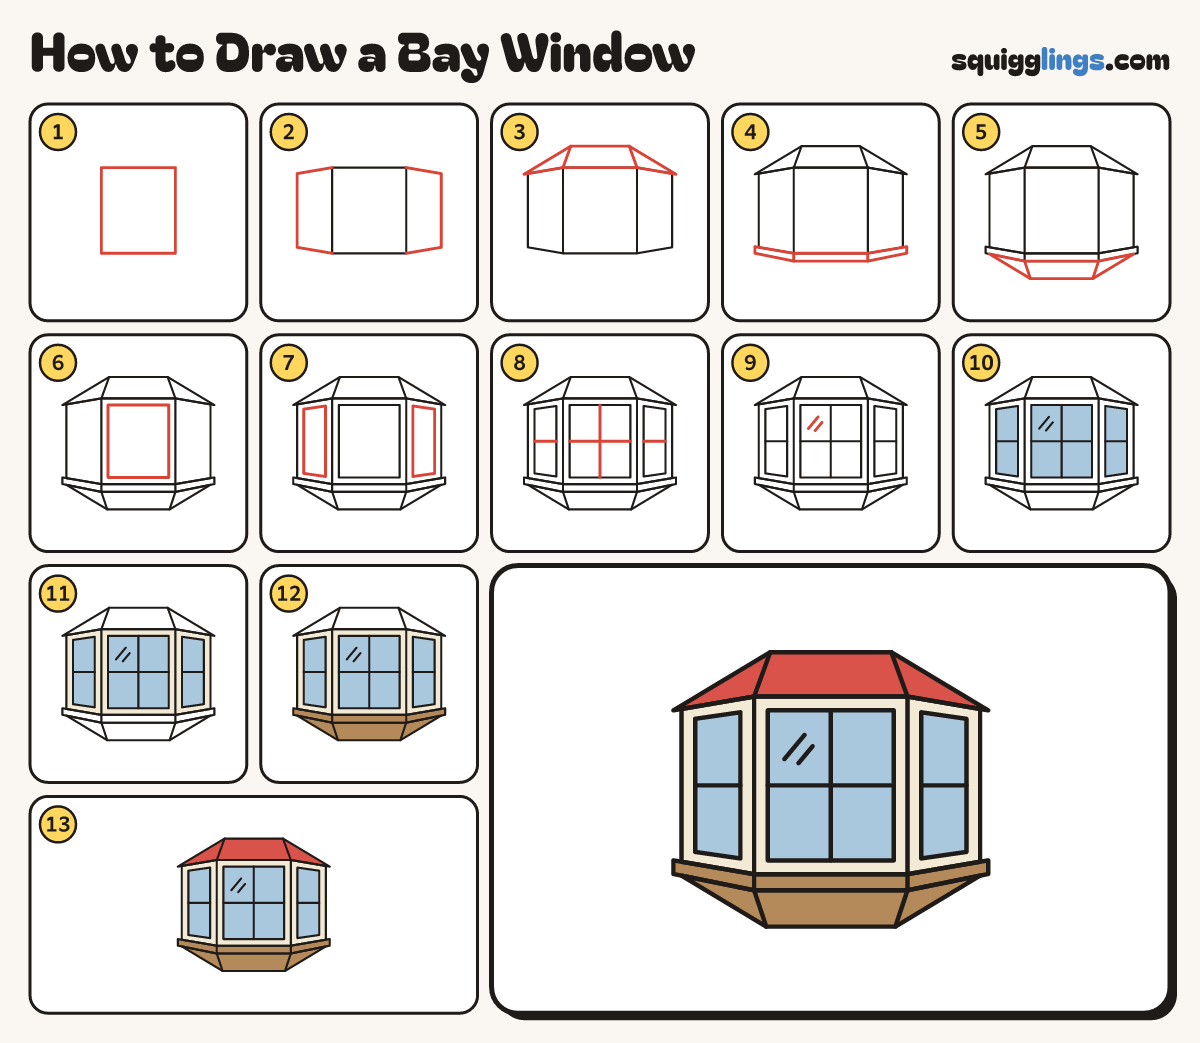
Each picture adds one red line. Draw that line, then scroll to the next picture. Rub out any dashed helper lines at the end. First up: the middle window.
Step 1: The middle window
Draw a big upright box in the middle of your page, a little taller than wide.
Step 2: The side windows
From each top corner slope out and down a little, drop straight down, then slope back to the bottom corner.
Tip The side panels are narrow because they turn away from you.
Step 3: The roof
Draw a roof: slope up from each end to a flat top. Add 2 lines down to the corners.
Step 4: The sill
Under the windows draw a thin sill that follows the 3 panels and sticks out a little at each end.
Step 5: The base
Under the sill draw a base that slopes in to a flat bottom. Add 2 lines from the sill corners.
Step 6: Middle glass
Inside the middle window draw a smaller box for the glass, leaving a frame all round.
Step 7: Side glass
Inside each side panel draw a narrow glass shape. Slope its top and bottom like the panel.
Step 8: Window bars
Cross the middle glass with 1 line down and 1 line across. Draw 1 line across each side glass.
Step 9: Shiny glass
In the top left pane draw 2 short slanted lines to make the glass shine.
Step 10: Sky blue glass
Go over your lines. Colour all the glass sky blue.
Step 11: Cream frames
Colour the 3 window frames cream, around the blue glass.
Step 12: Brown sill and base
Colour the sill and the base under it brown.
Step 13: Red roof
Colour the roof red. Your bay window is done!
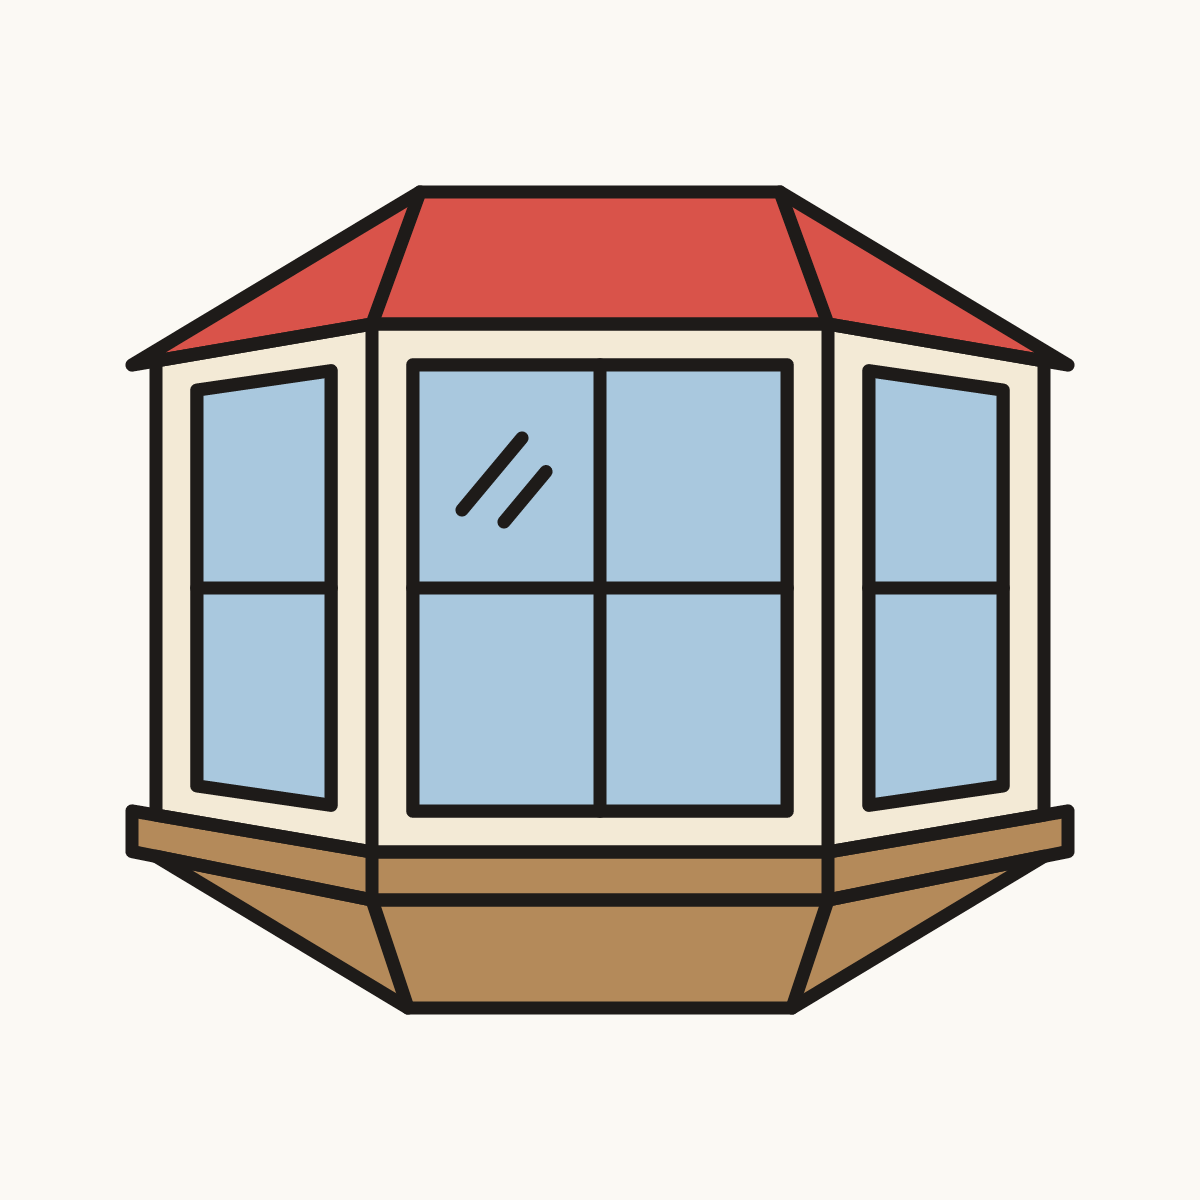
Your finished drawing
Follow the steps above and this is where you end up: a bay window, drawn by you.
Every step in one picture